Questions and answers
No questions on this lesson yet. Be the first to ask one.
The C major scale is played entirely on white keys, which is why it's usually the first scale we learn, and also why it can be surprisingly hard to play well. With no black keys to orient the hand, it's easy to lose track of where the thumb passes under and the fingers fold over, and the hand tends to flatten out along the front edge of the keys. Let's aim for a hand that sits a little further into the keys, with the thumb passing under to F in the right hand and the third finger folding over to A in the left.
| C Major Scale Overview | |
|---|---|
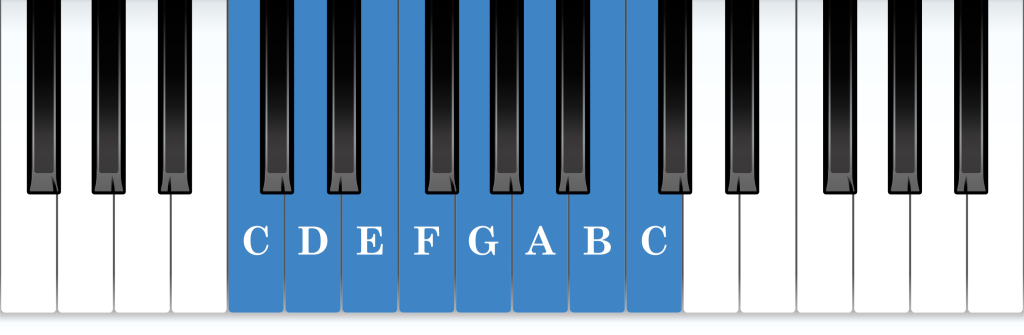
| Keyboard Layout | 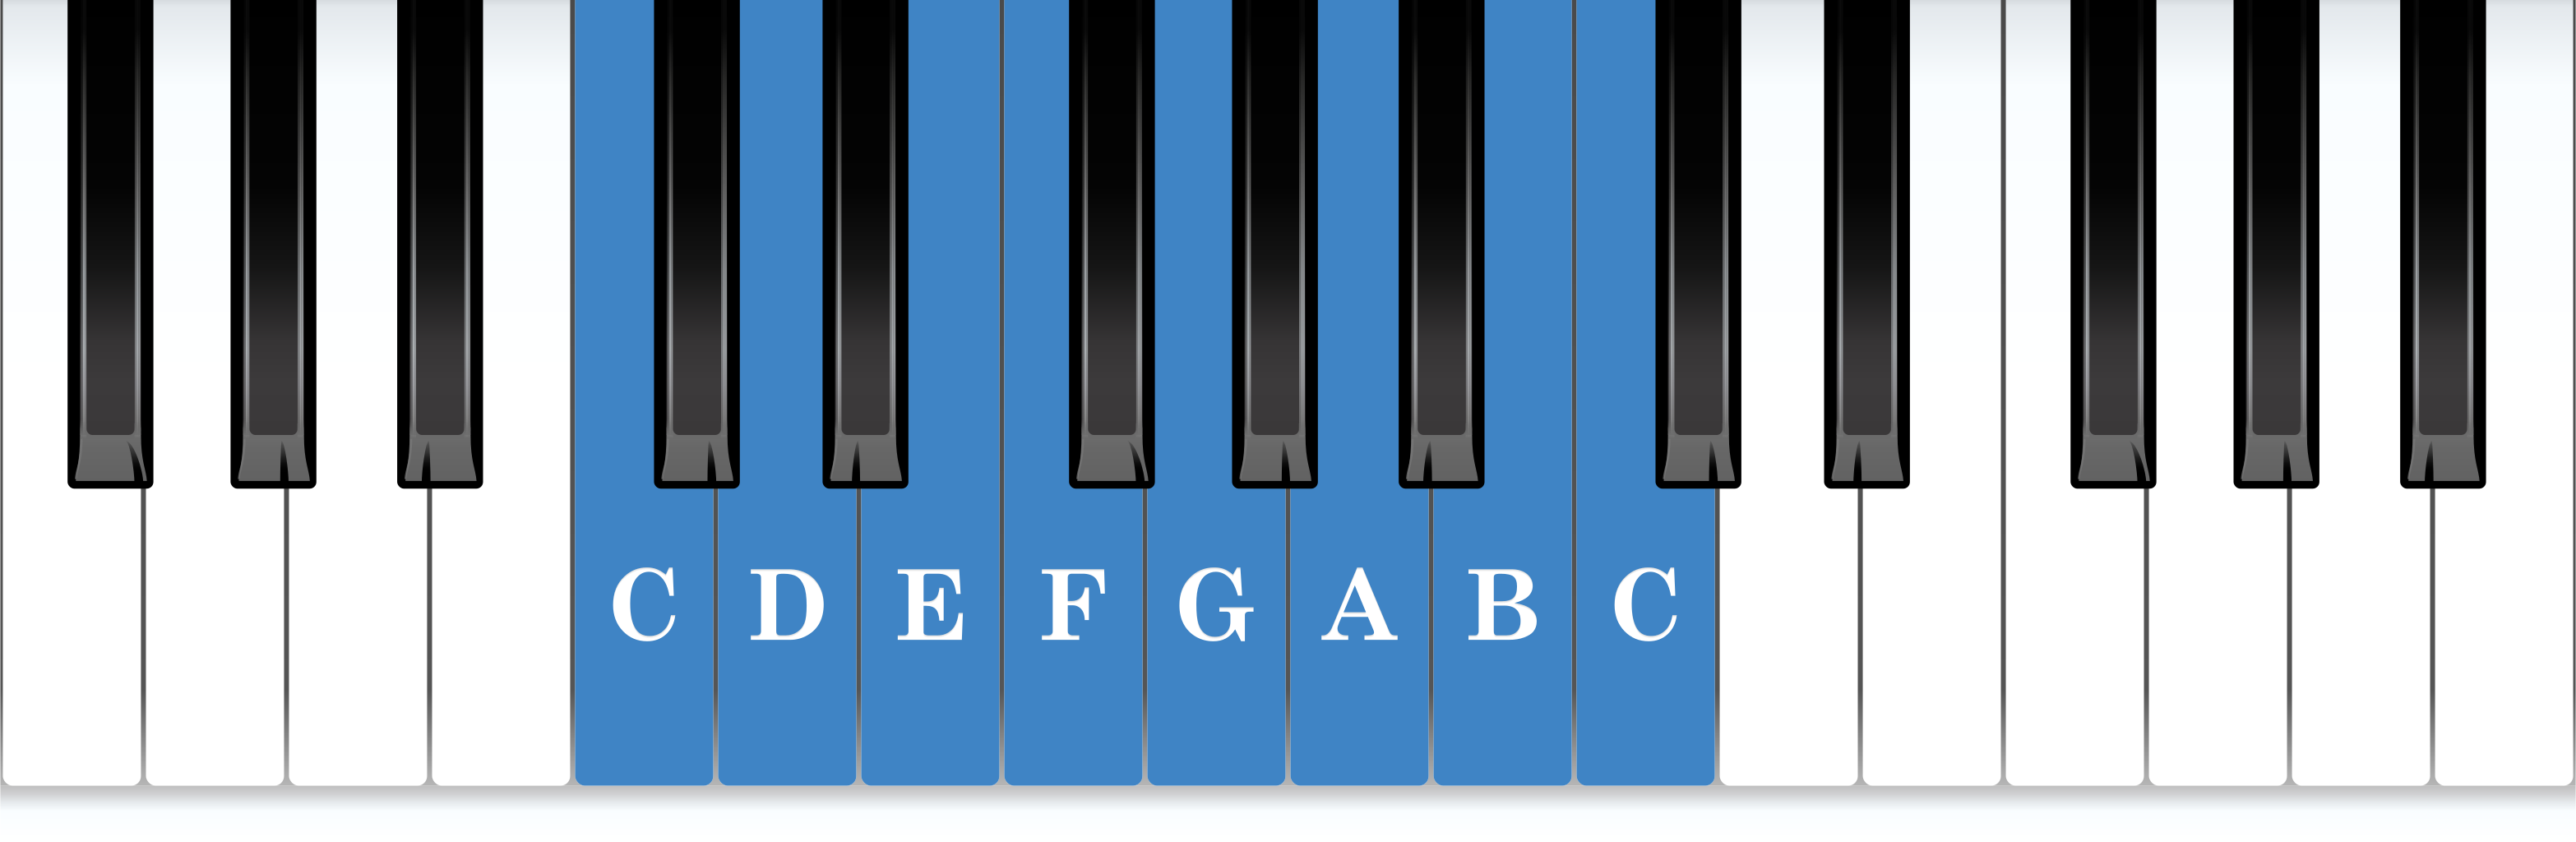 |
| Staff Layout | 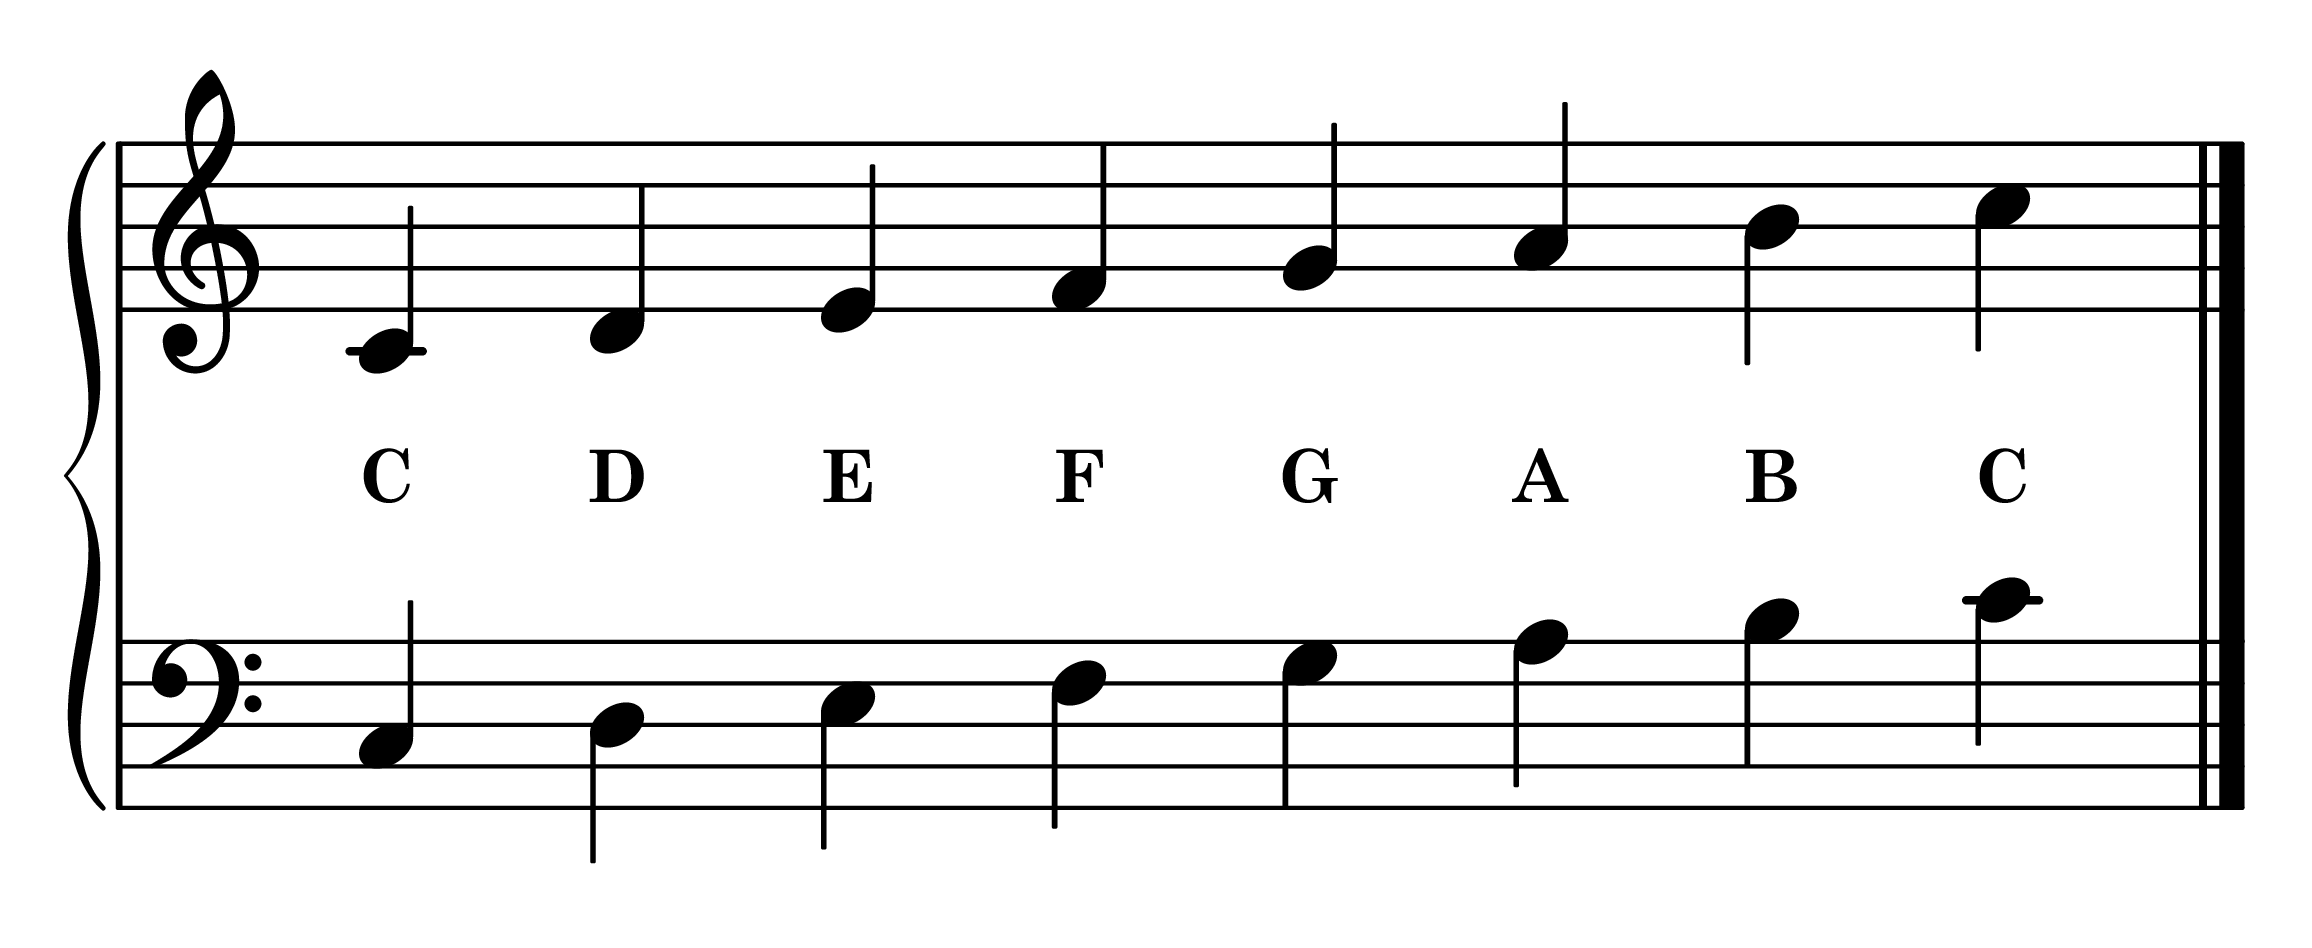 |
| Key Signature | No sharps (♯), No flats (♭) |
| Notes of Scale | C, D, E, F, G, A, B, C |
| RH Fingering | 1 2 3 - 1 2 3 4 - 5 |
| LH Fingering | 5 - 4 3 2 1 - 3 2 1 |
| Relative Scale | A Minor Scale |
| Parallel Scale | C Minor Scale |
The C major scale is a continuous line of white keys, with nothing to interrupt the surface. As a terrain, it’s completely flat. That’s part of what makes it approachable, and also what makes it easy to lose our place: there are no black keys to tell the hand where it is.
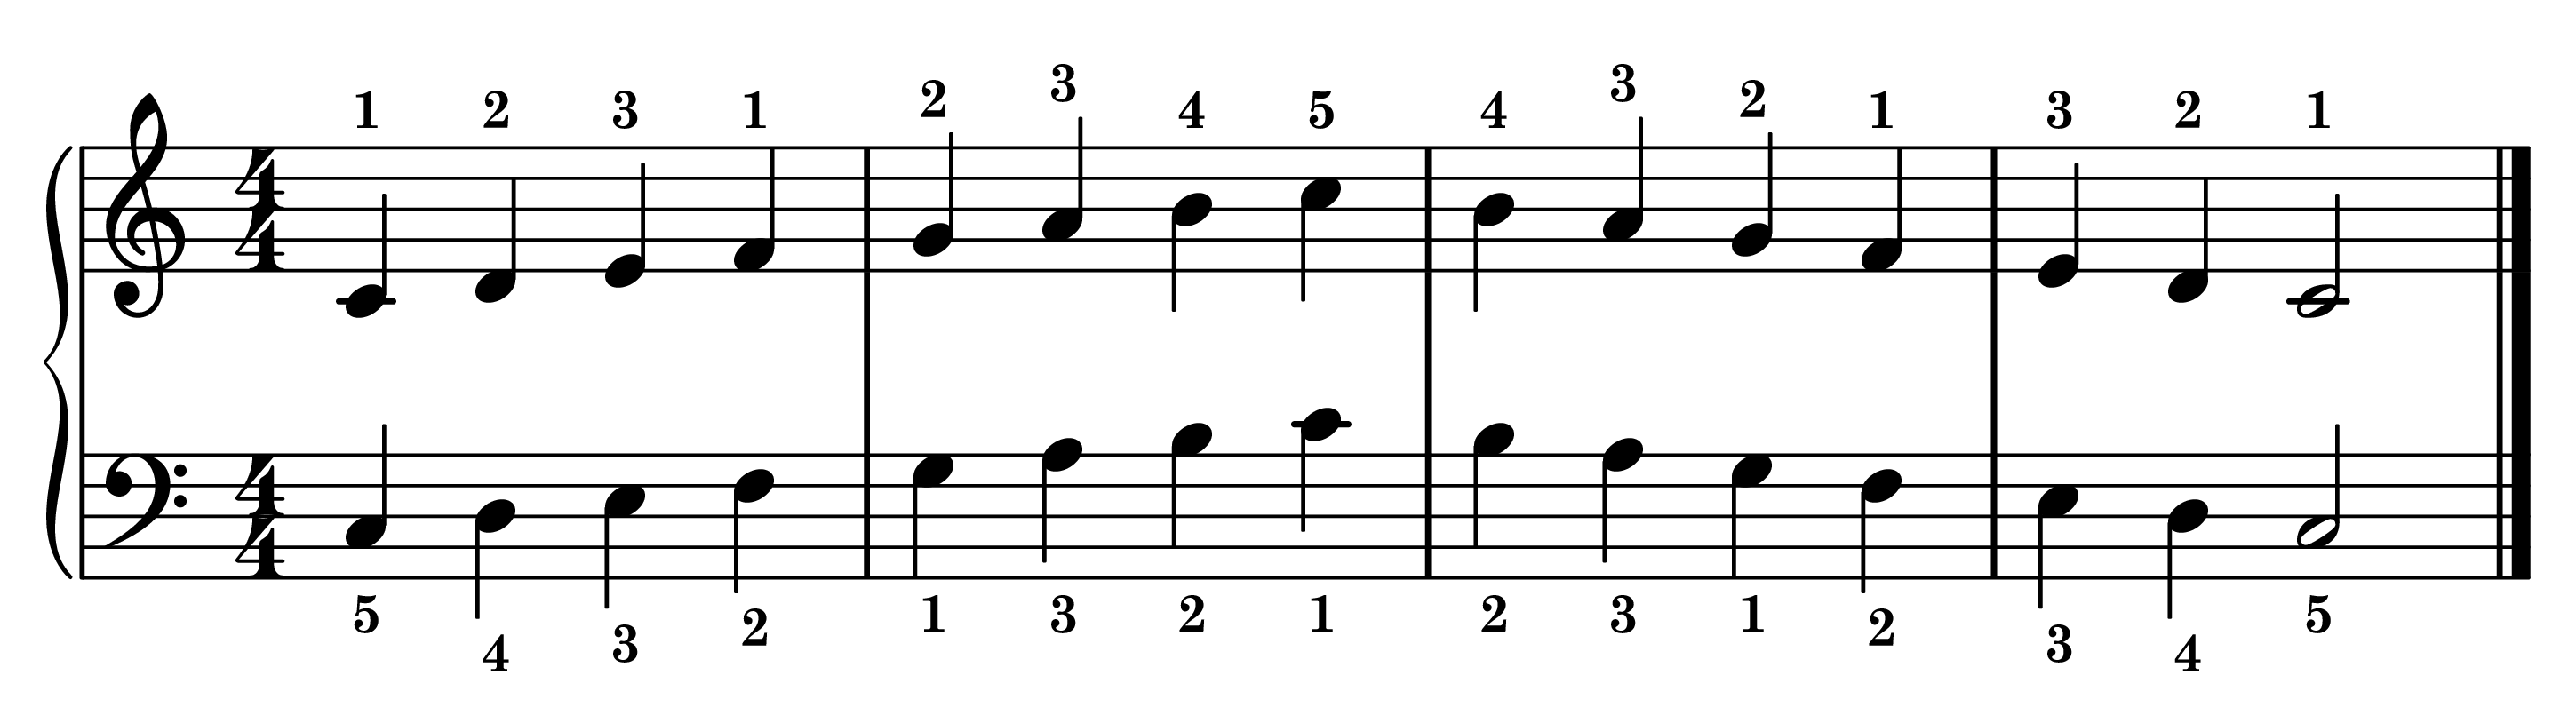
Here is the C major scale for both hands together, one octave up and back down.
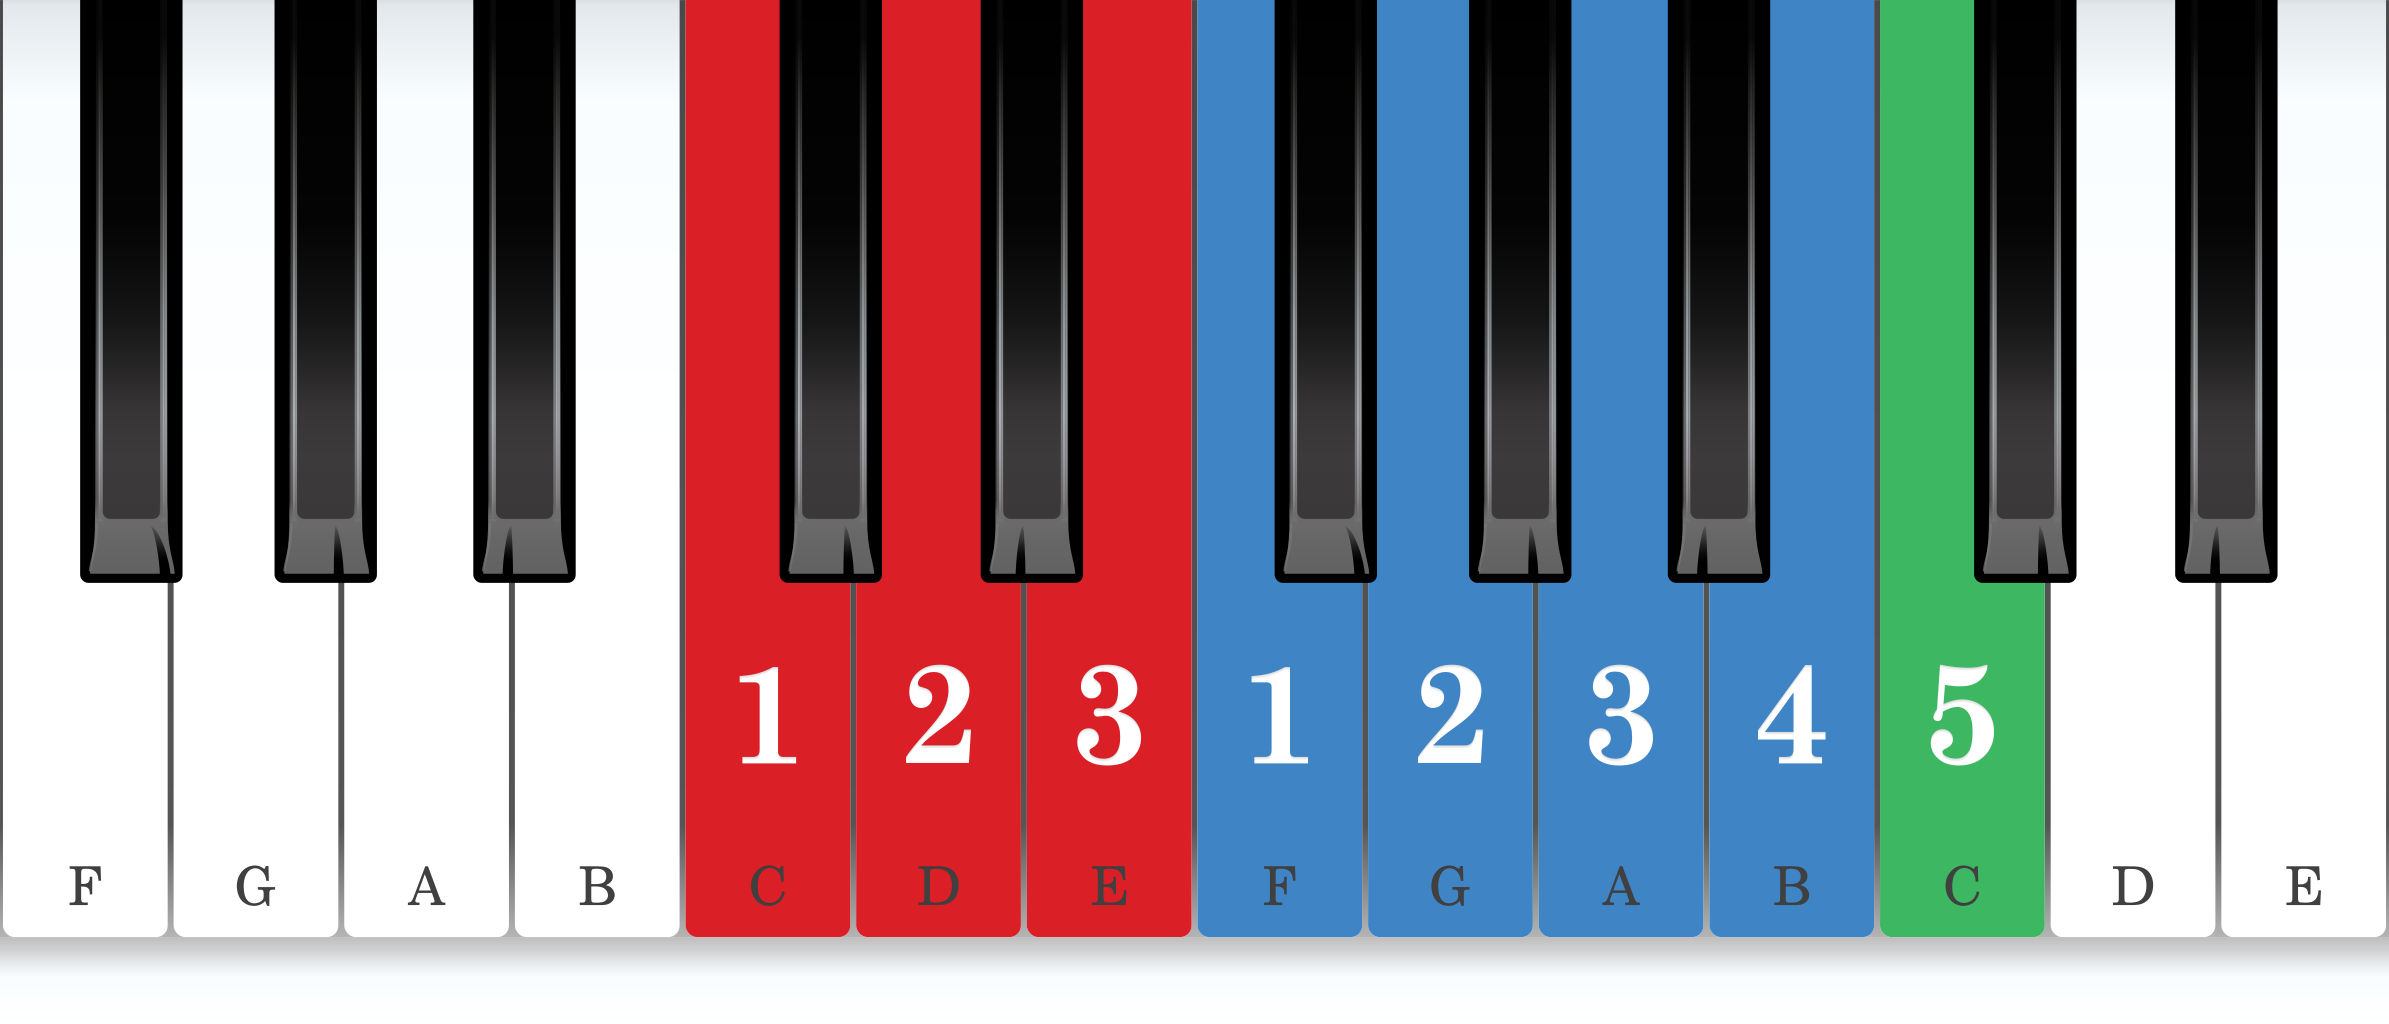
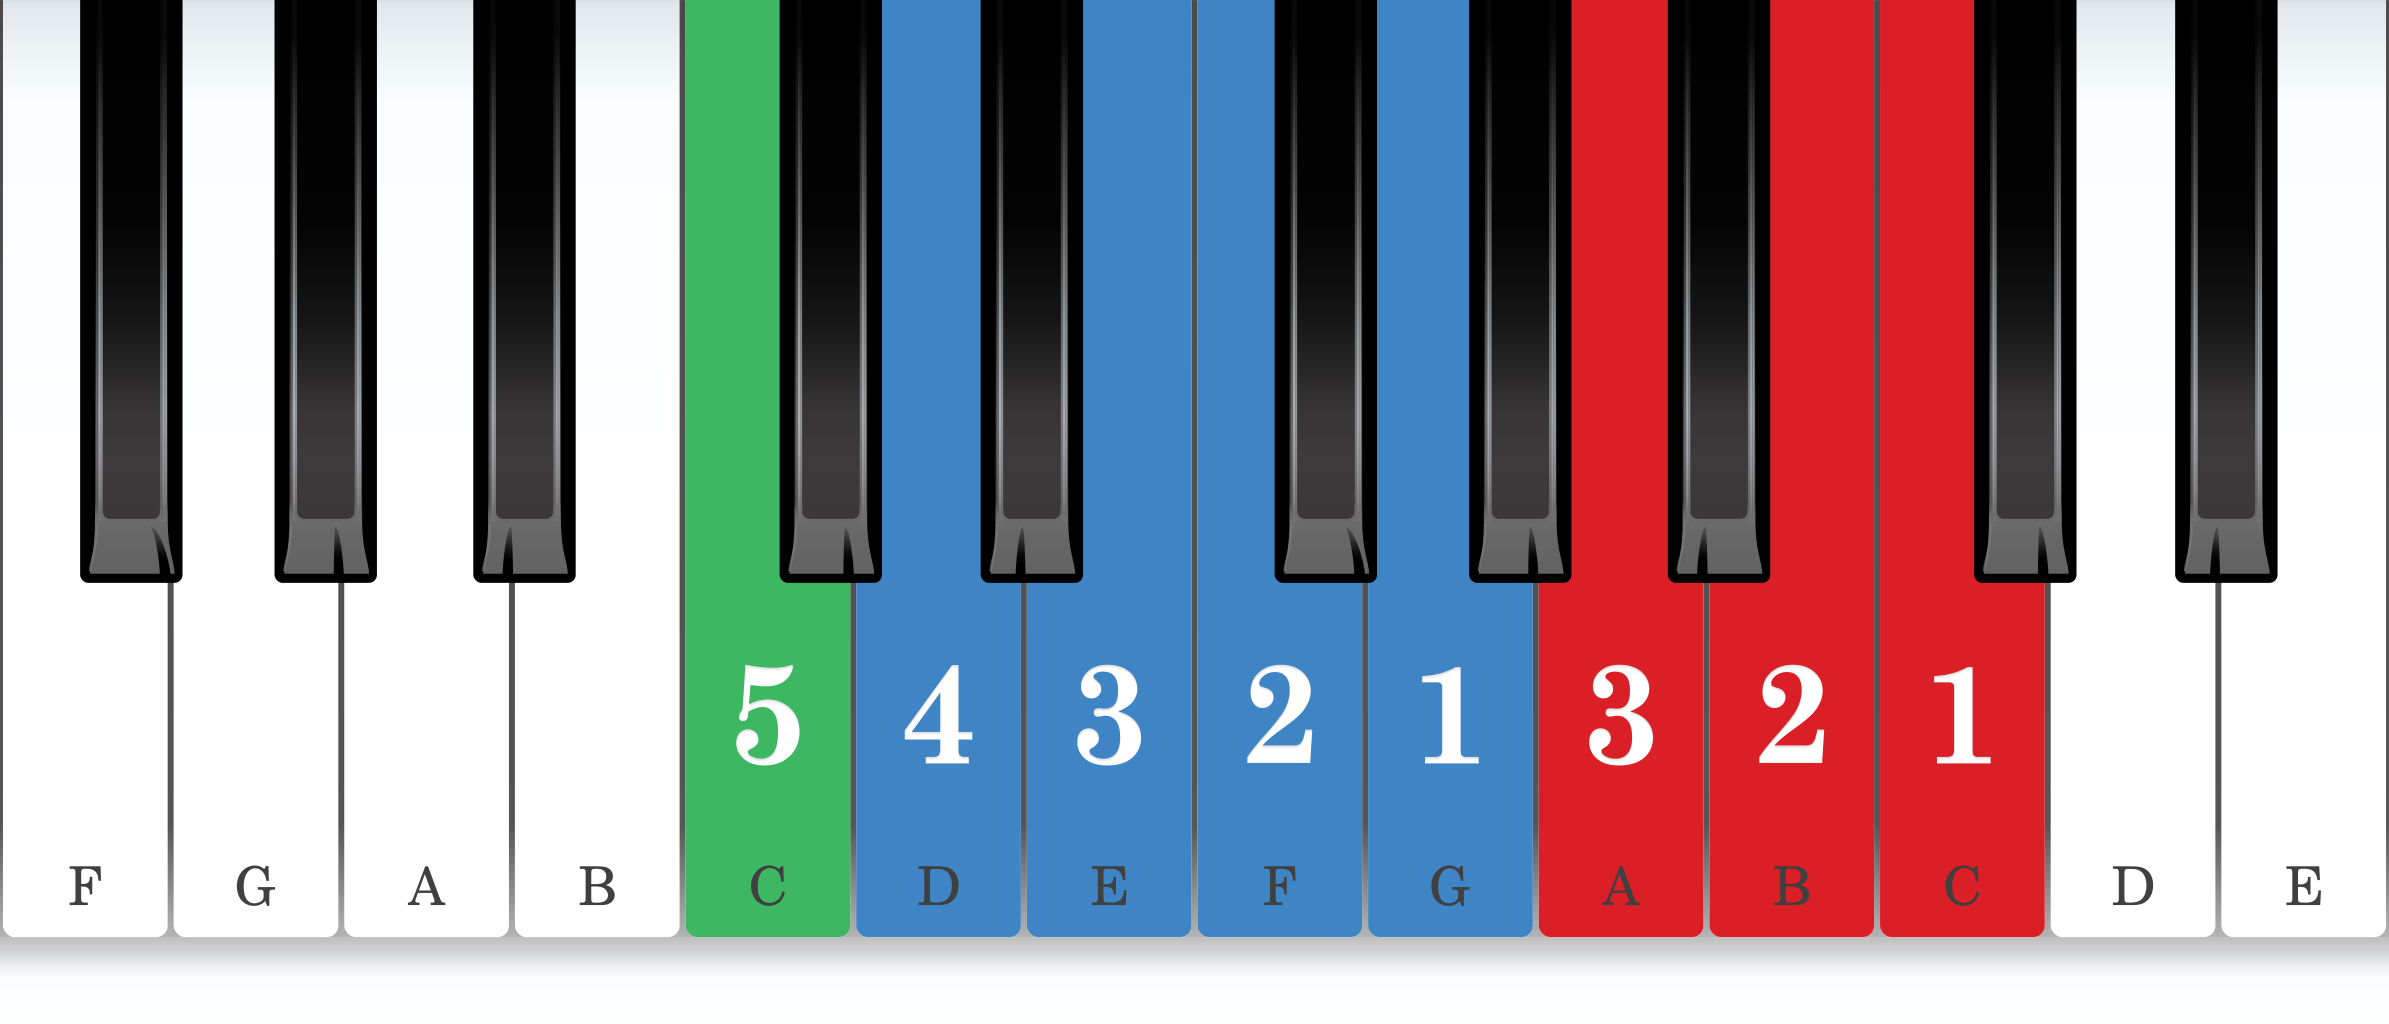
Let’s start with each hand on its own. The fingering becomes much clearer once we see the scale’s core positions, the groups of notes the hand can hold in one position. Every scale divides into two of them: a group of three notes played with fingers 1-2-3 (red on the charts) and a group of four played with 1-2-3-4 (blue).
In the right hand, C, D, and E make up the three-note group, and F, G, A, and B the four-note group, with the top C on the fifth finger (green). The left hand mirrors this: the bottom C on the fifth finger, then D, E, F, and G as the four-note group, and A, B, and C as the three.
A useful way to work with the core positions is in three stages:
Once each hand feels reliable on its own, we can put them together. The difficulty here is that the two hands’ core positions don’t line up, so following them in both hands at once tends to create more confusion than clarity. Instead, let’s look for sync points: moments where both hands use the same finger on the same note, or where the fingers form a mirror image.
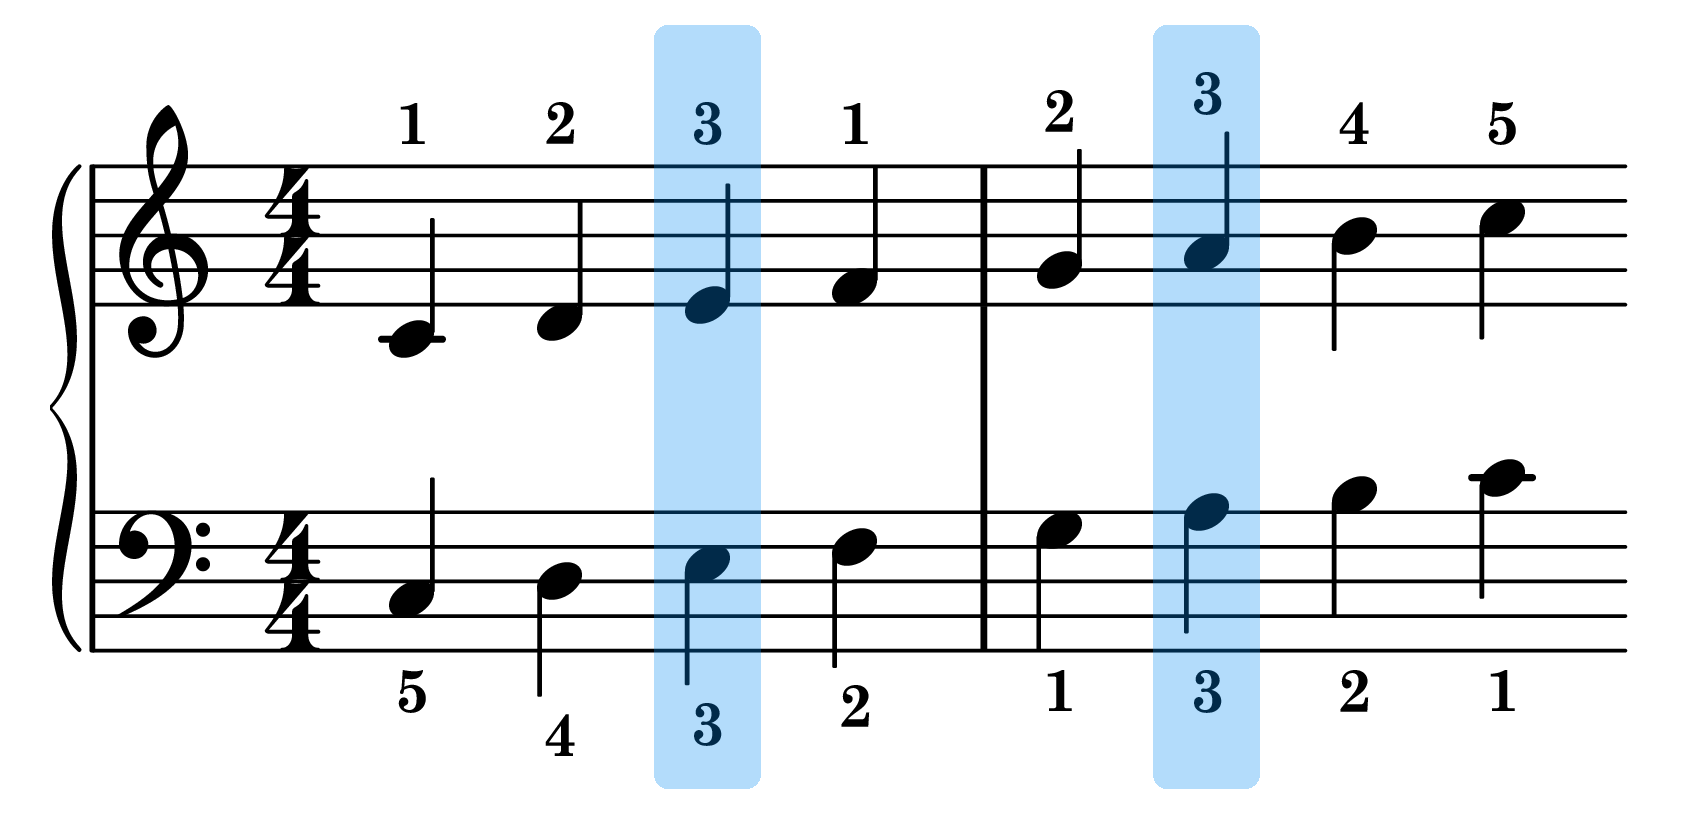
In C major, the 3rd fingers meet on E and on A.
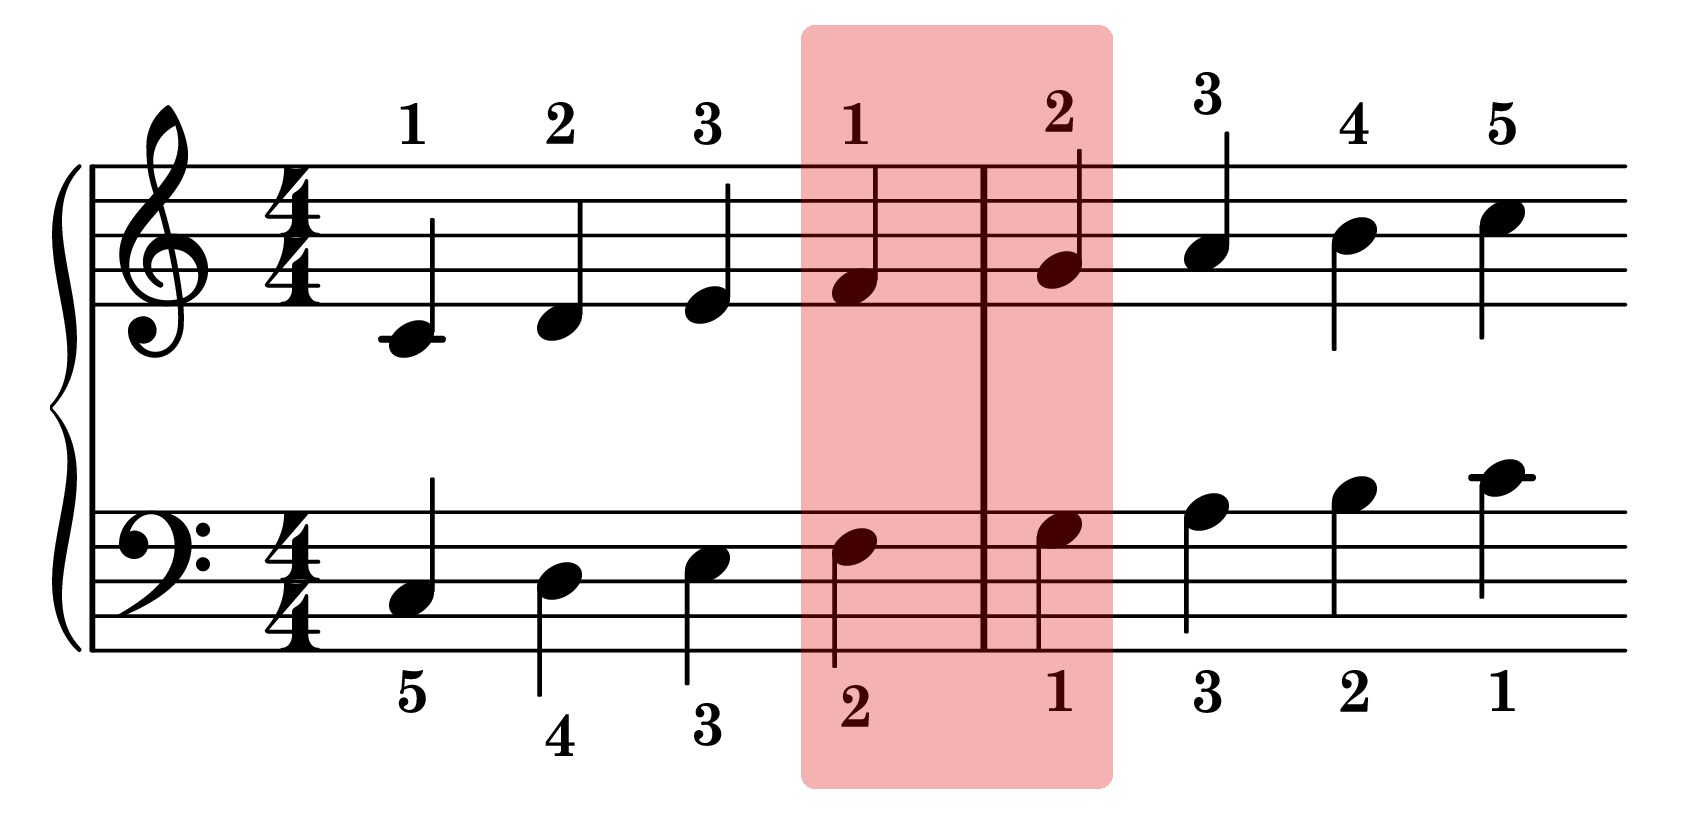
The thumbs come together in the two-note group F and G, where fingers 1 and 2 form a mirror image, a shape sometimes called the “crab claw”. When we play this moment with both hands, the scale feels anchored, and it becomes much less likely that either hand tucks or folds onto the wrong finger.
The same three stages work for sync points:
Once one octave feels consistent, we can extend the scale further up the keyboard. In the right hand, instead of finishing on the fifth finger, the thumb passes under to C again and the core positions repeat until the top. In the left hand, the core positions simply continue upward; on the way down, the thumb takes the place of the fifth finger on each C until the very bottom, where the fifth finger finishes the scale.
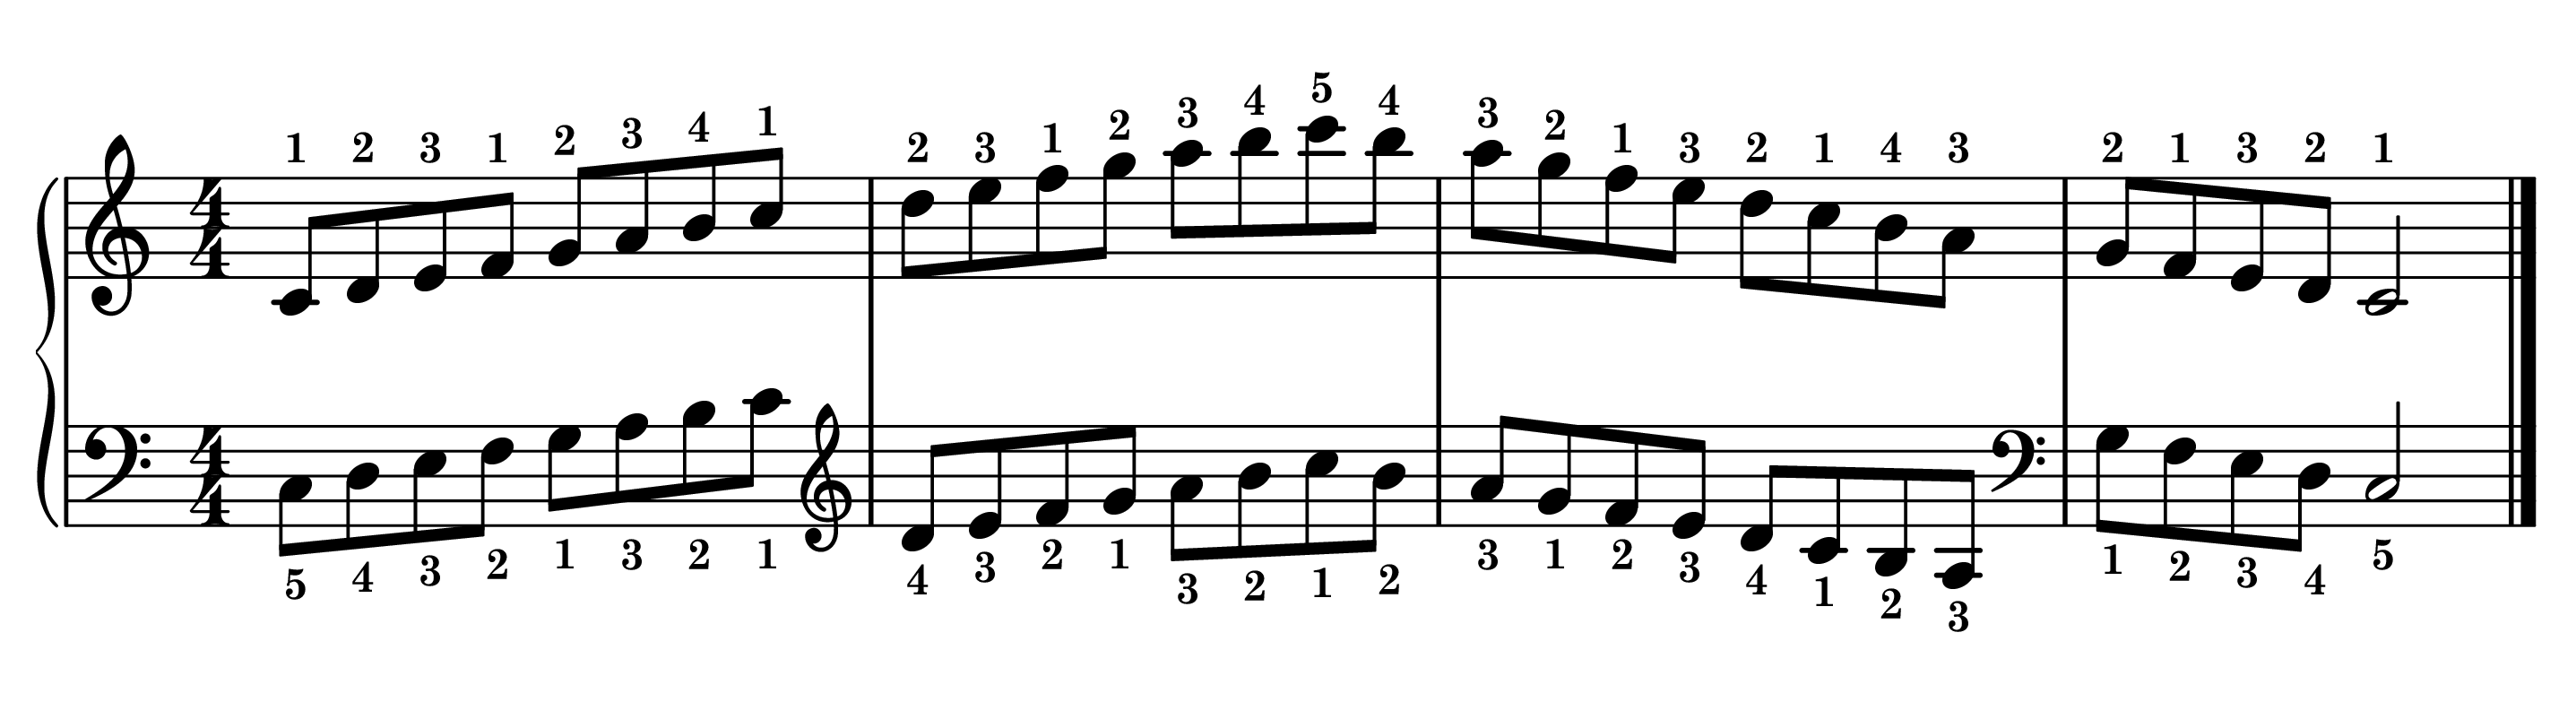
Two things tend to go wrong in C major. The first is fingering: with no black keys to anchor the hand, it’s easy to tuck the thumb or fold a finger over at the wrong moment without noticing until the scale comes apart. Keeping the core positions and sync points clearly in mind is what holds it together.
The second is hand position. The all-white layout invites the hand to curl up and push out toward the front edge of the keys. It usually works better to let the longer fingers, 2, 3, and 4, reach into the area alongside the black keys. Feeling the sides of the fingers brush against the black keys is fine, and actually a good sign.
Other techniques related to the C major piano scale:
No questions on this lesson yet. Be the first to ask one.
Continue learning with our full library of piano scale lessons