
The Complete Guide to Piano 5-Finger Patterns
Learn to play and practice five-finger patterns with a simplified, practical approach
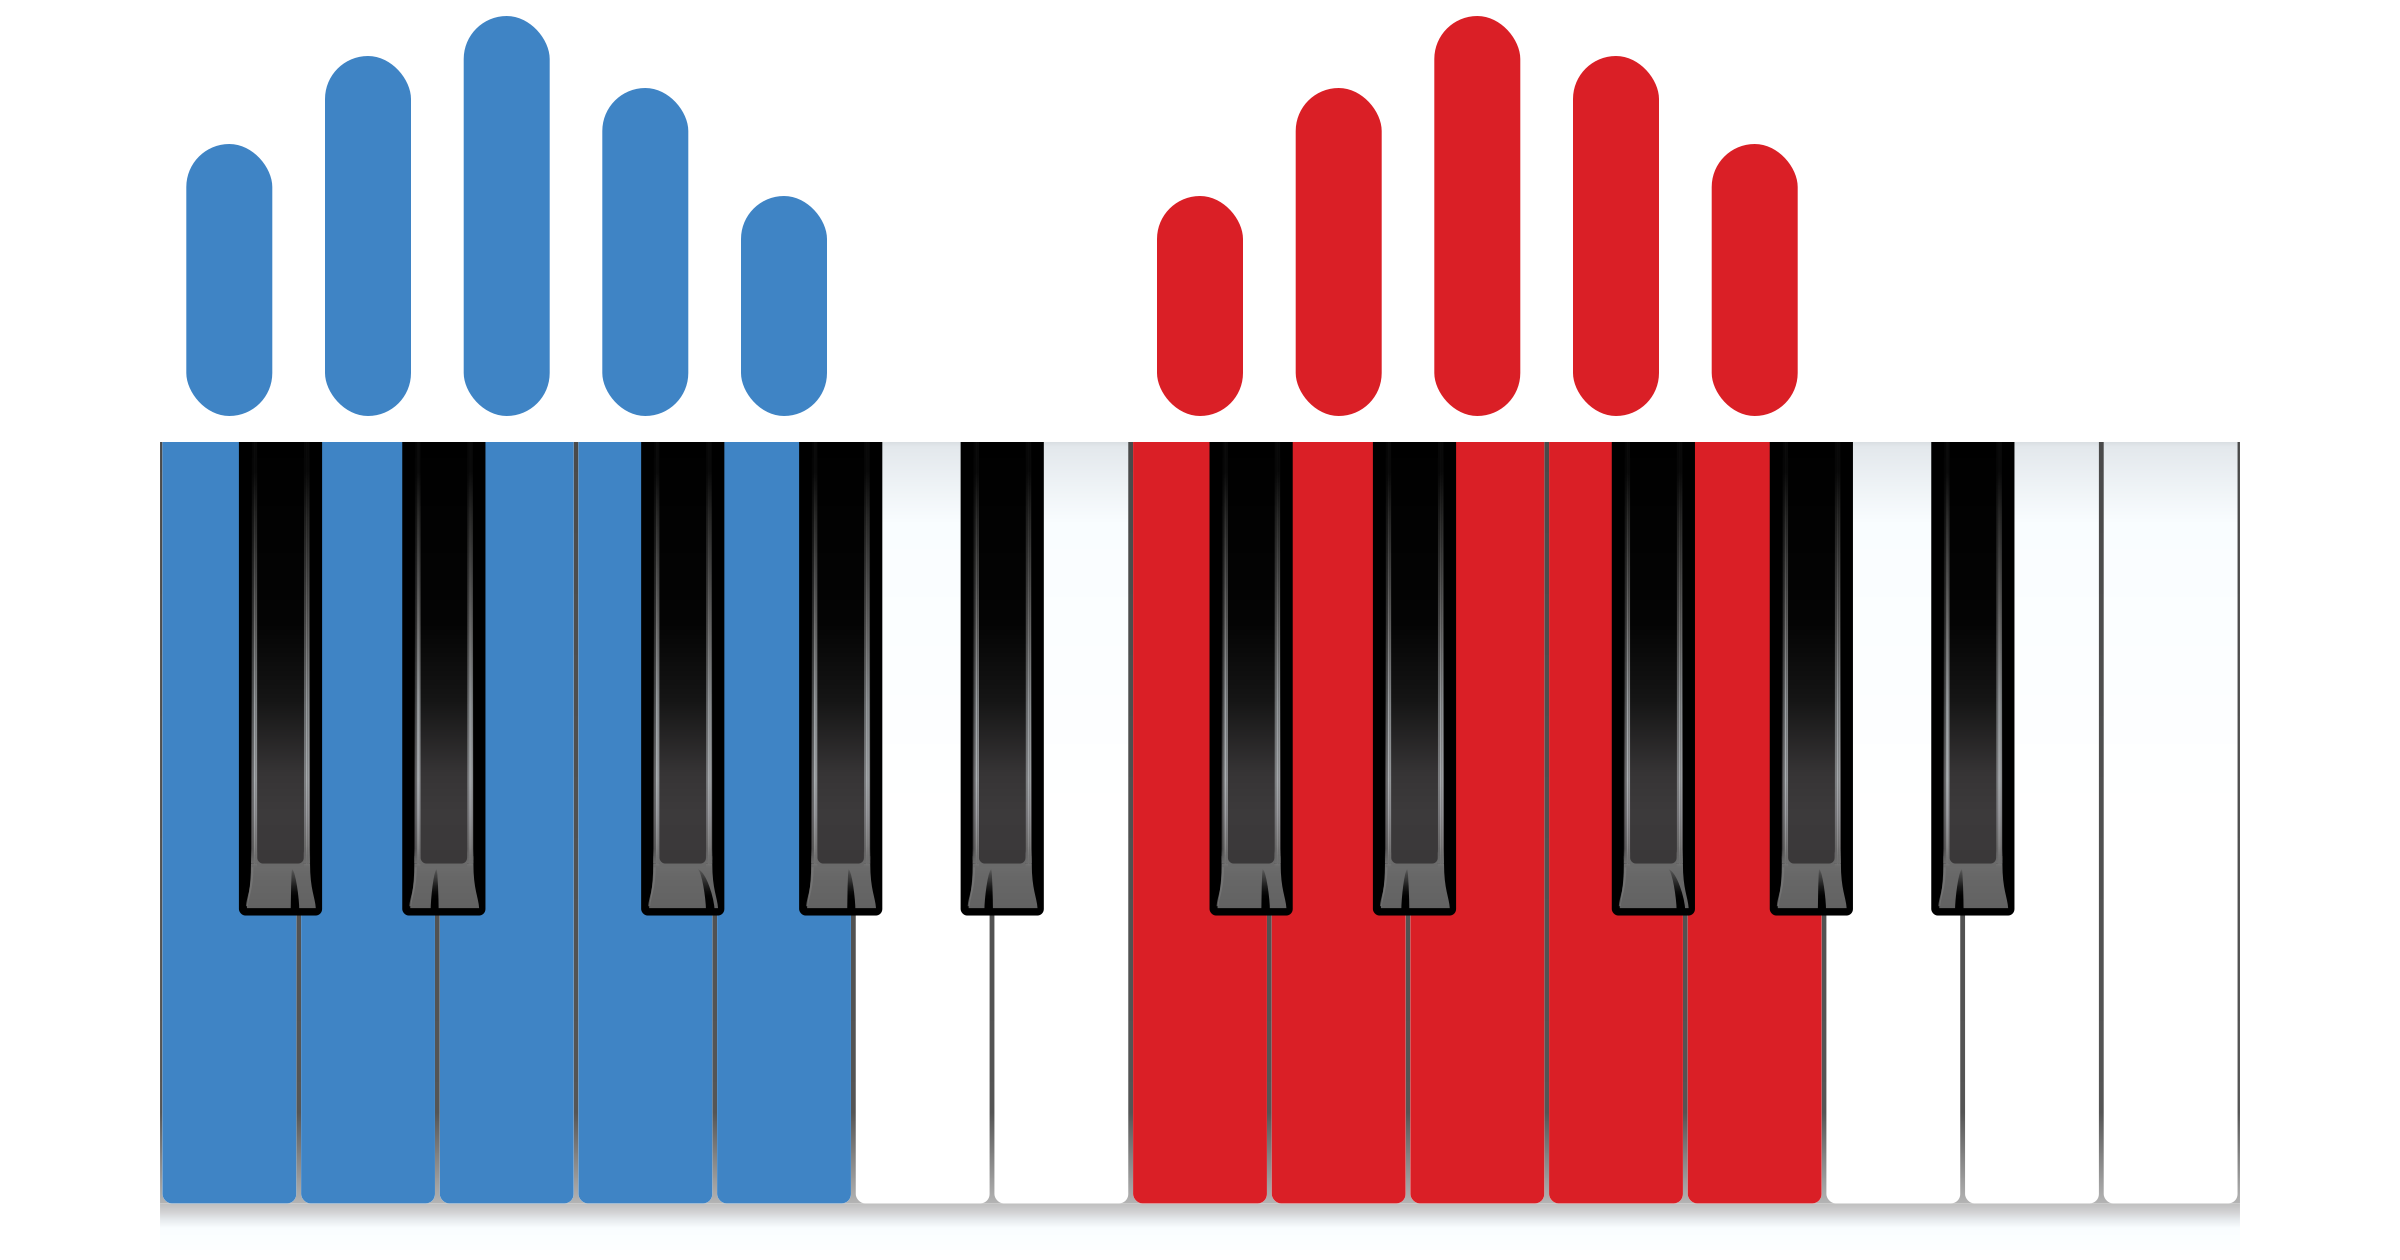
Five-finger patterns are piano hand positions that help us feel grounded and comfortable in the piano keys. Each finger takes one key while the whole hand stays in position. This way, we unlock the ability to play and read a wide variety of melodies without worrying about moving our hands.
That is why they are worth knowing in every key. Once the hand knows the shape, it can move to a new starting note without relearning anything, and the fingers begin to find their keys by feel rather than by looking.
What are five-finger patterns, and why are they important?
A five-finger pattern is five neighbouring notes of a scale, played with fingers 1 through 5, one finger on each key. The hand does not travel. It sits over the notes and the fingers take turns.
The pattern shows up constantly in music, so playing it in every key gives the hand a set of reliable positions to start from. The black and white keys fall under the fingers differently from one position to the next, and noticing that early is a large part of what makes the rest of the keyboard feel familiar.
It is also a good place to listen closely. With the hand settled, attention can go to evenness, to the weight in each finger, and to the difference between a major and a minor sound.
How to build five-finger patterns on the piano
A five-finger pattern takes the first five notes of a scale. The right hand plays 1-2-3-4-5 going up, and the left hand plays 5-4-3-2-1. The root sits under the thumb in the right hand and under the fifth finger in the left. Each pattern is named for that starting note, so the pattern that begins on C is the C position.
There are two kinds, Major and Minor. They differ by a single note, and that note changes the character of the whole pattern. We’ll start with major.
The anatomy of Major five-finger patterns
A major pattern is the first five notes of the major scale. The notes sit a whole step, a whole step, a half step and a whole step apart:
W-W-H-W
That puts a major third between the root and the third finger, and a perfect fifth between the root and the fifth finger.
Need to brush up on intervals? Check out our quick guide here.
This pattern is the same in every key, which is why the sound is the same wherever the hand sits. What changes from one position to the next is where the black keys fall, and that is what the hand has to learn.
Here is an overview of all twelve major patterns. Each has its own lesson with the keyboard layout, the fingering for both hands, and the notes written on the staff.
The 12 Major Five-Finger Patterns
C Major Position
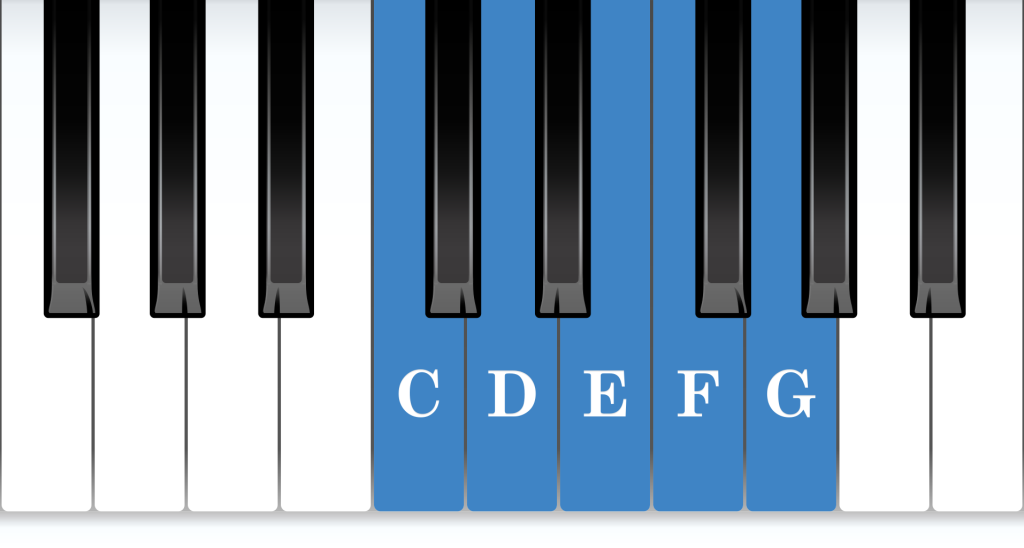
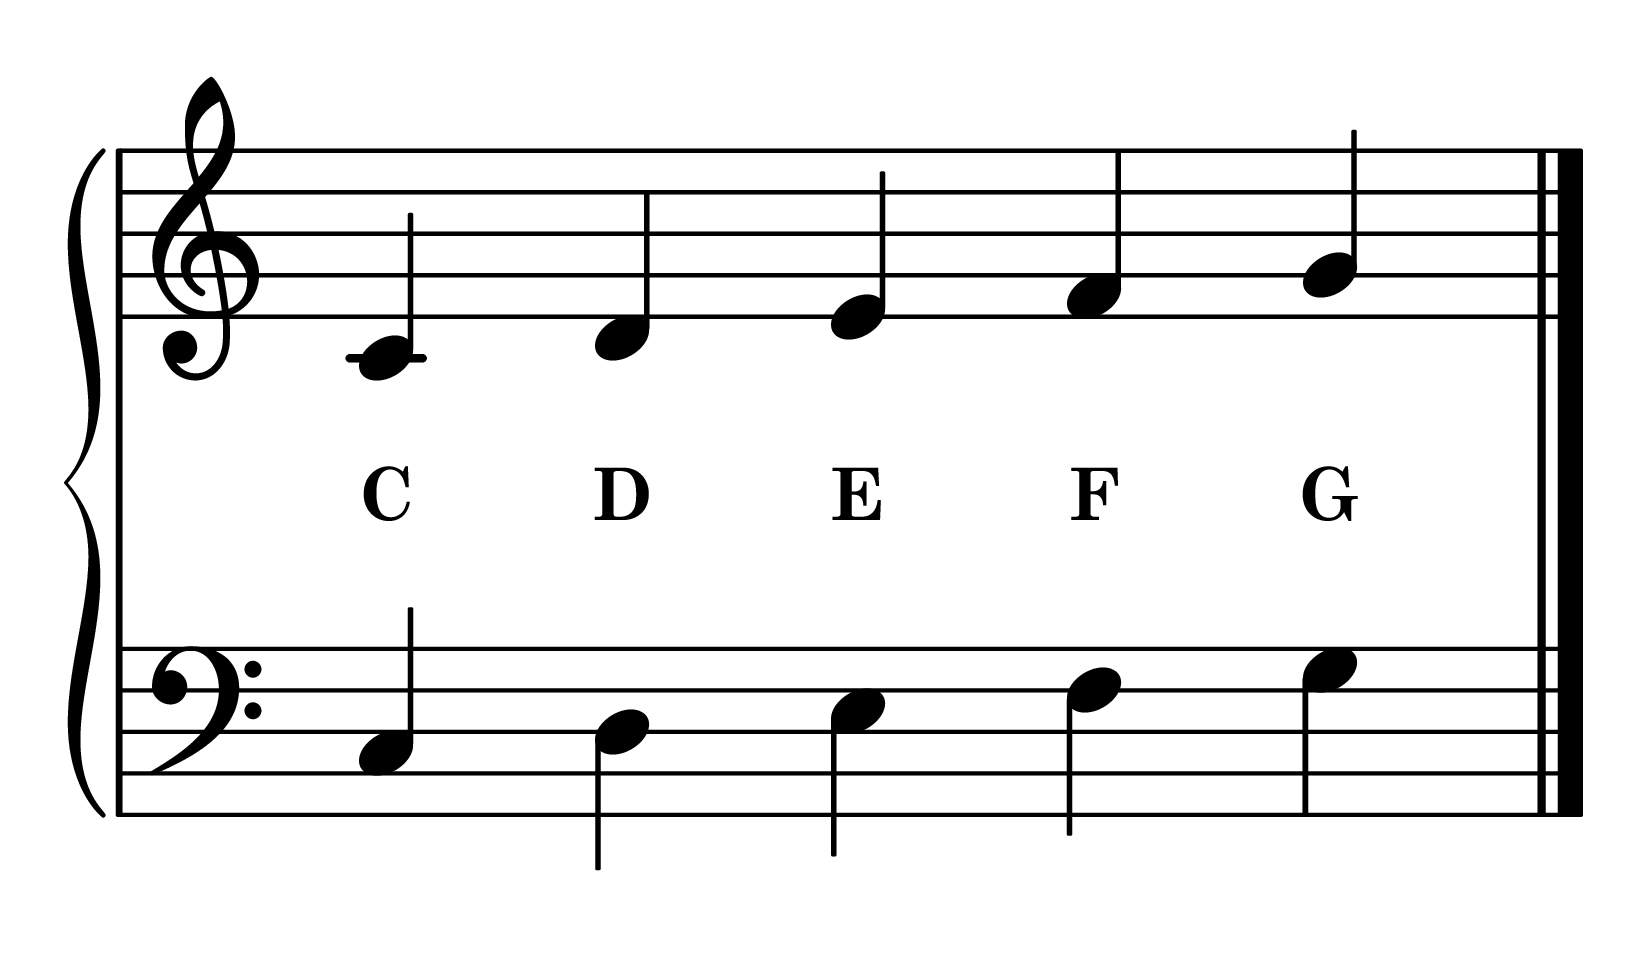
LH Fingering: 5 4 3 2 1
G Major Position
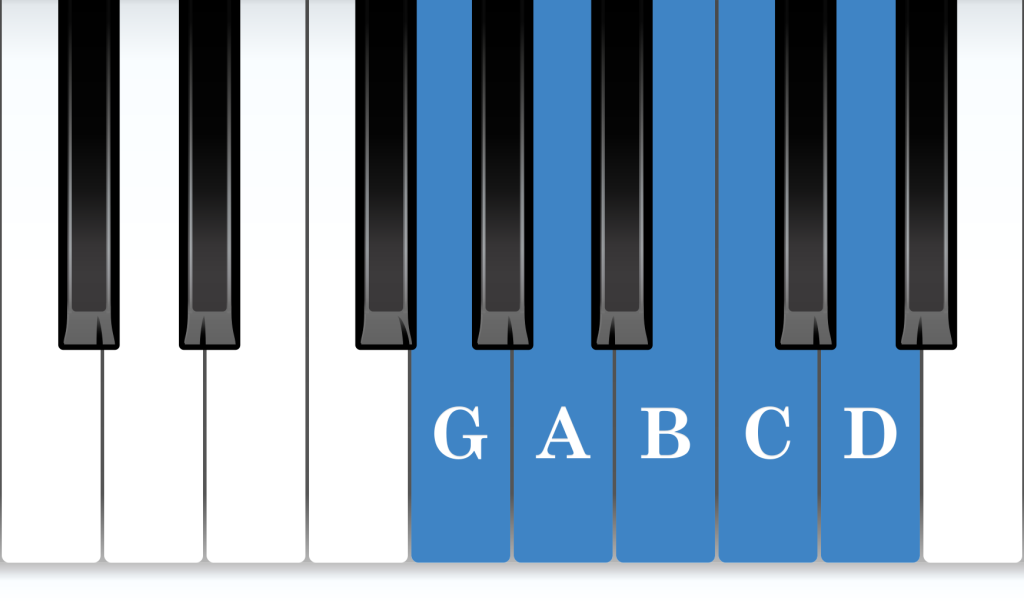
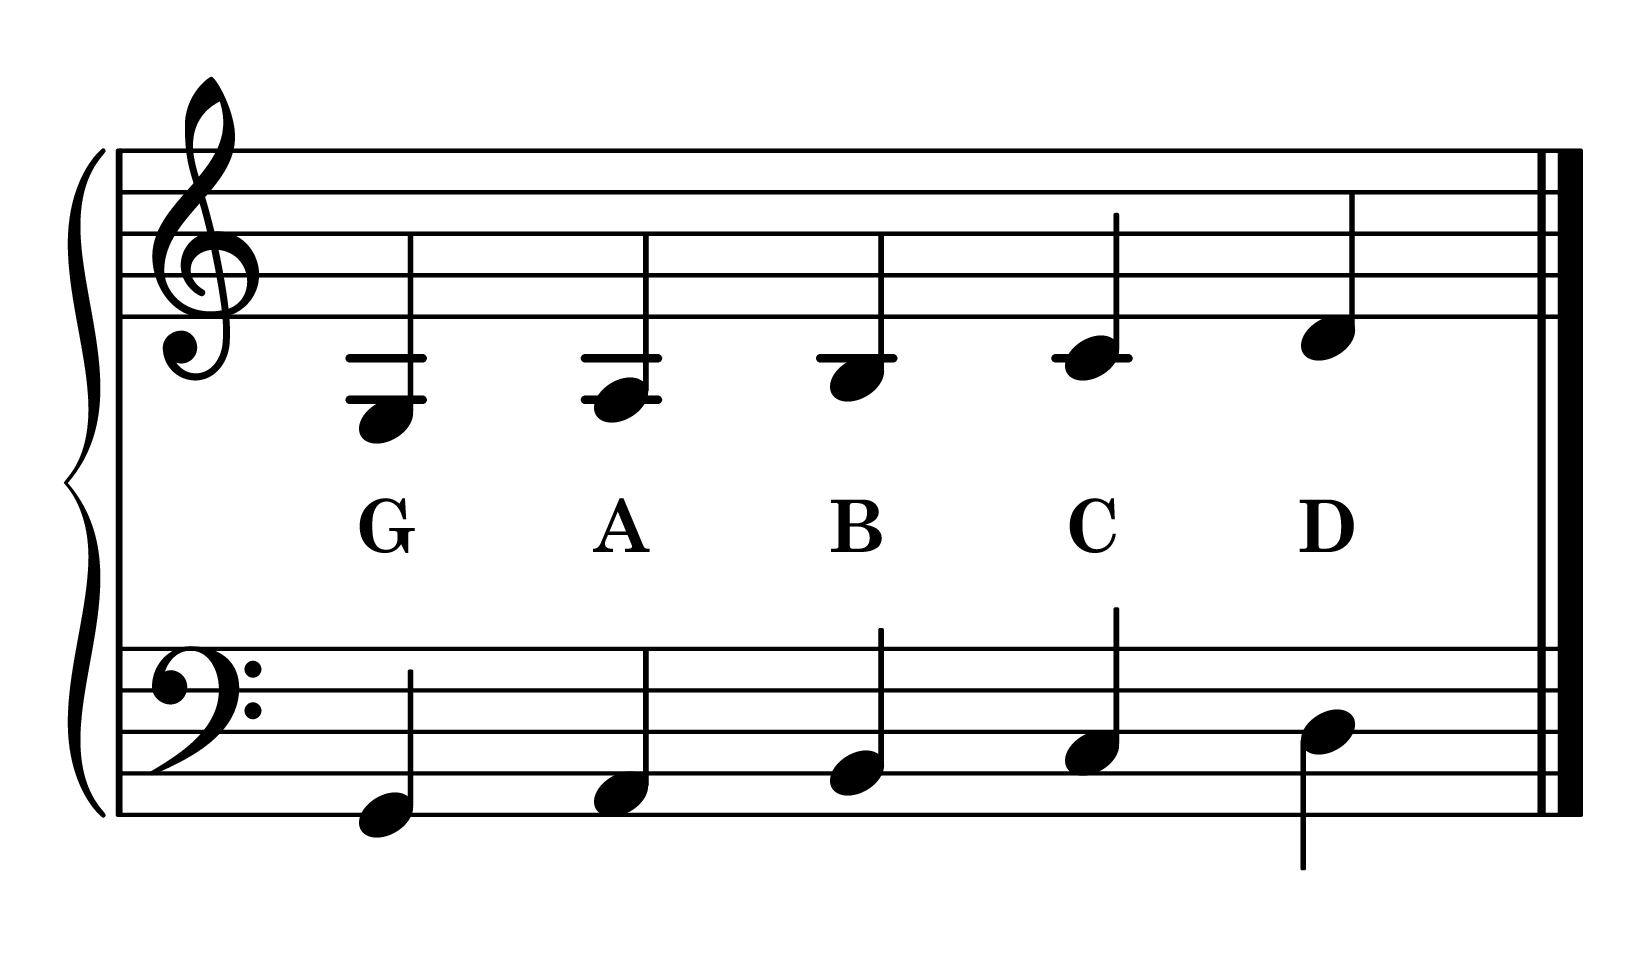
LH Fingering: 5 4 3 2 1
D Major Position
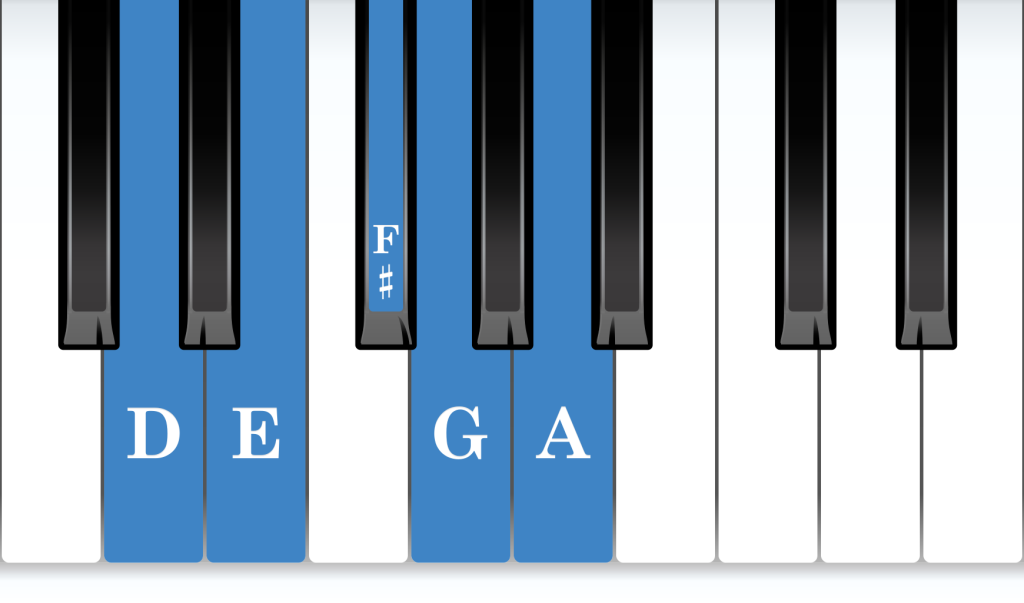
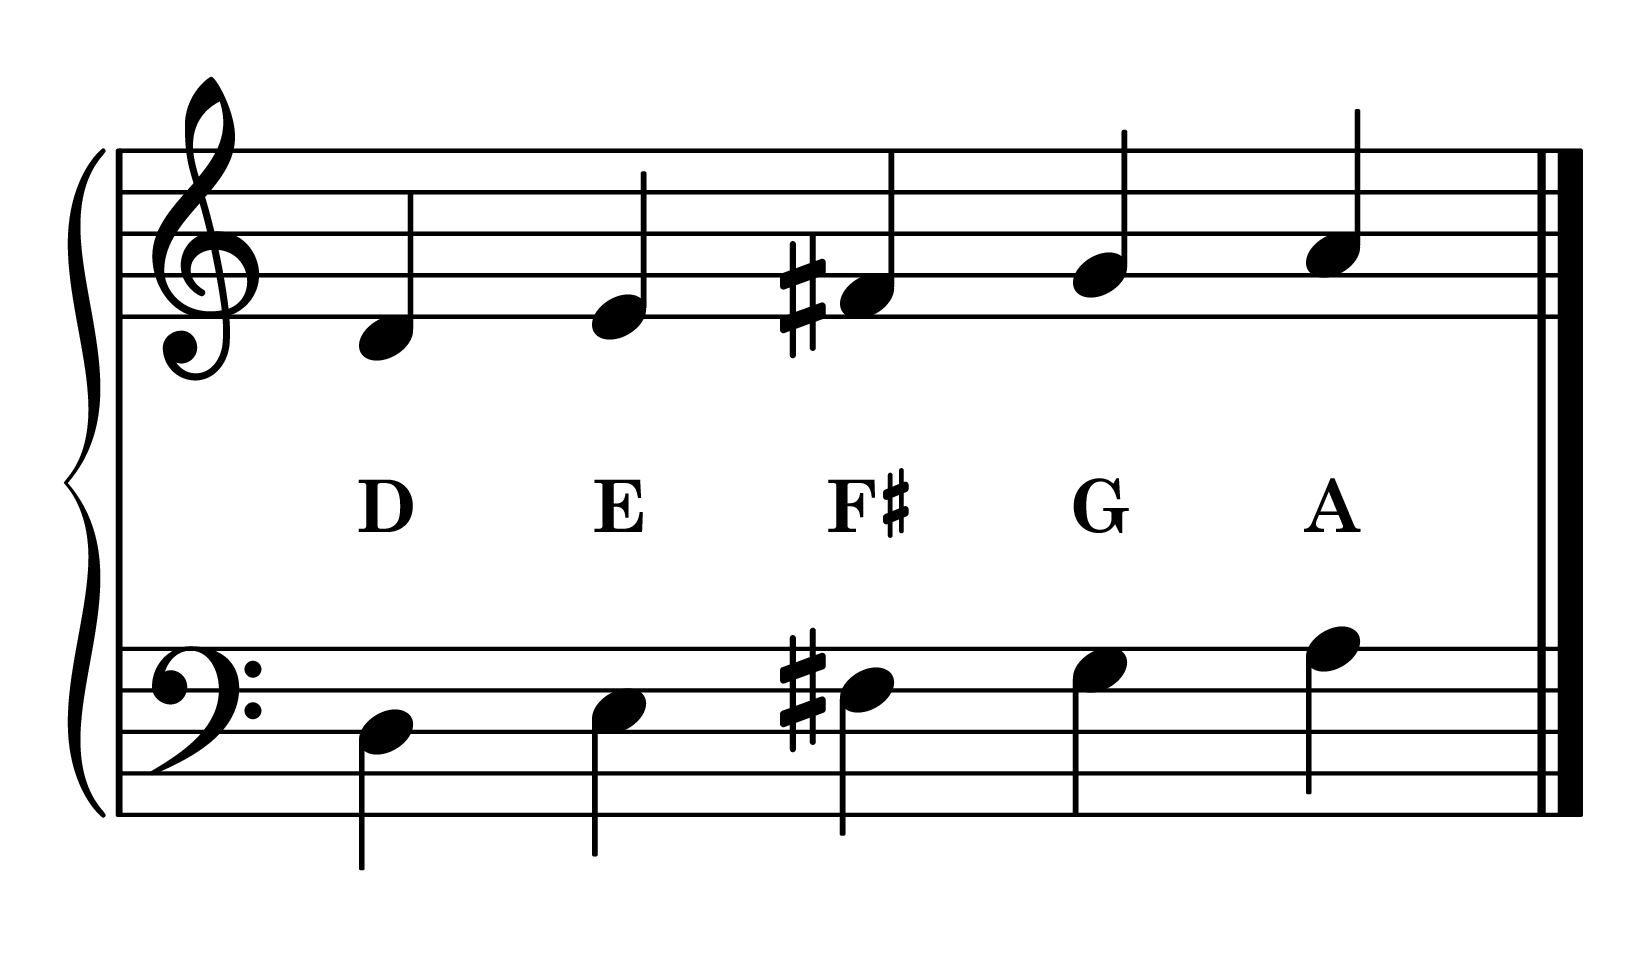
LH Fingering: 5 4 3 2 1
A Major Position
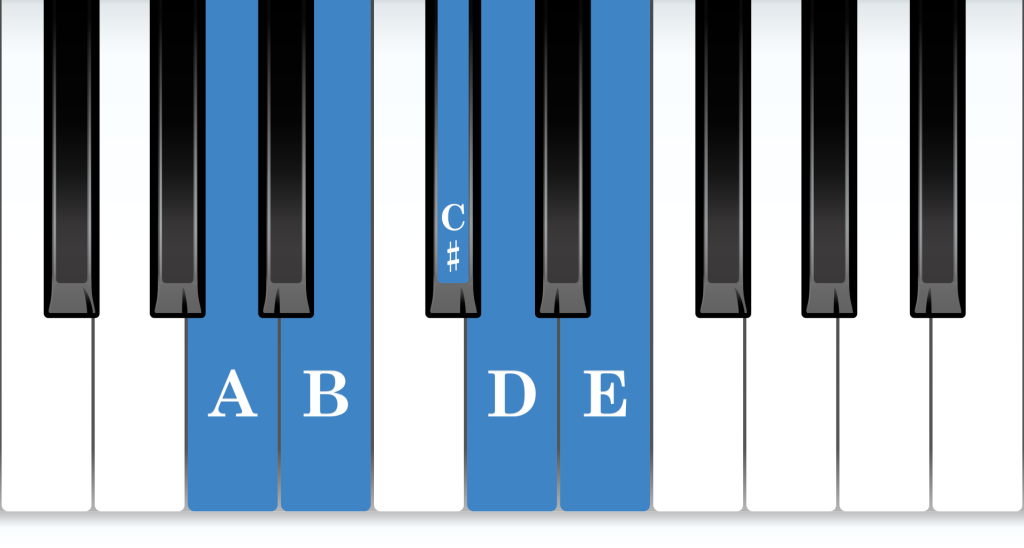
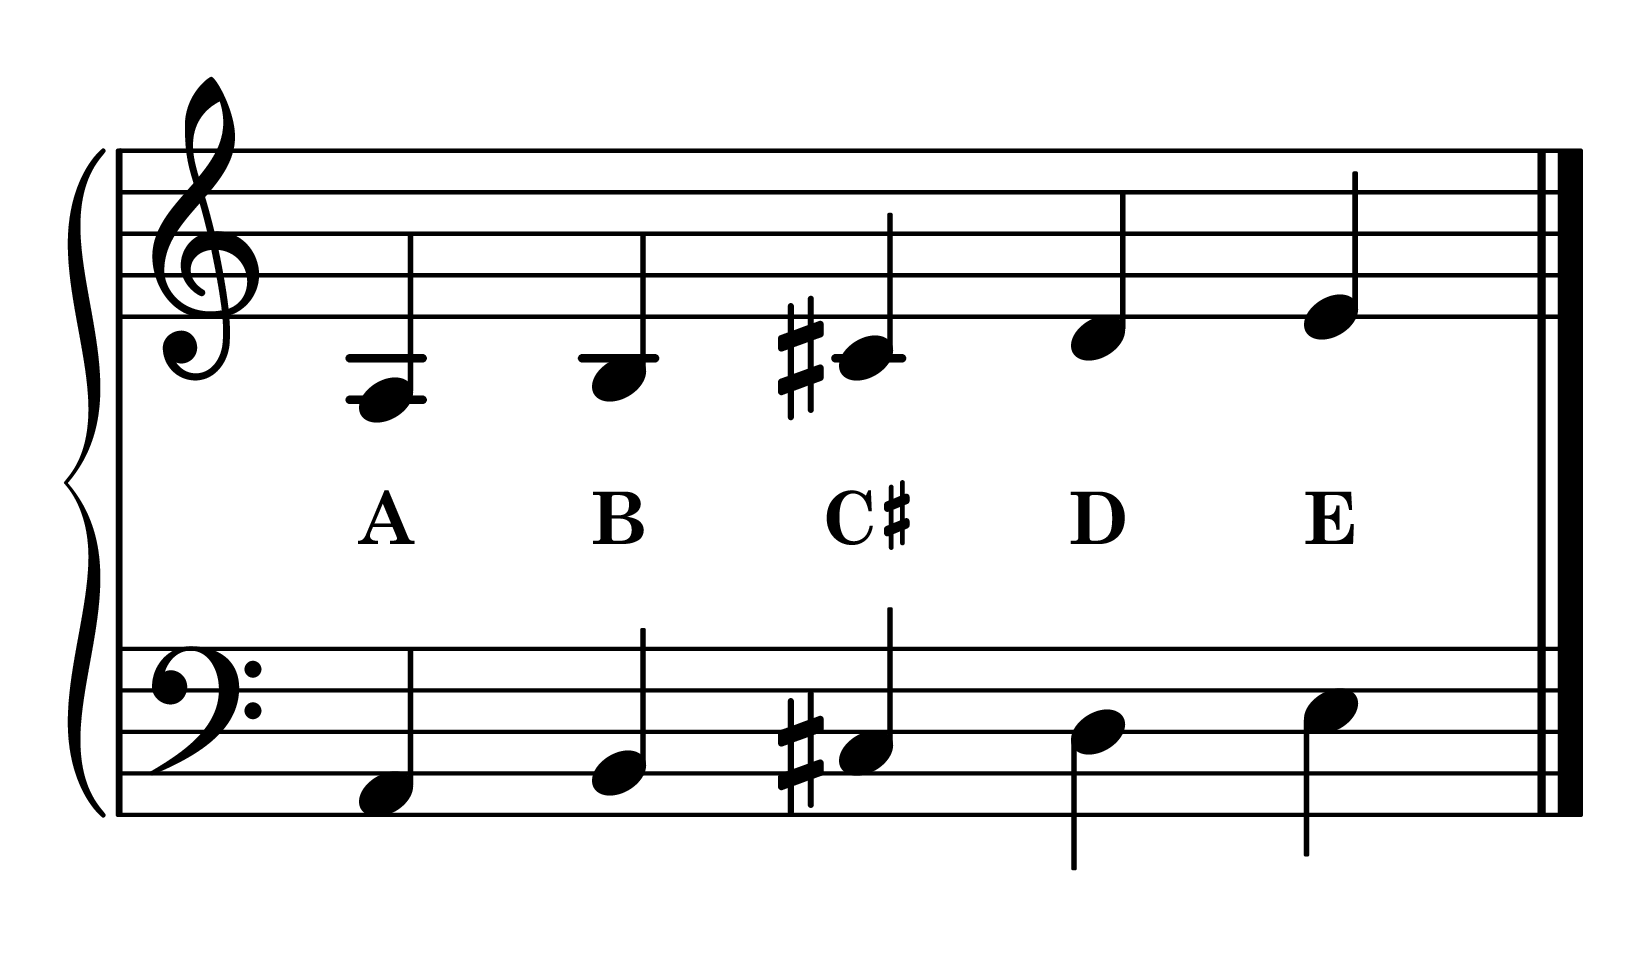
LH Fingering: 5 4 3 2 1
E Major Position
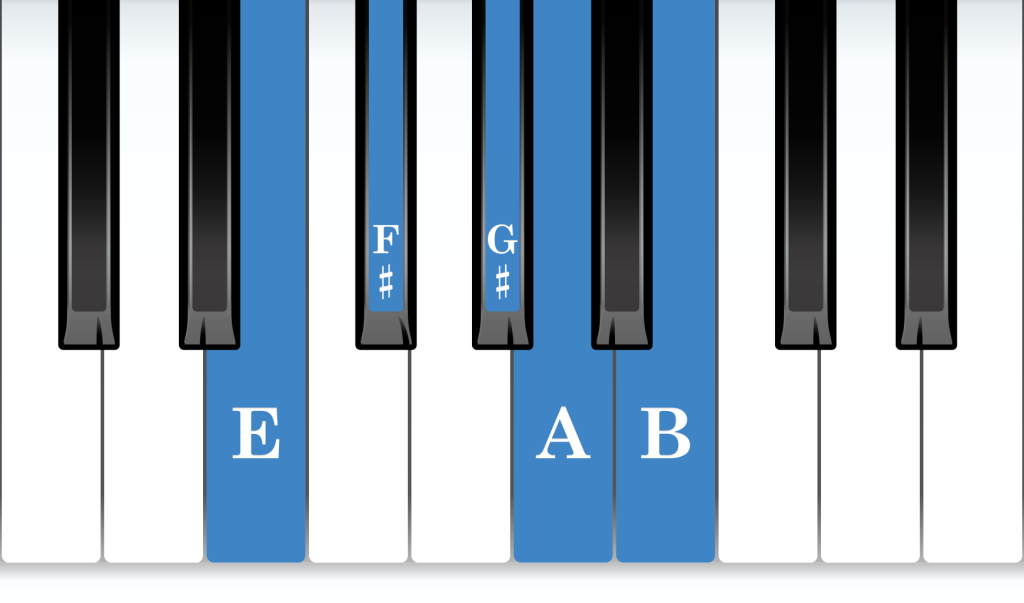
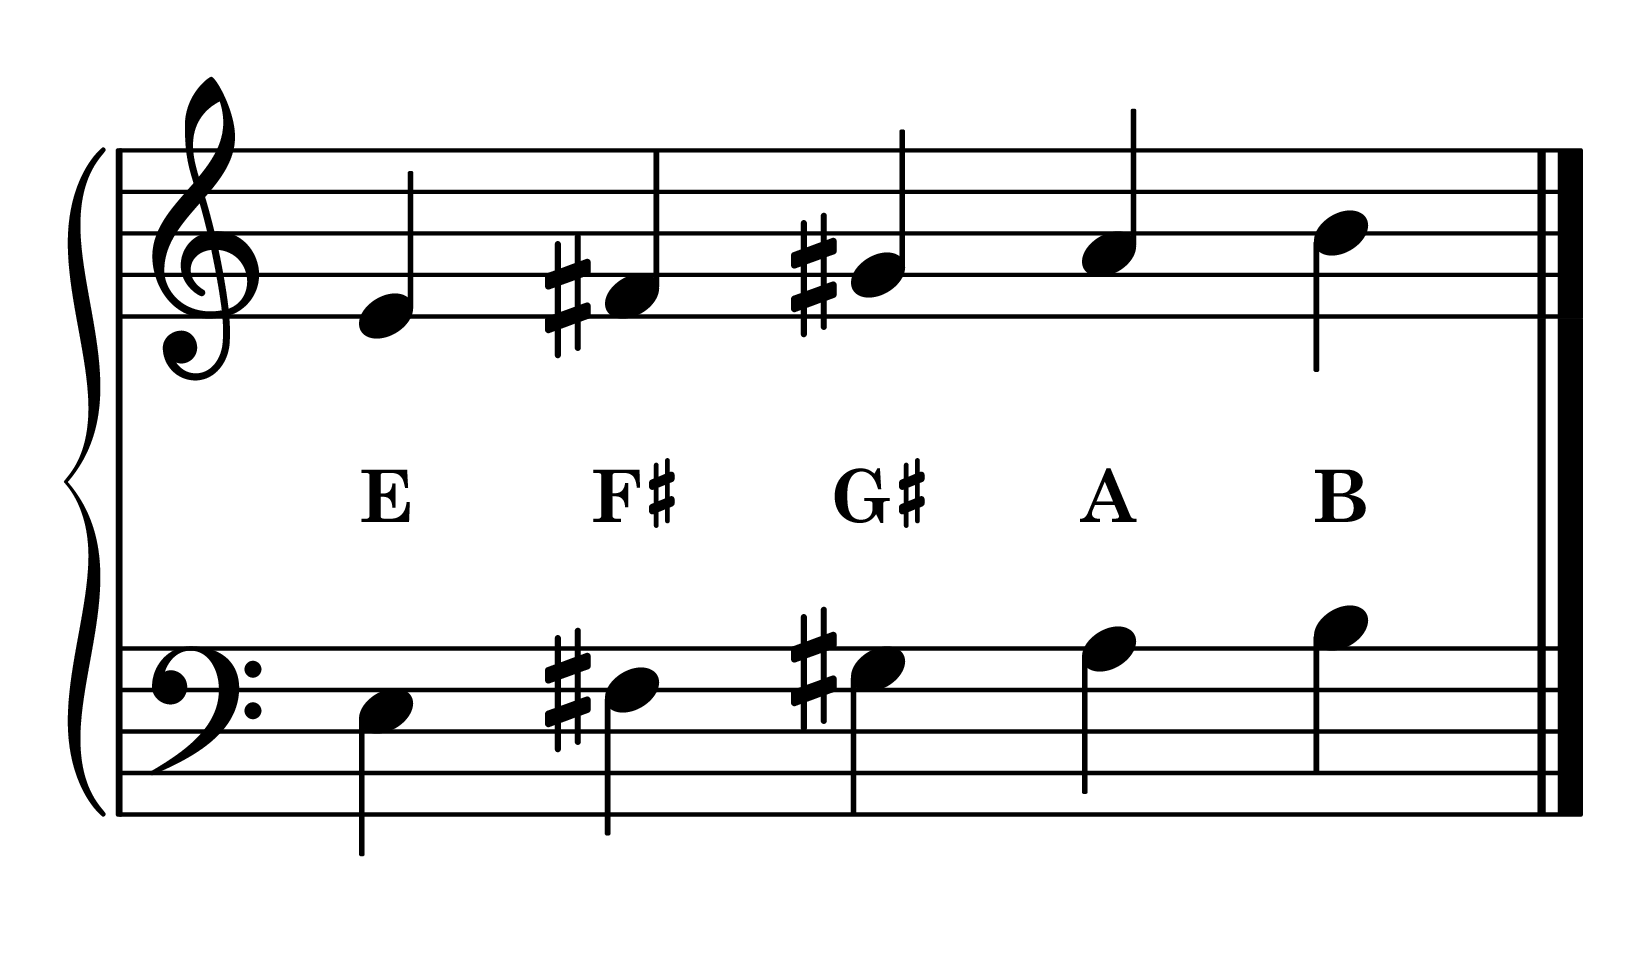
LH Fingering: 5 4 3 2 1
B Major Position
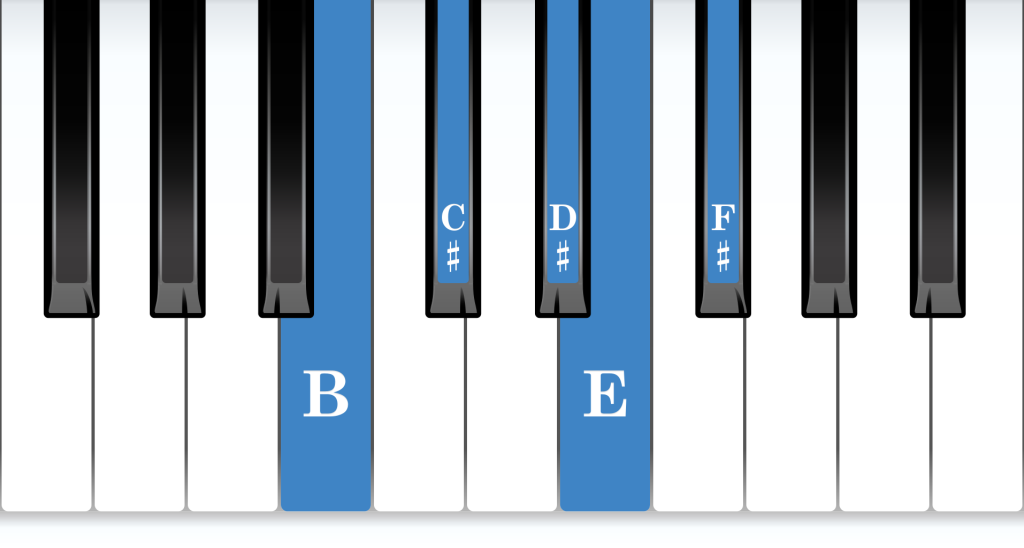
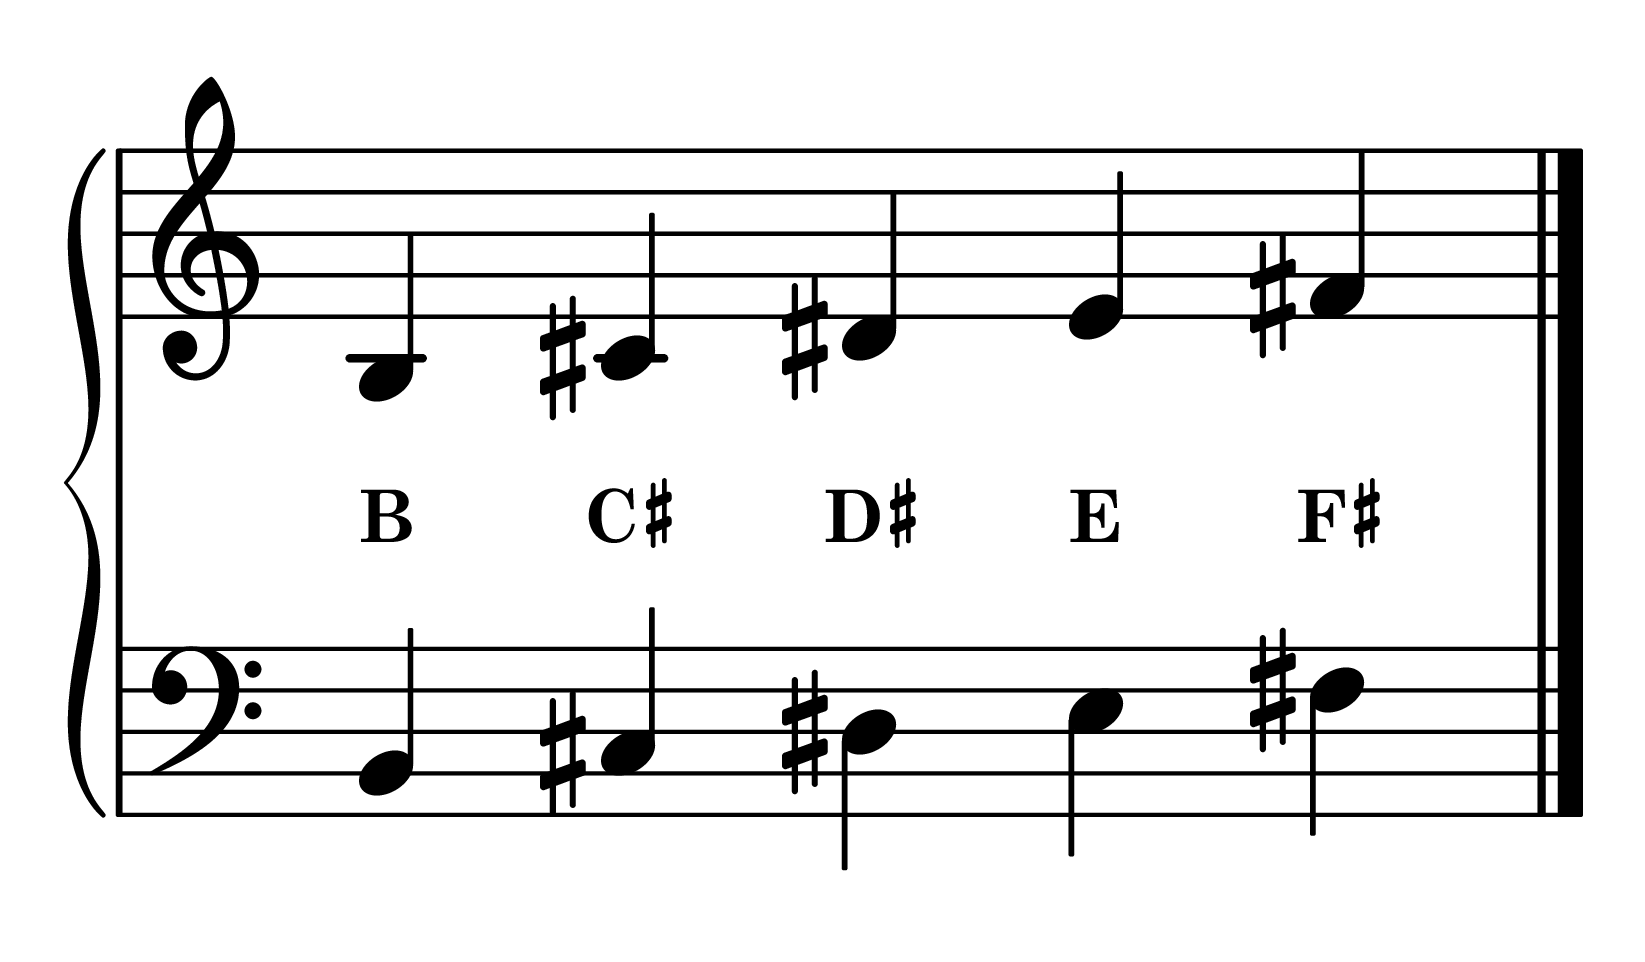
LH Fingering: 5 4 3 2 1
G-flat Major Position
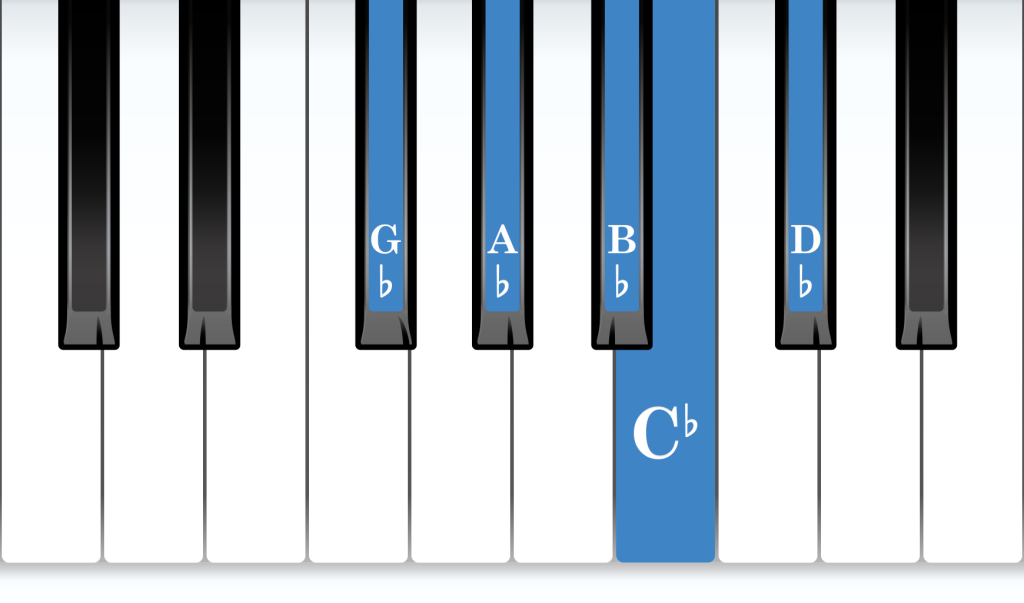
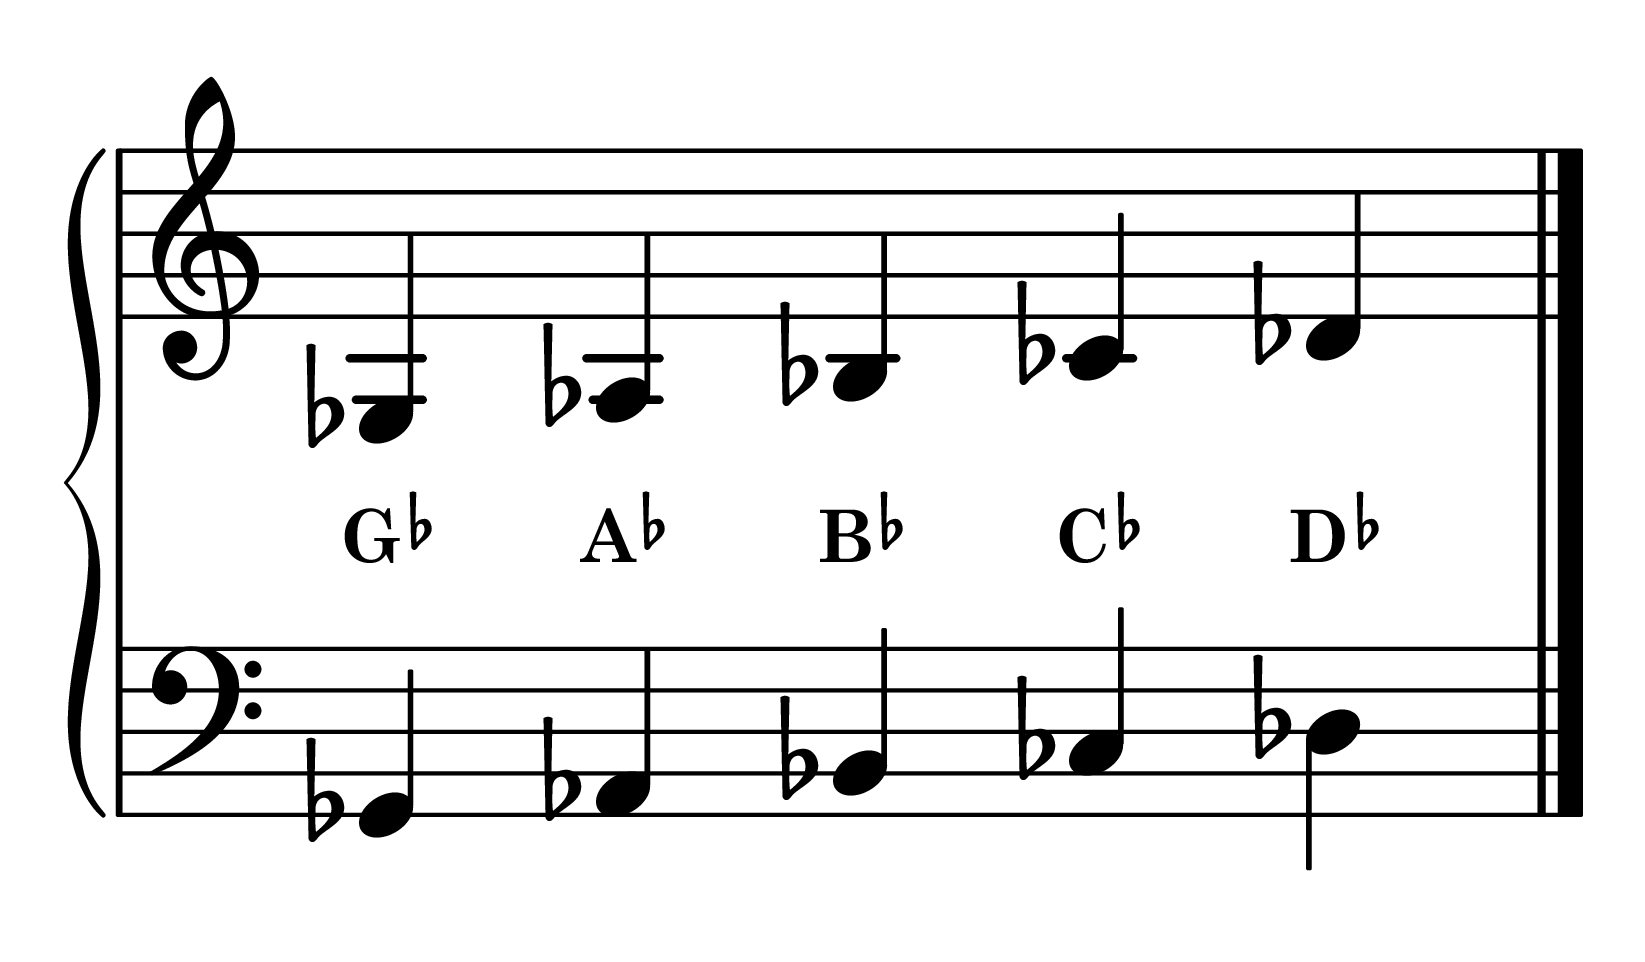
LH Fingering: 5 4 3 2 1
D-flat Major Position
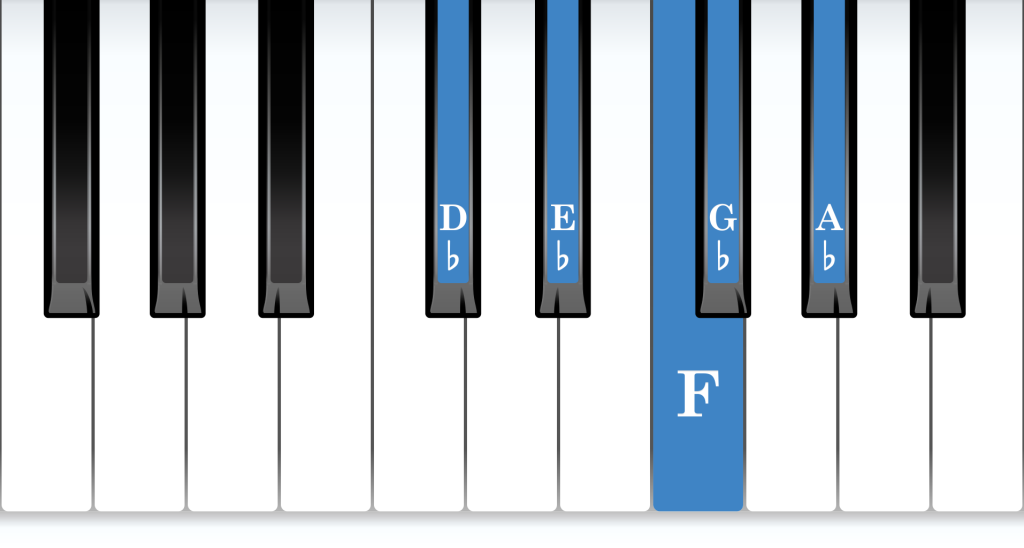
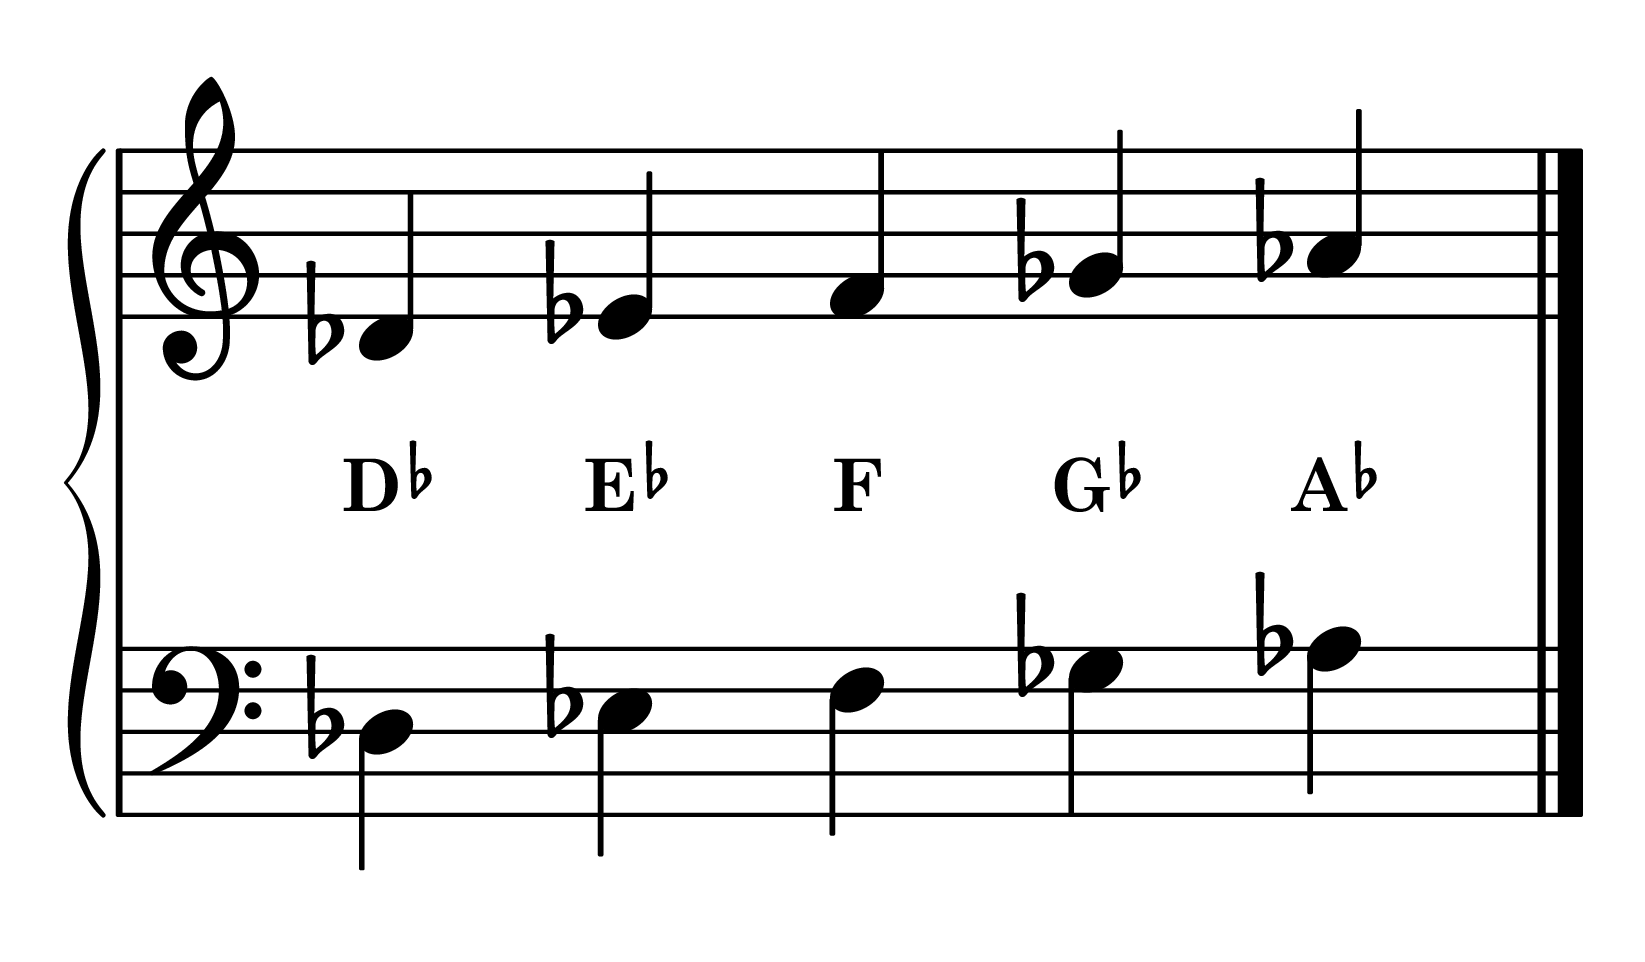
LH Fingering: 5 4 3 2 1
A-flat Major Position
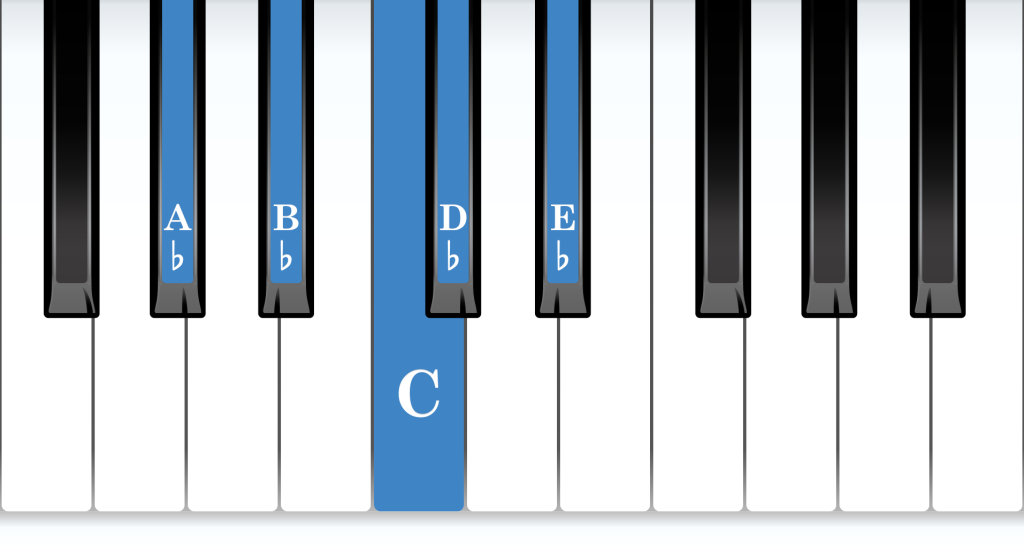
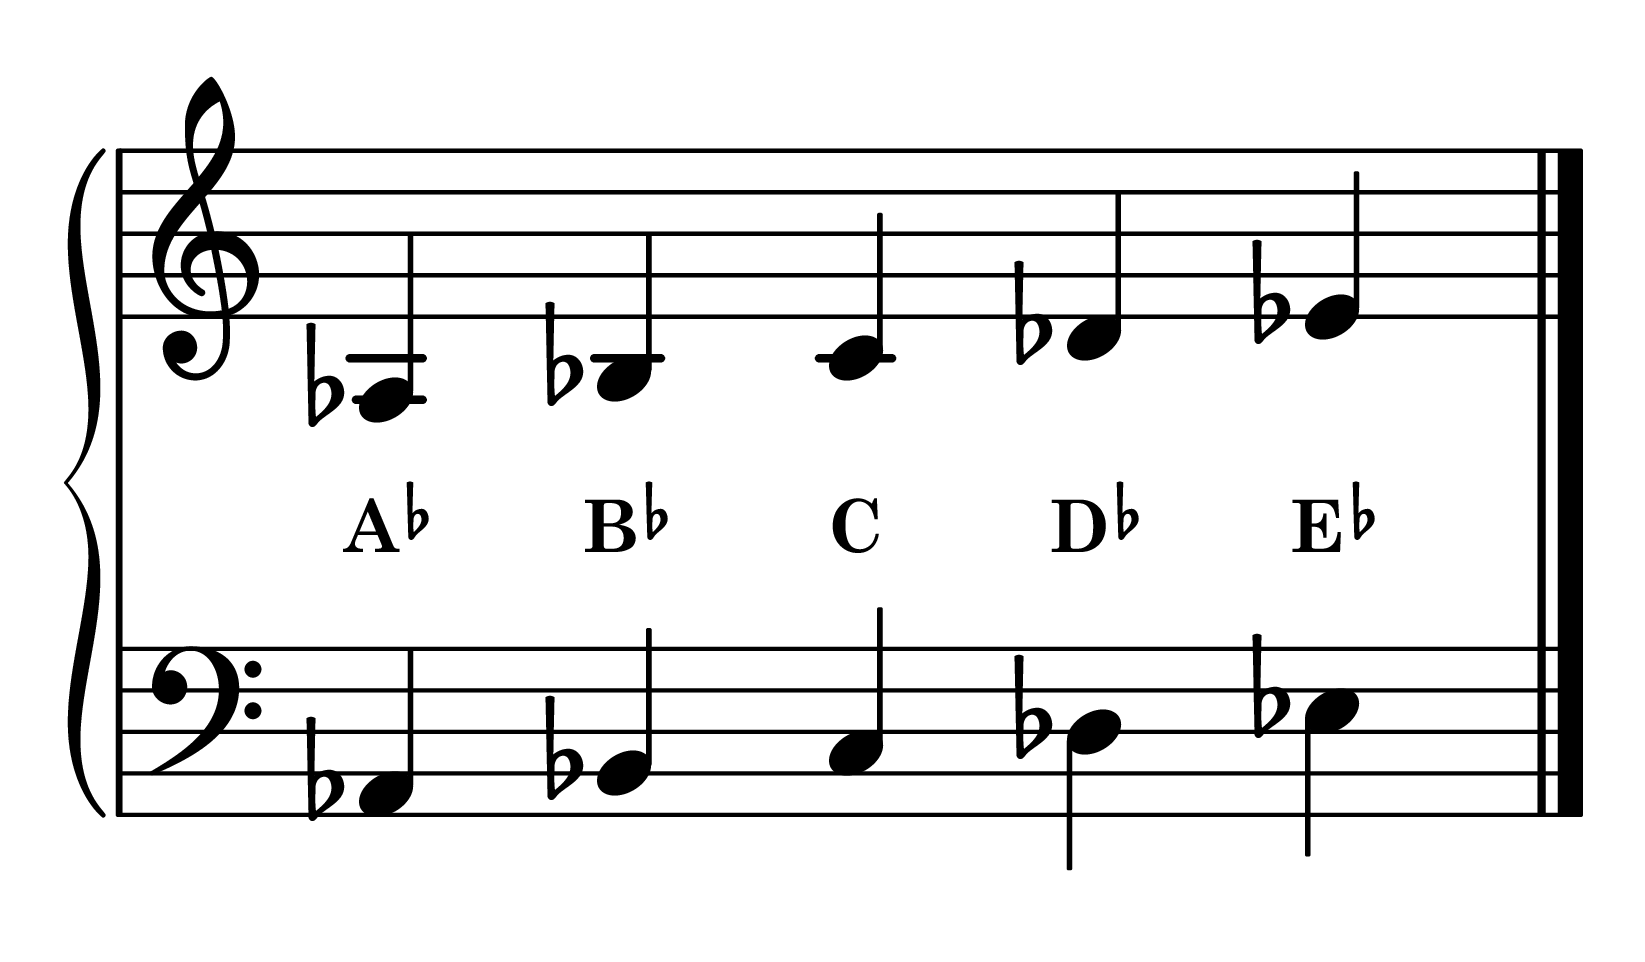
LH Fingering: 5 4 3 2 1
E-flat Major Position
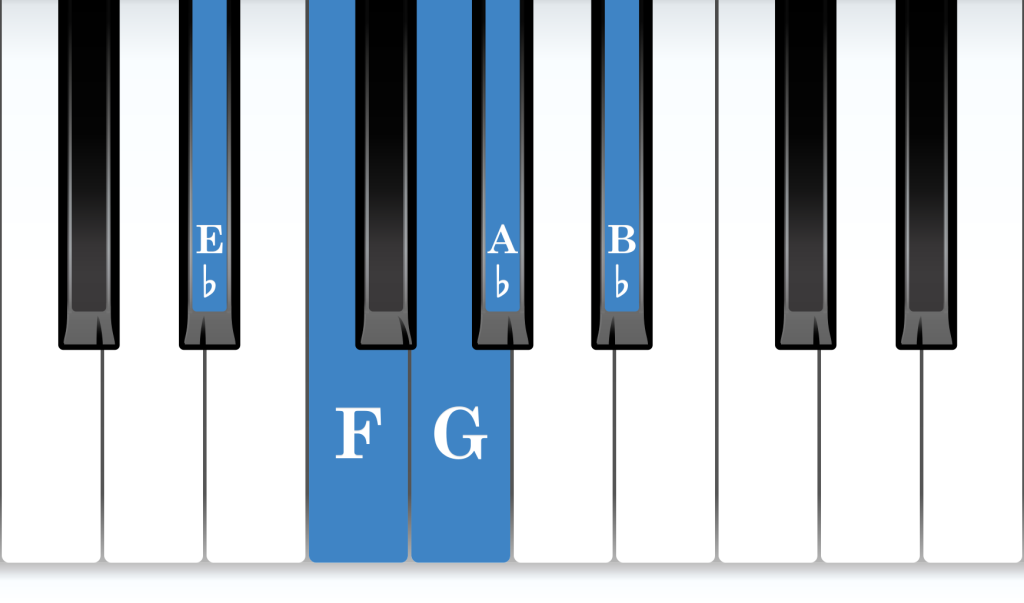
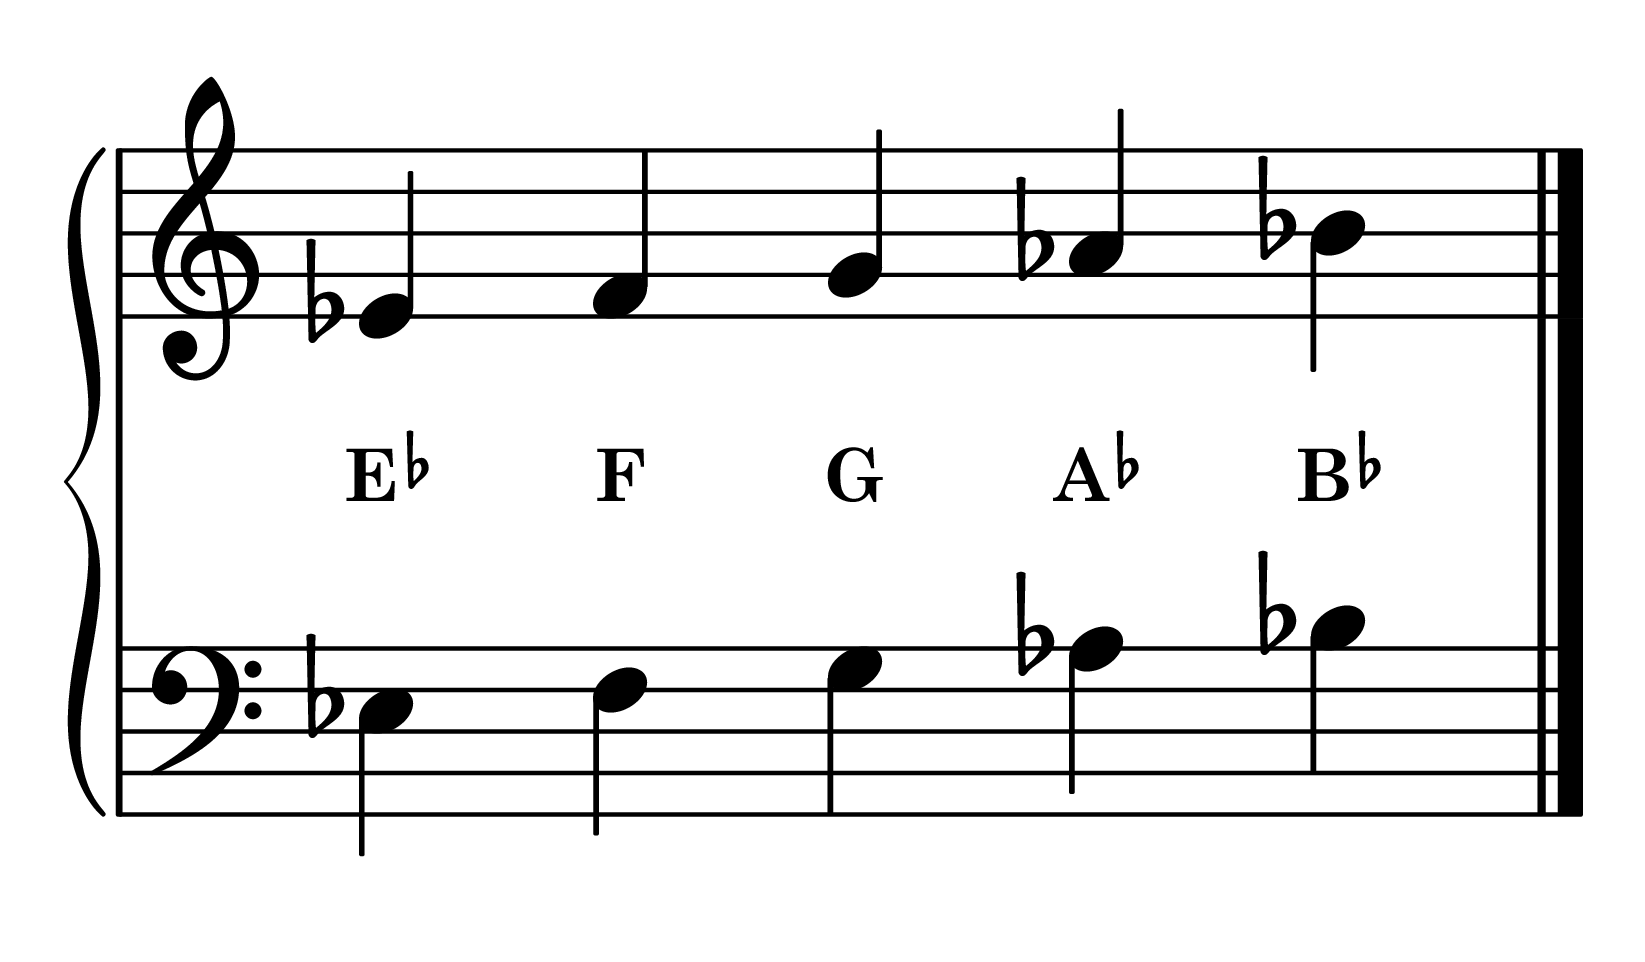
LH Fingering: 5 4 3 2 1
B-flat Major Position
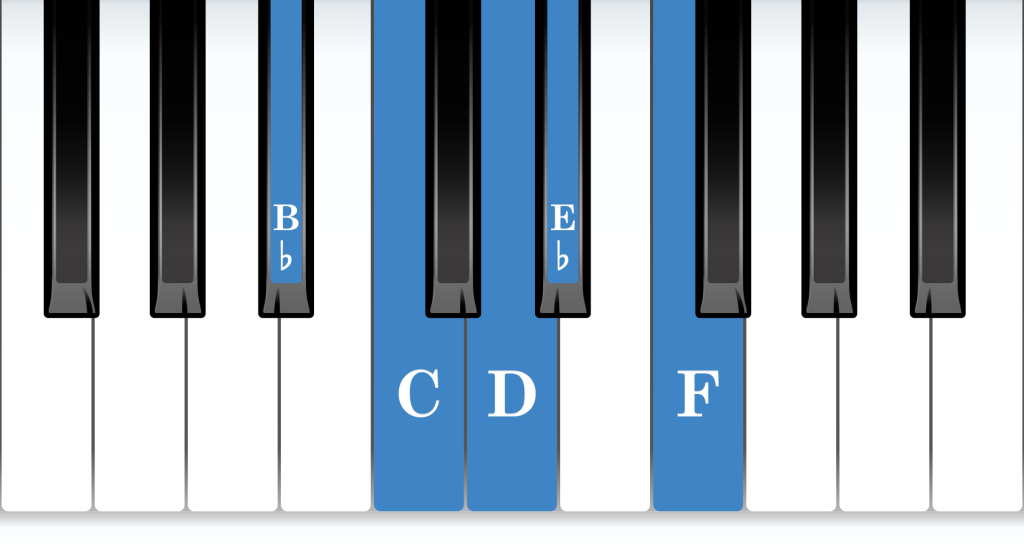
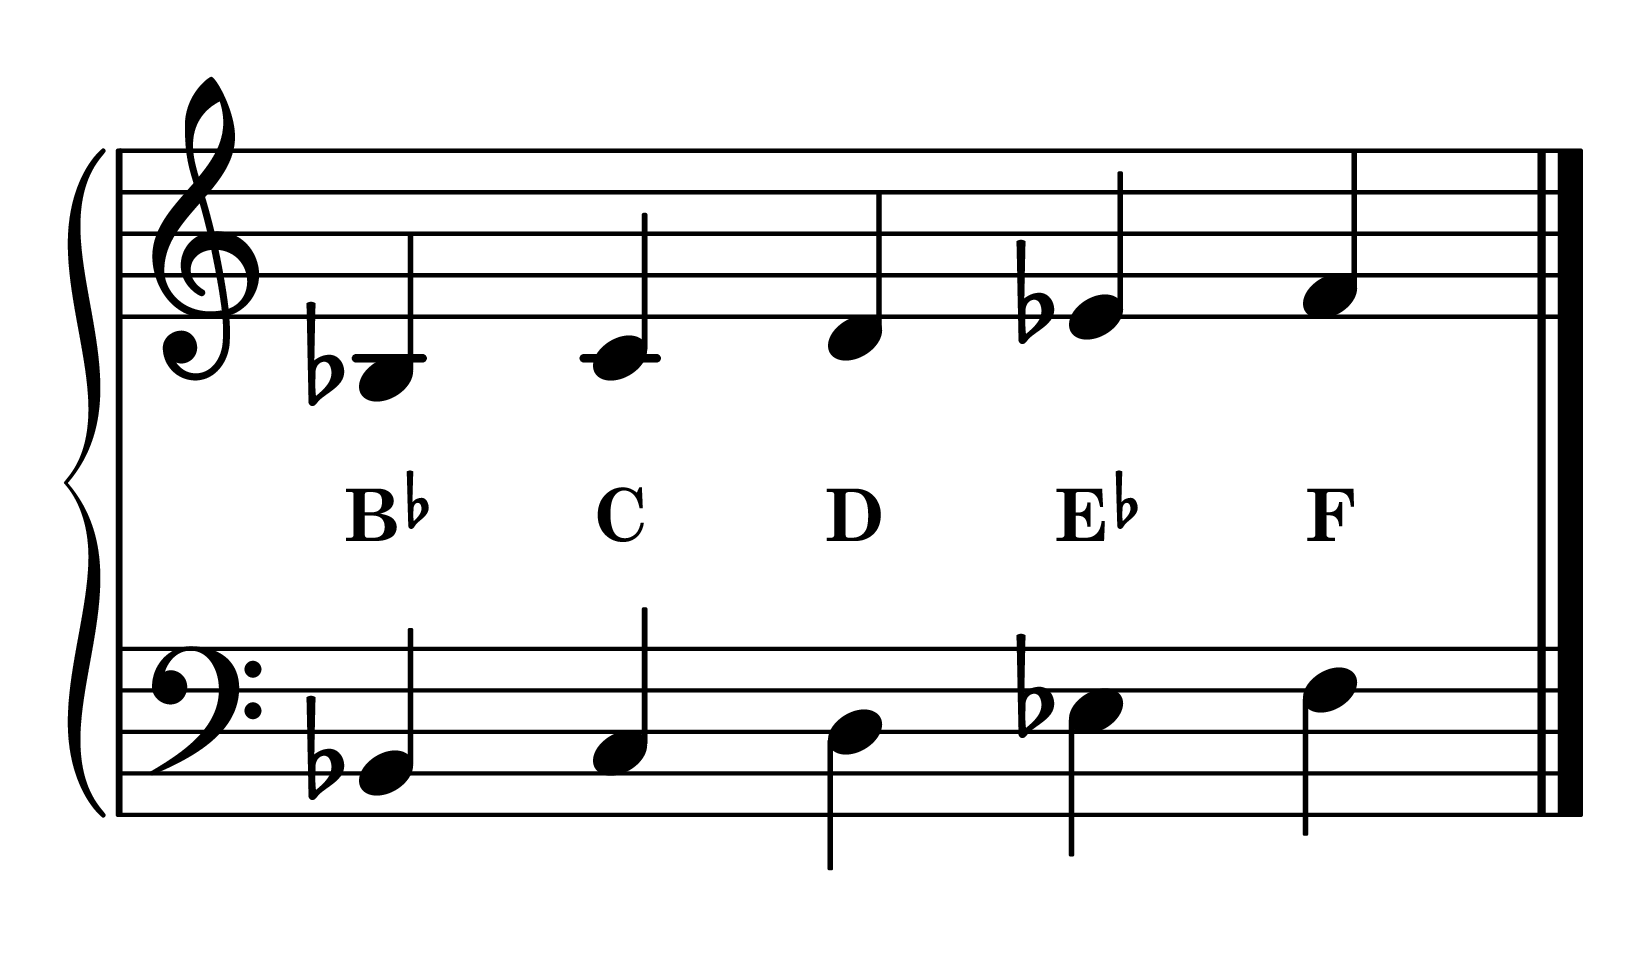
LH Fingering: 5 4 3 2 1
F Major Position
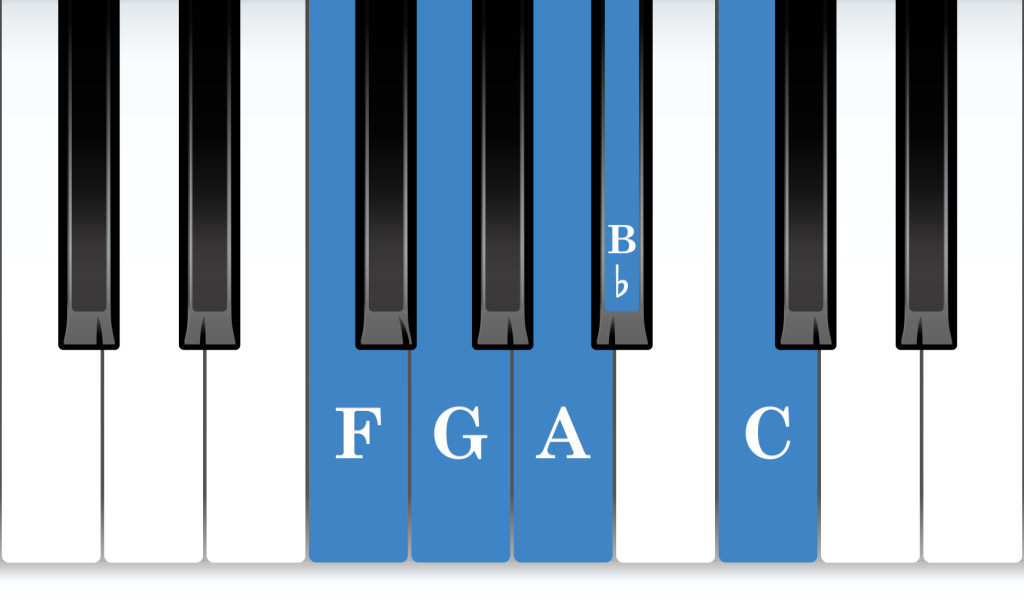
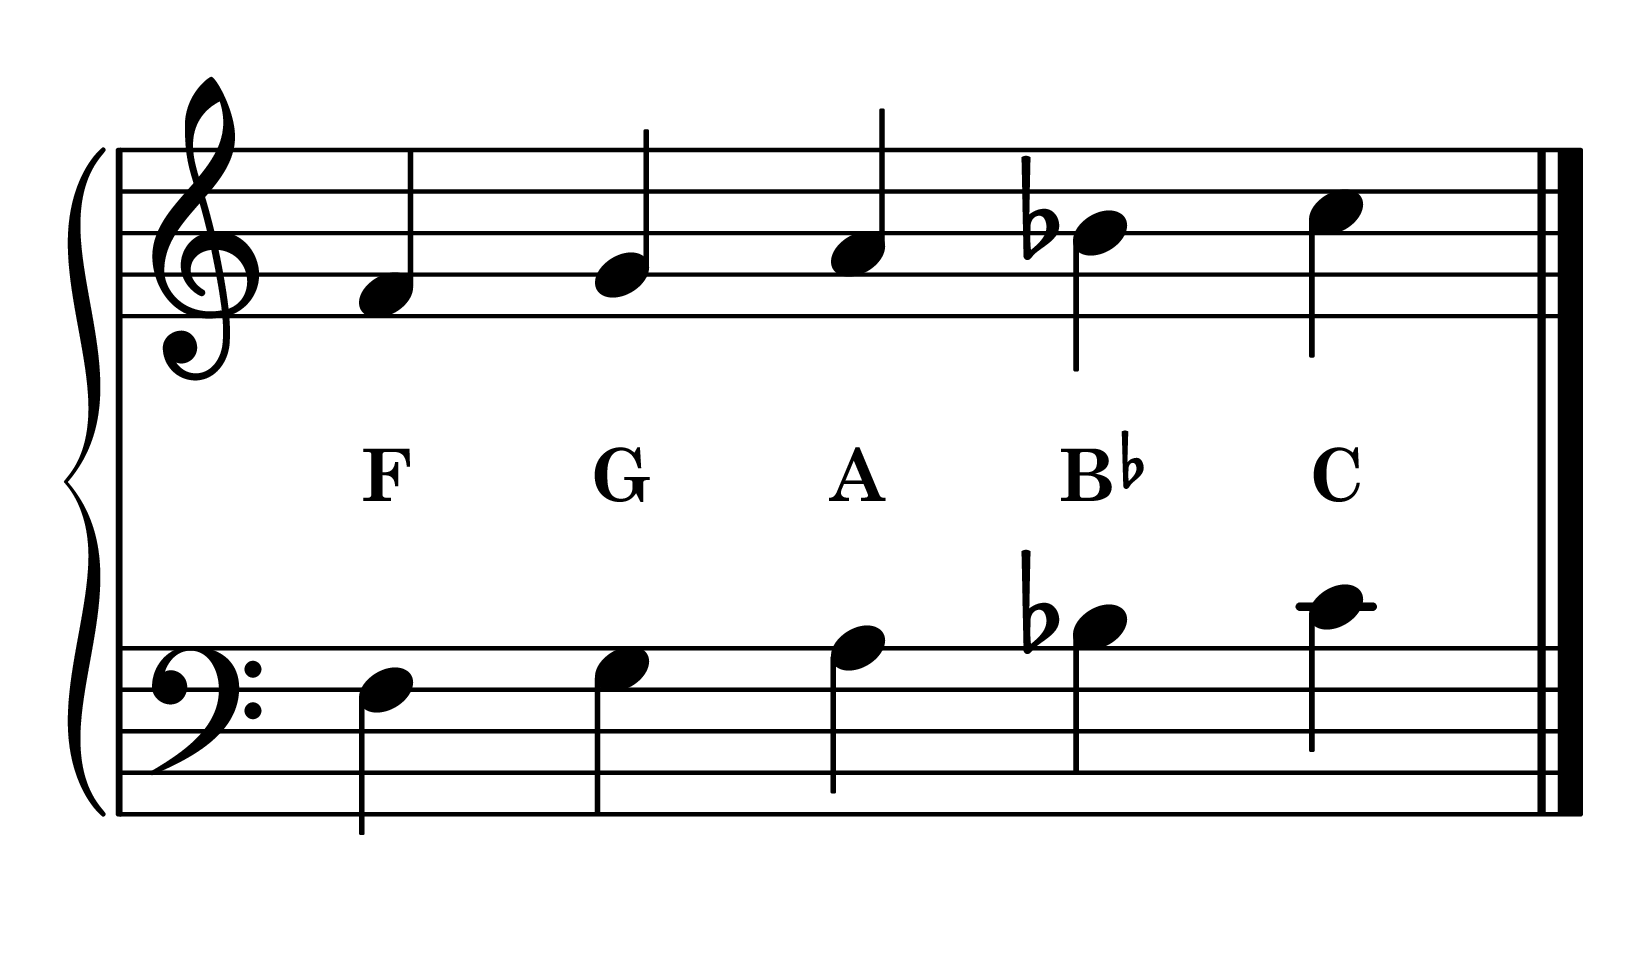
LH Fingering: 5 4 3 2 1
The anatomy of Minor five-finger patterns
A minor pattern is the first five notes of the natural minor scale. Only the third changes. It is lowered by a half step, so the pattern becomes:
W-H-W-W
The root and the fifth stay where they were, and the fingering is the same. The difference is in the middle of the hand, where the third finger moves to a lower key and the sound turns darker.
Try playing the major pattern, then lowering only the third finger, and listen to what that one note does.
In each lesson below, you’ll find the keyboard layout, the fingering for both hands, and the notes written on the staff.
The 12 Minor Five-Finger Patterns
A Minor Position
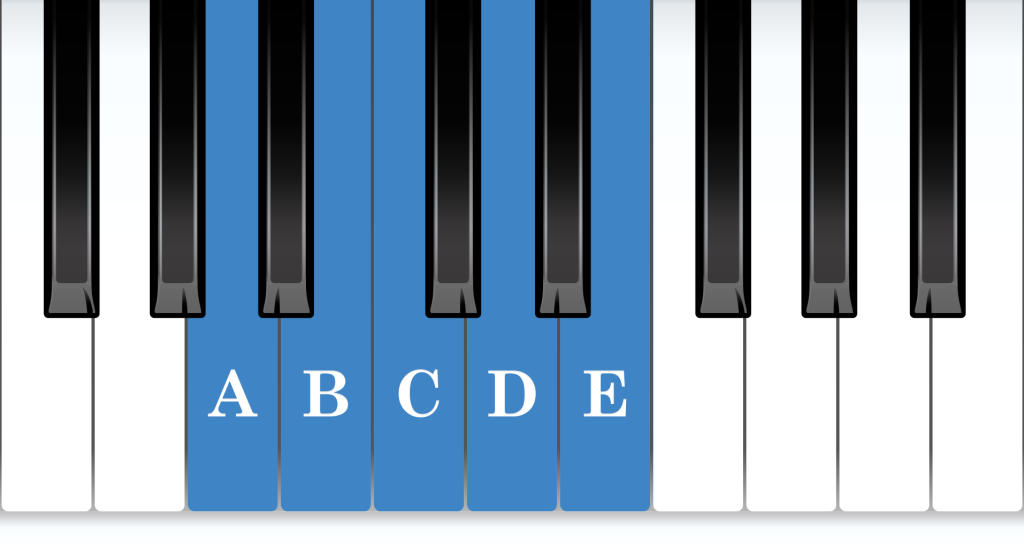
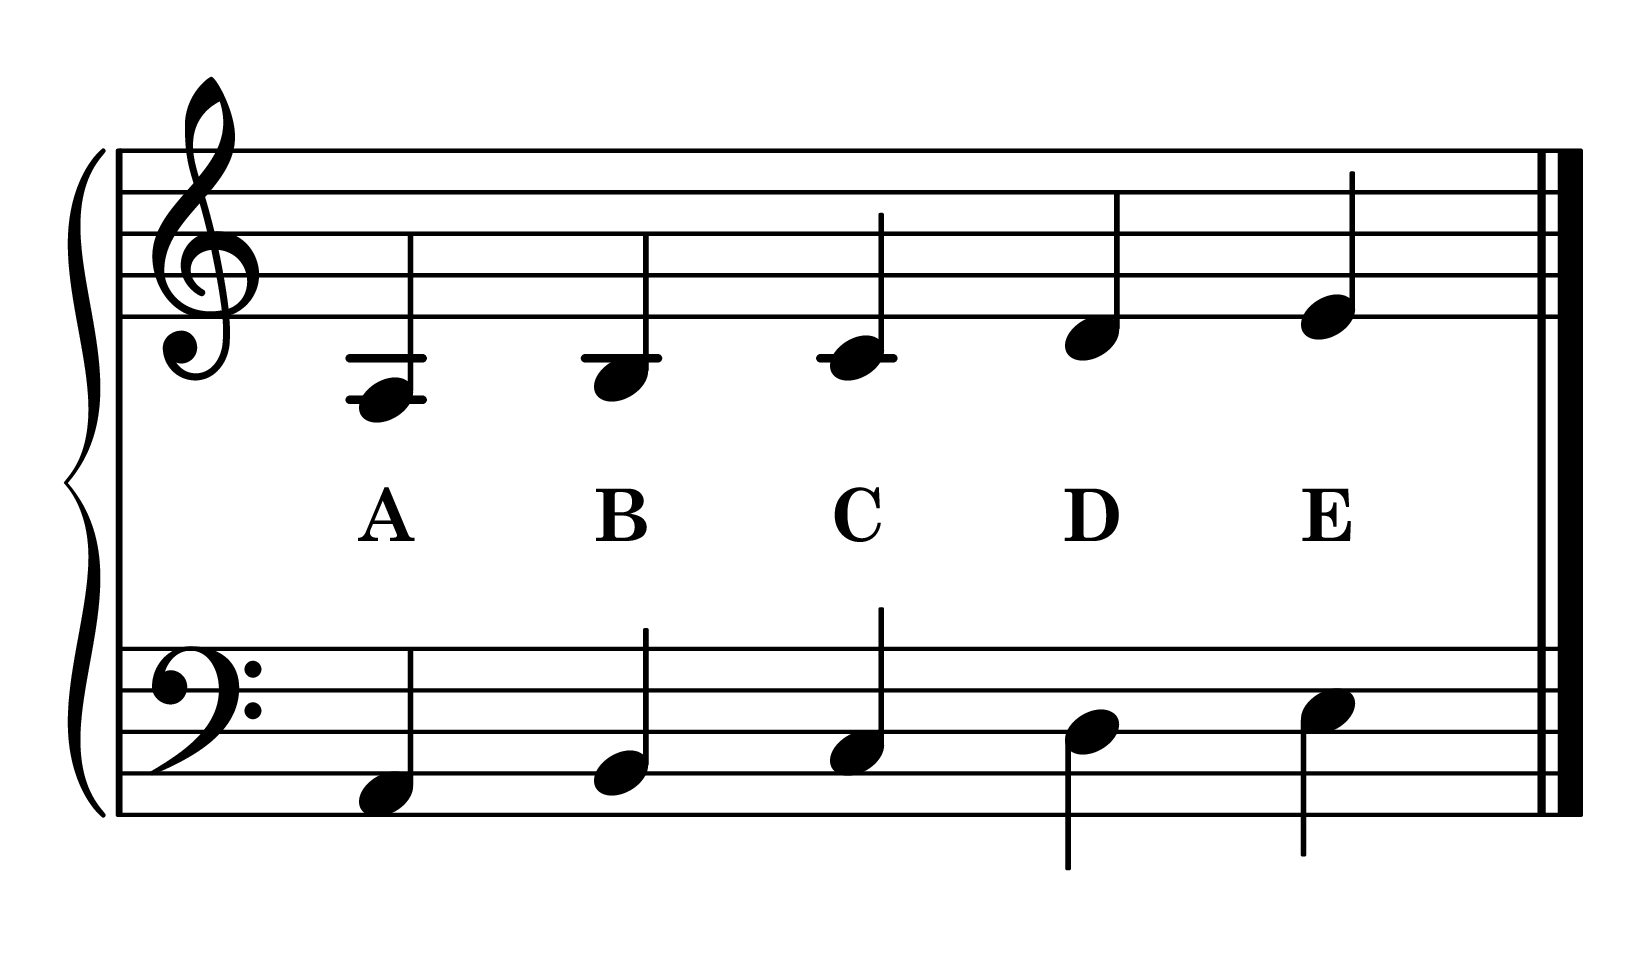
LH Fingering: 5 4 3 2 1
E Minor Position
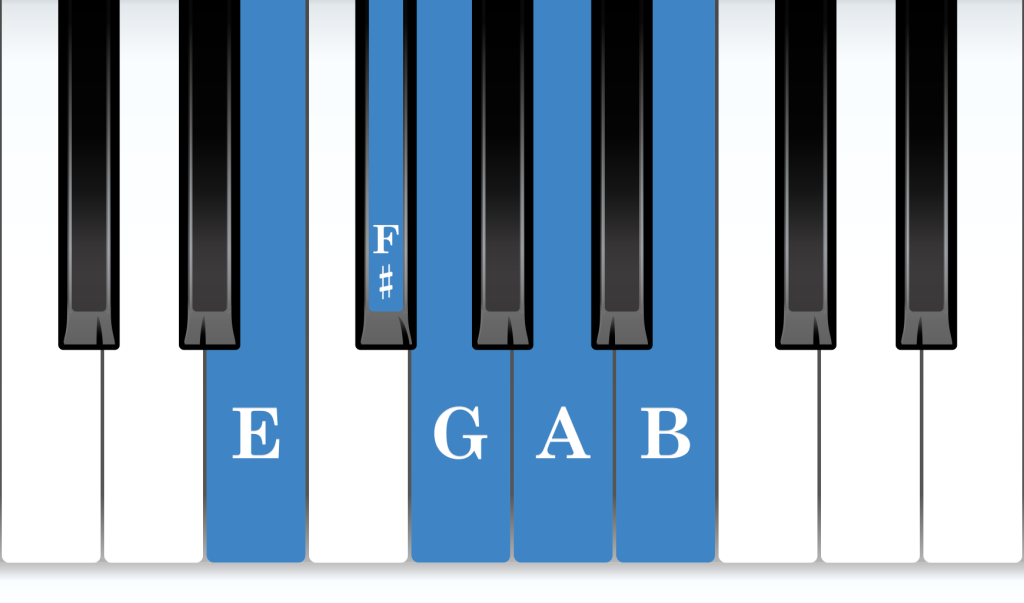
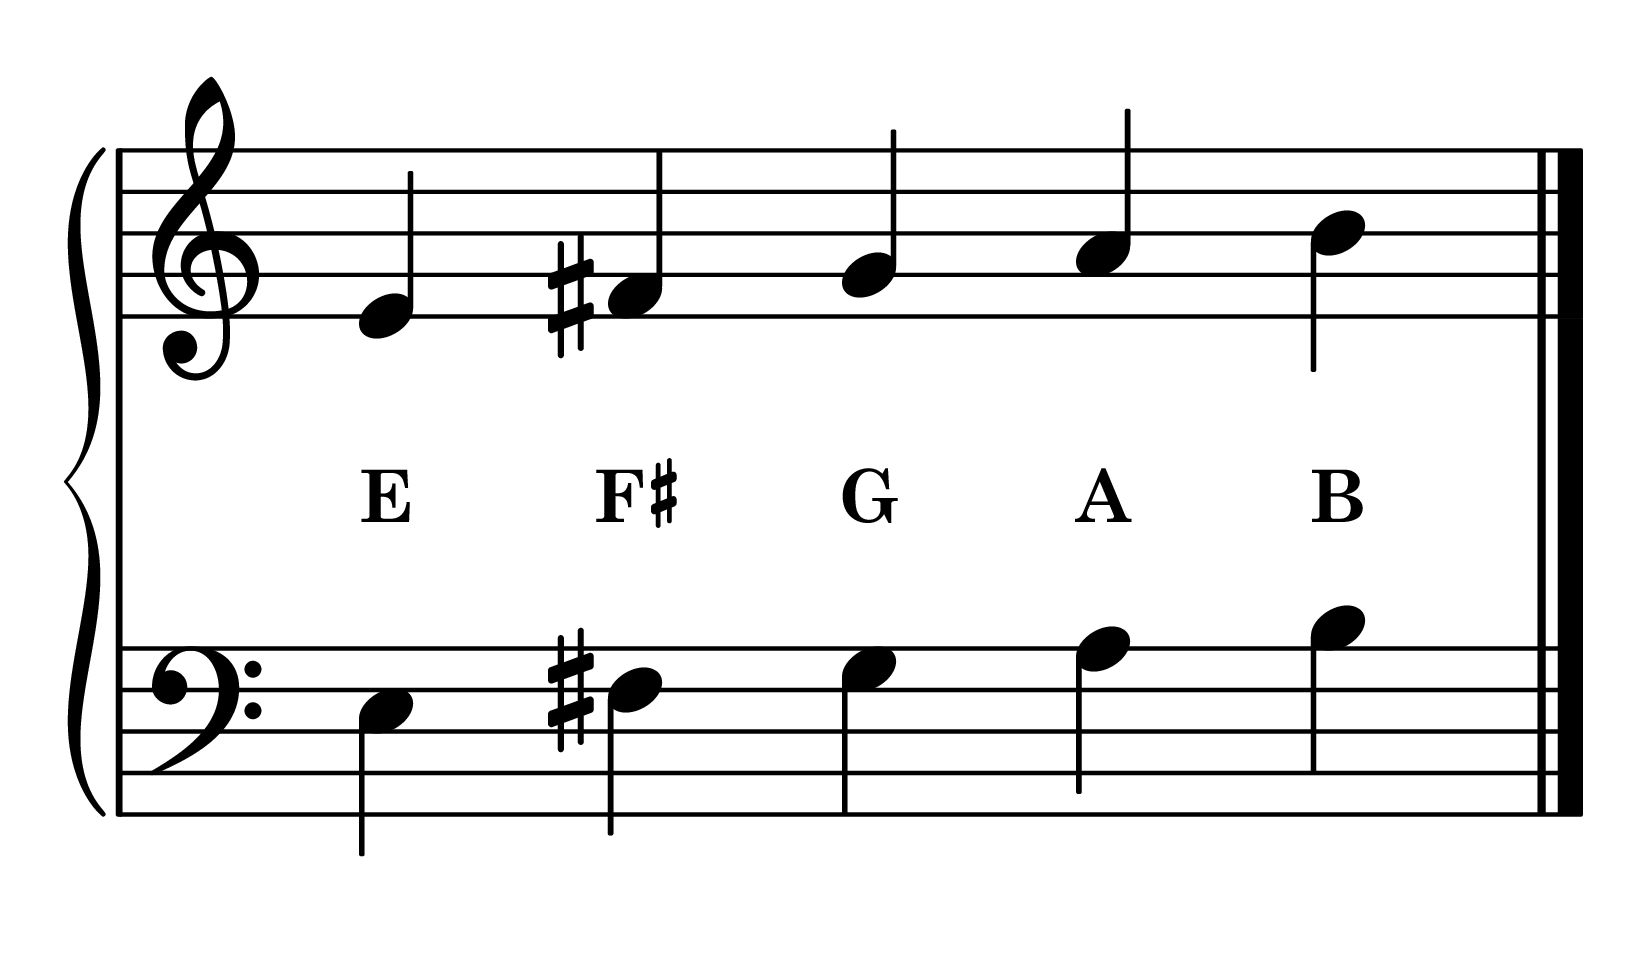
LH Fingering: 5 4 3 2 1
B Minor Position
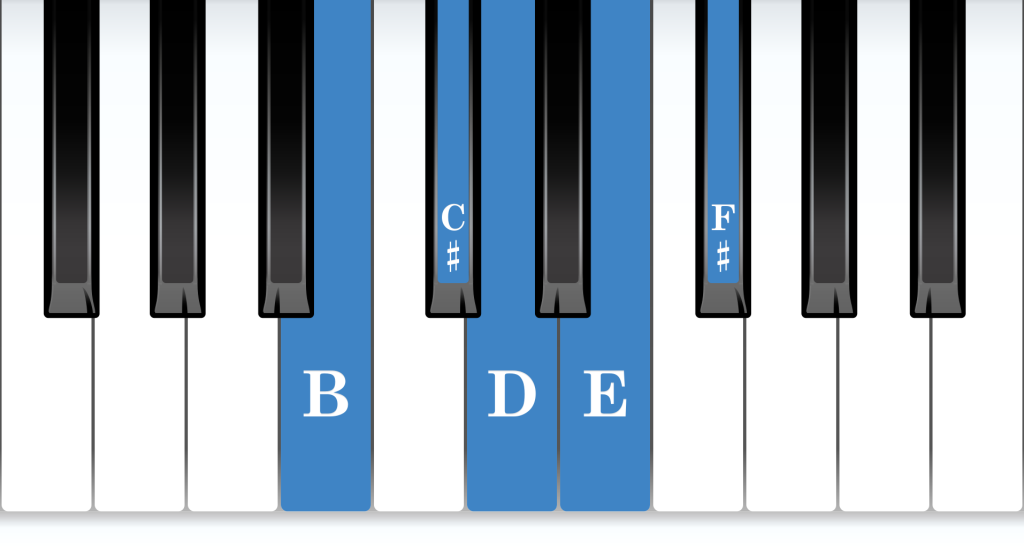
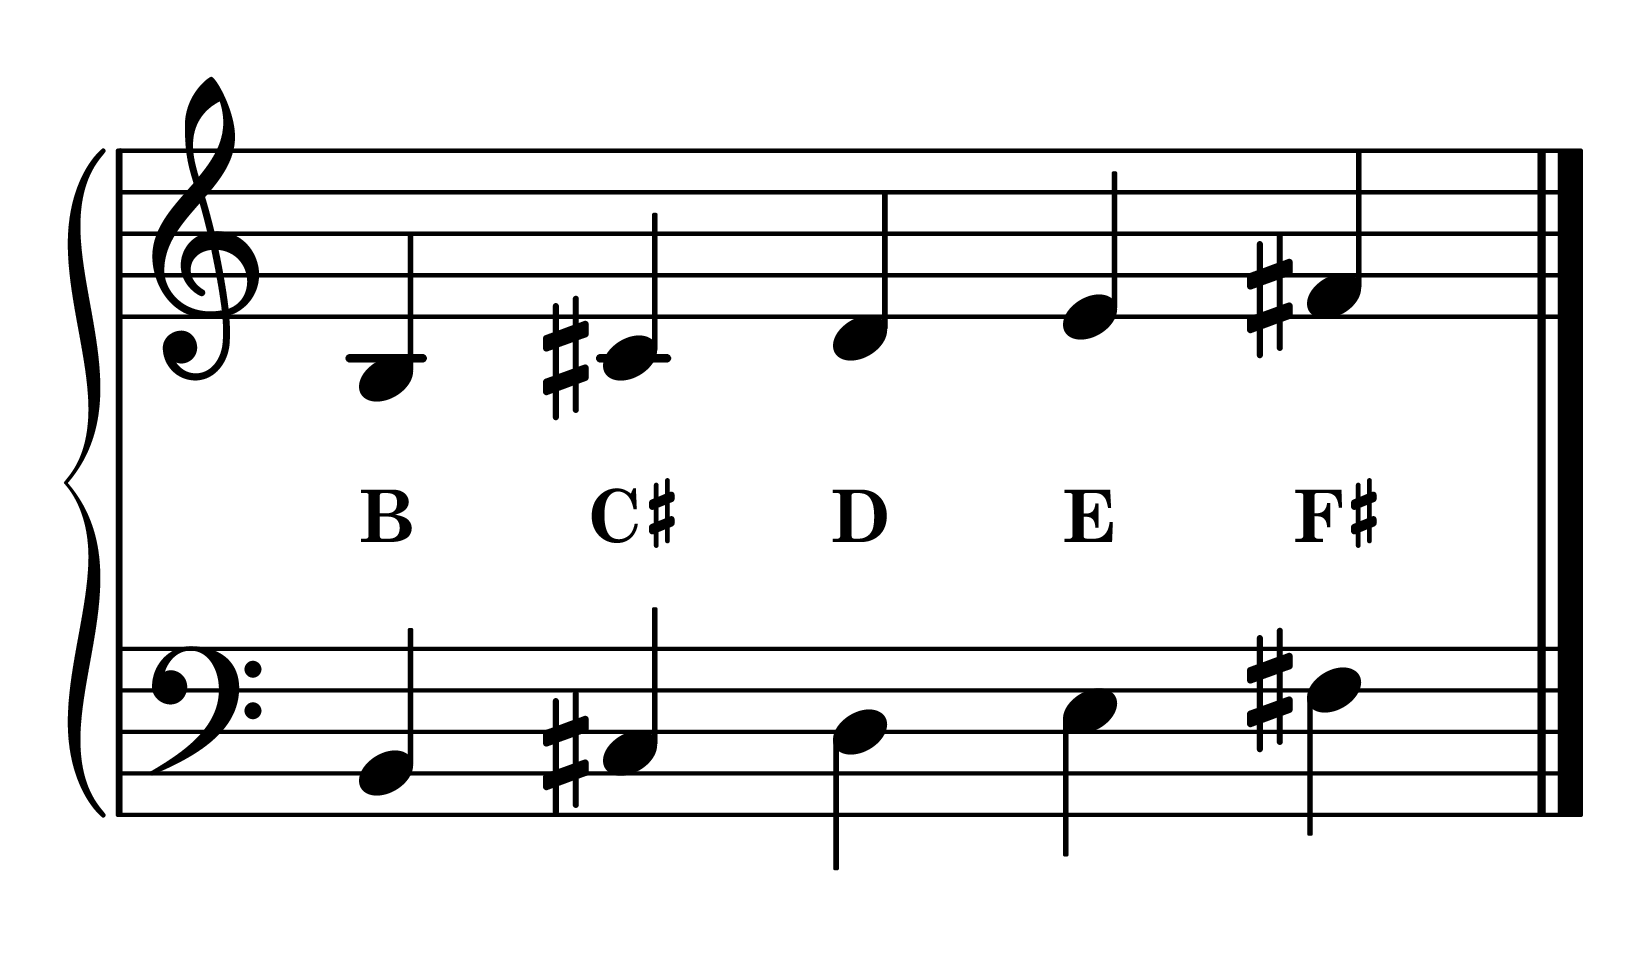
LH Fingering: 5 4 3 2 1
F-sharp Minor Position
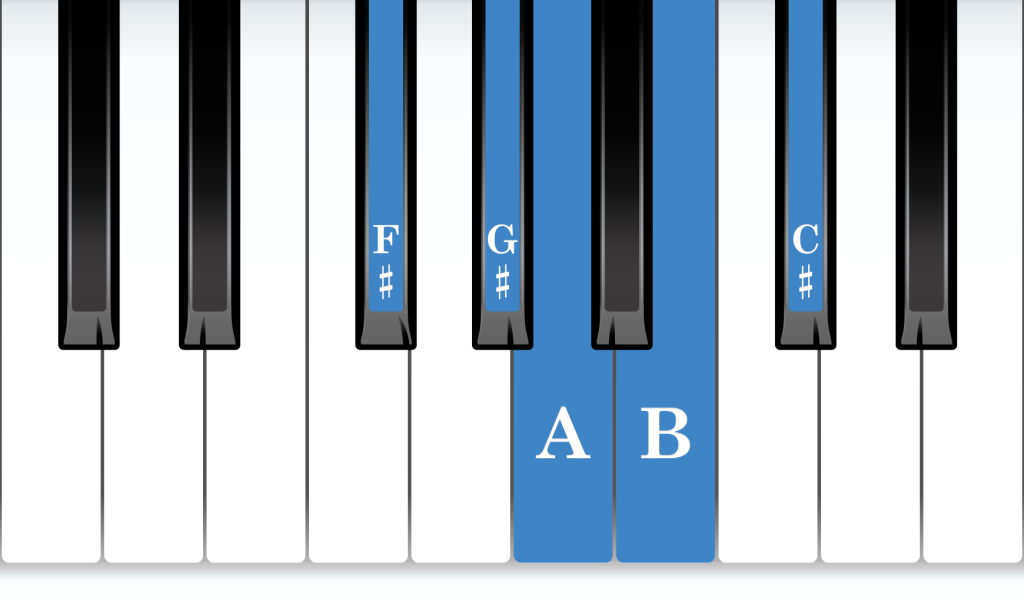
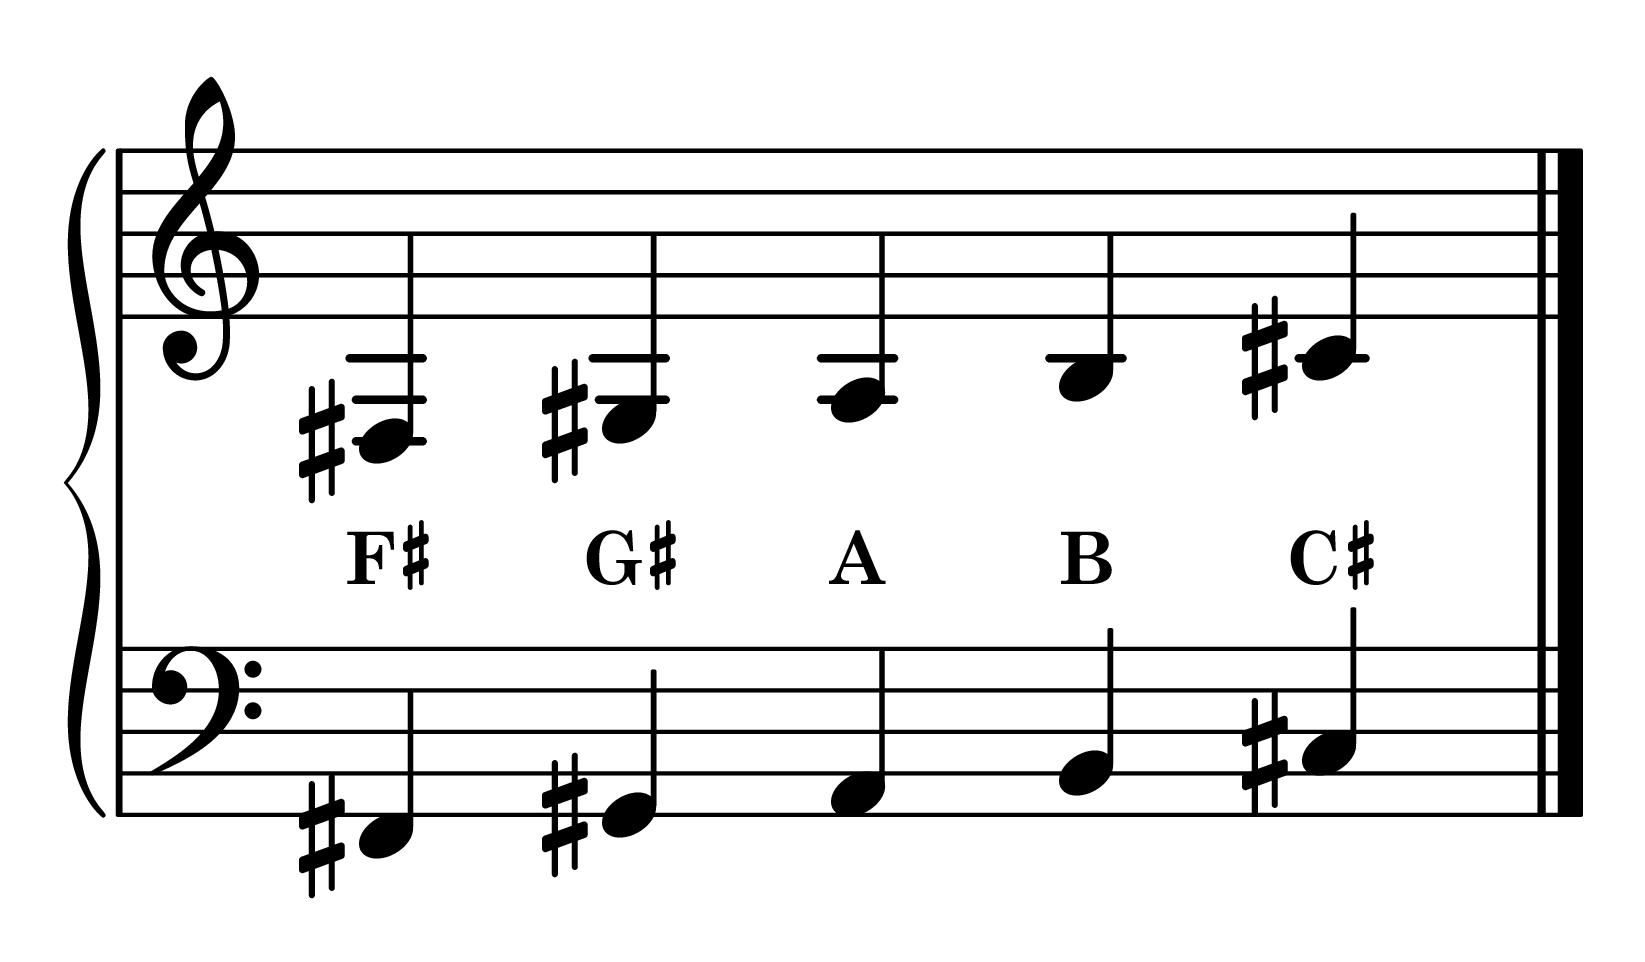
LH Fingering: 5 4 3 2 1
C-sharp Minor Position
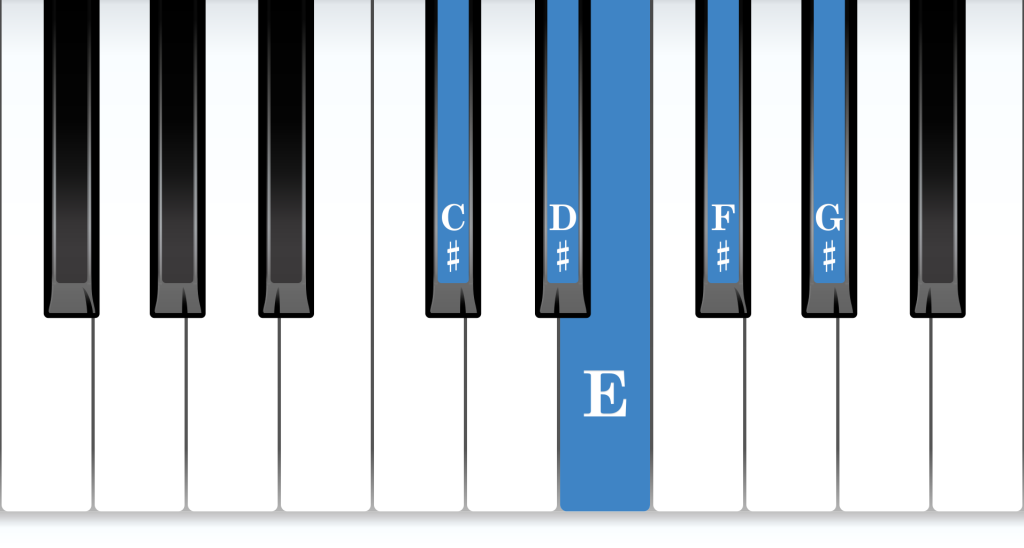
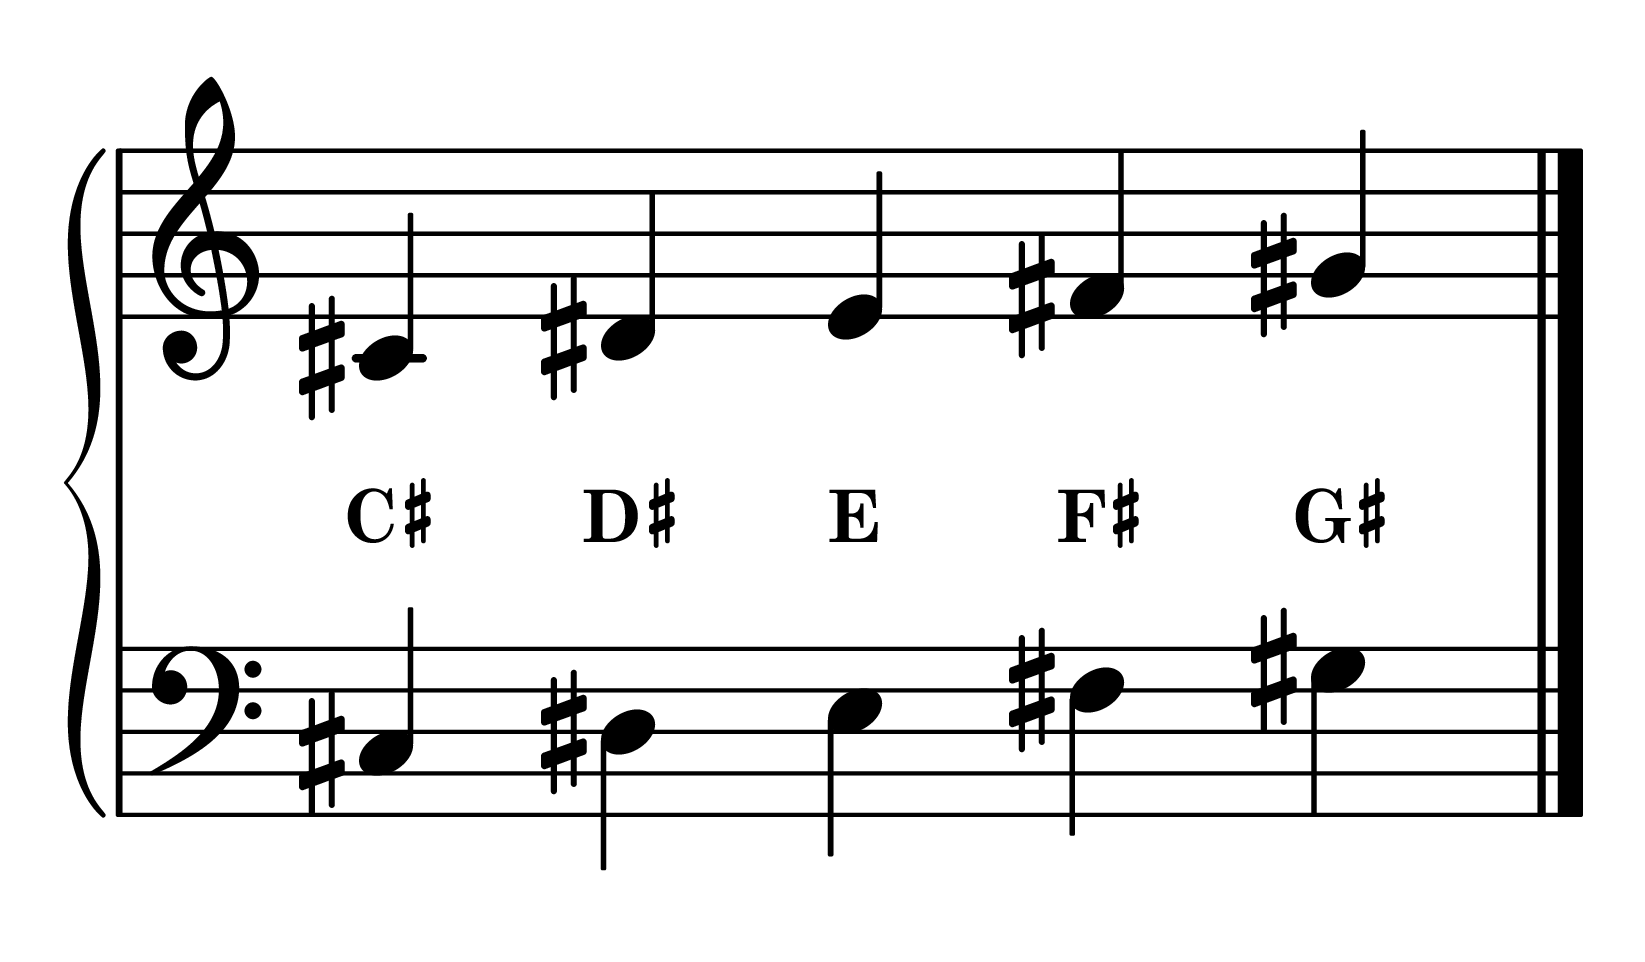
LH Fingering: 5 4 3 2 1
G-sharp Minor Position
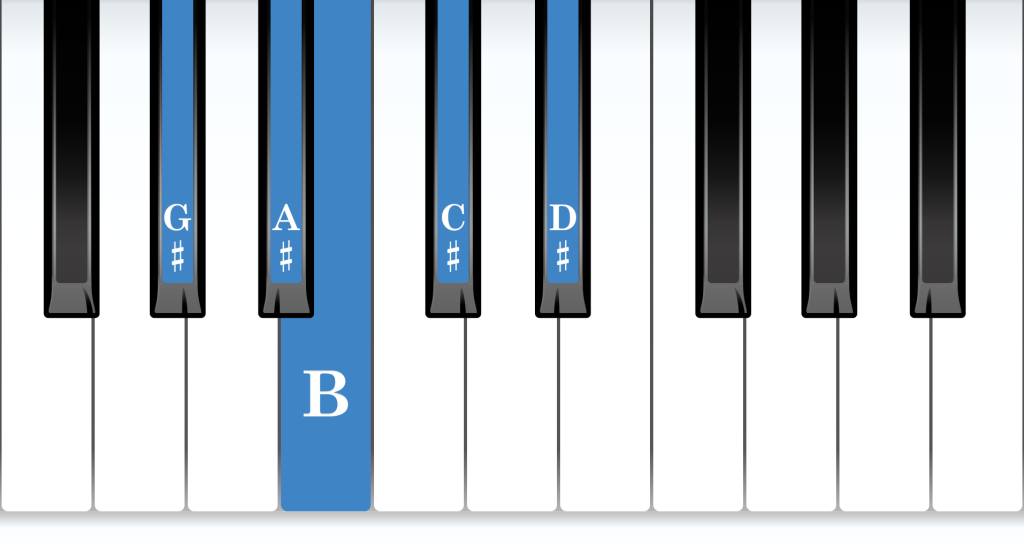
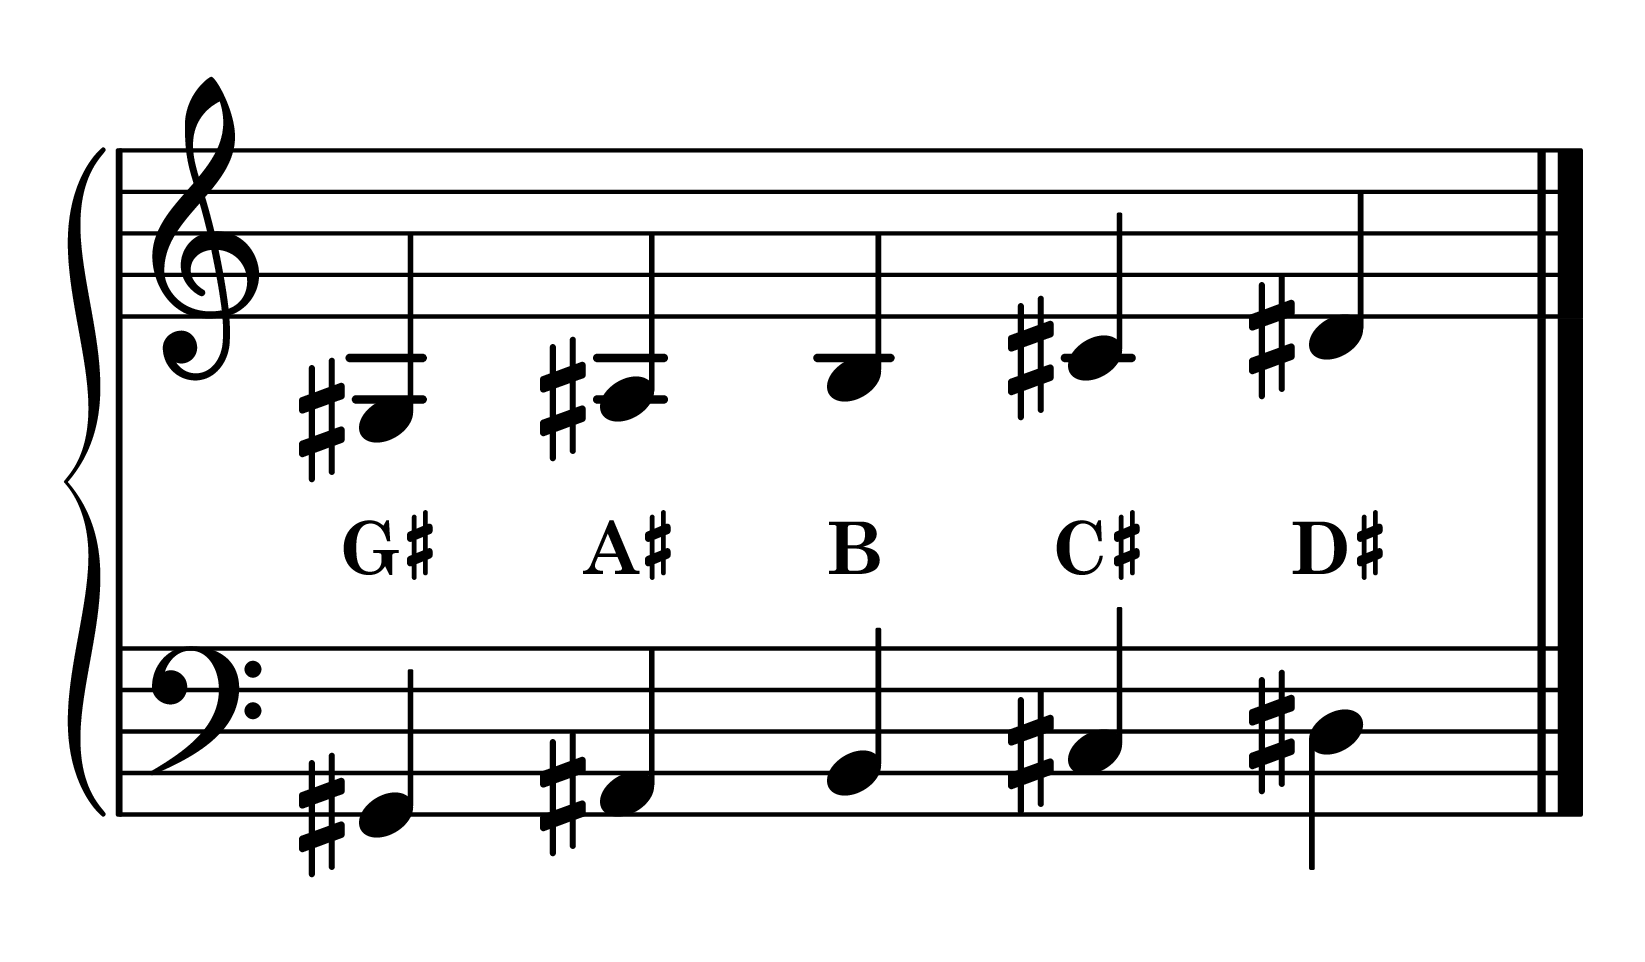
LH Fingering: 5 4 3 2 1
E-flat Minor Position
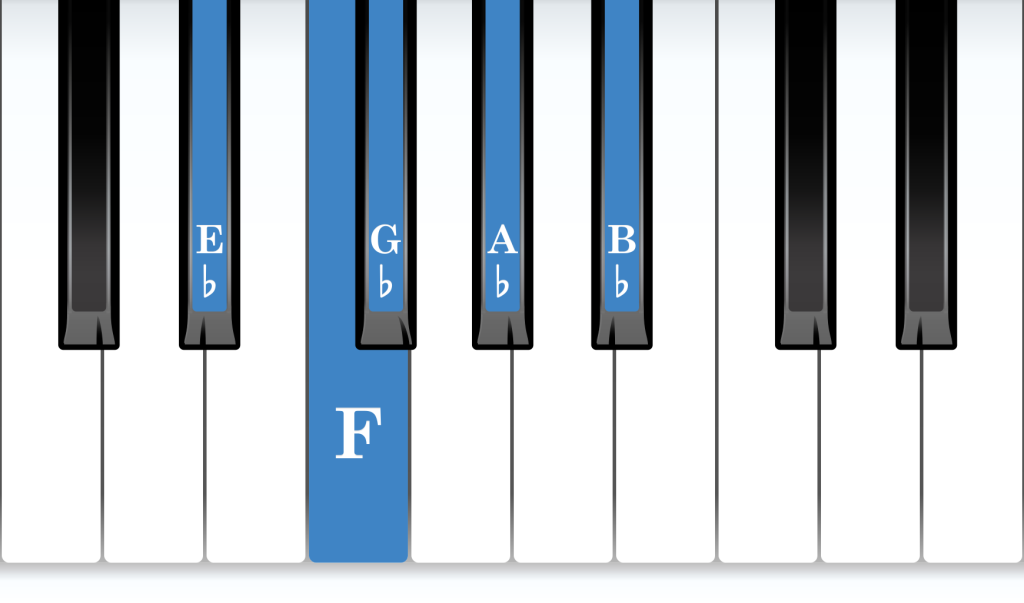
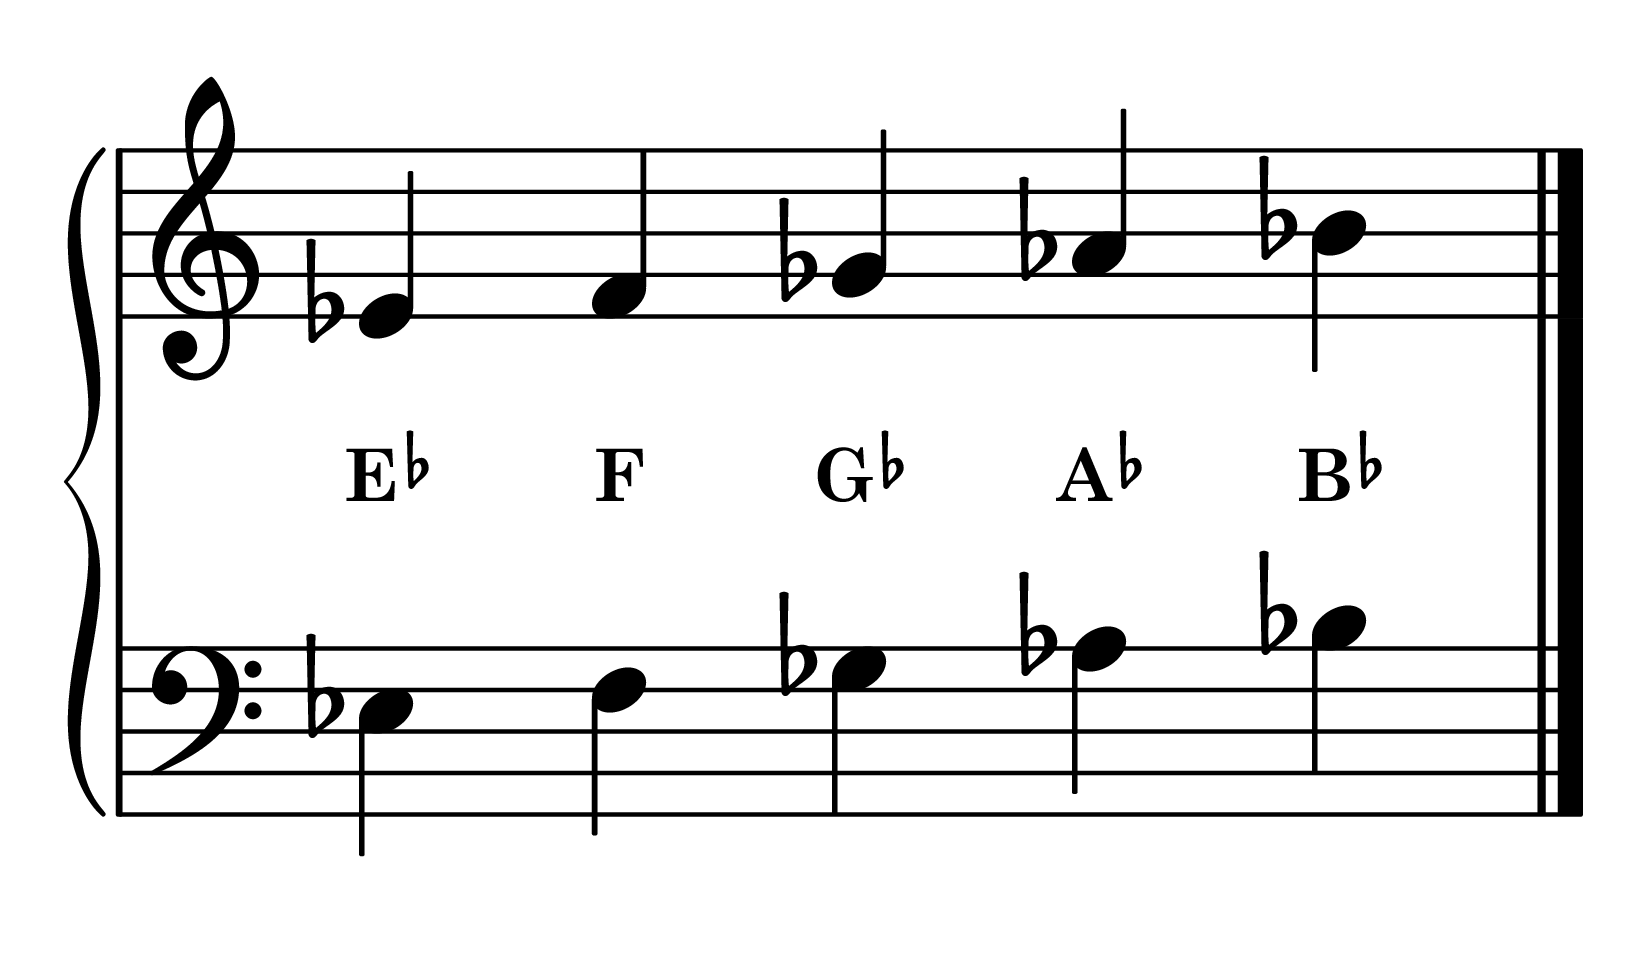
LH Fingering: 5 4 3 2 1
B-flat Minor Position
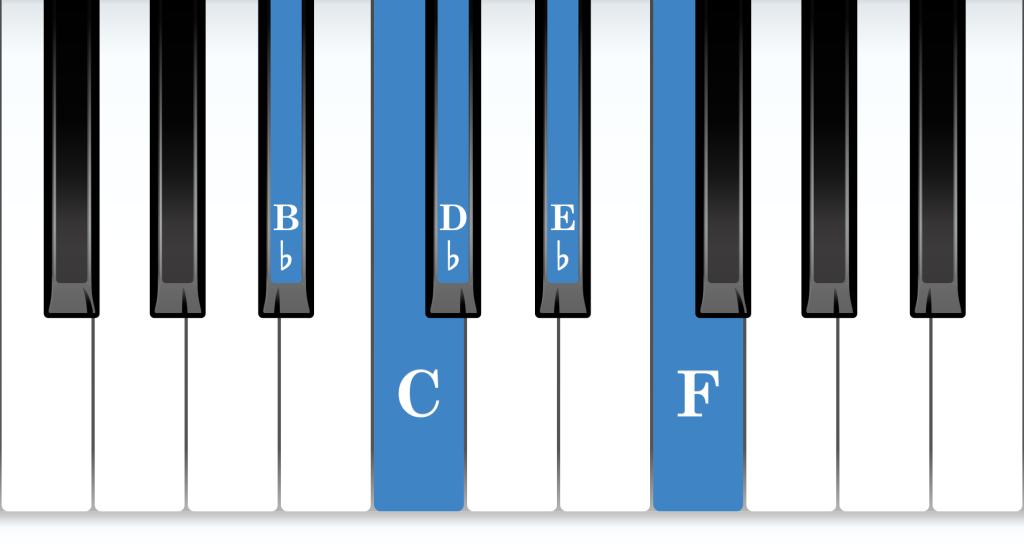
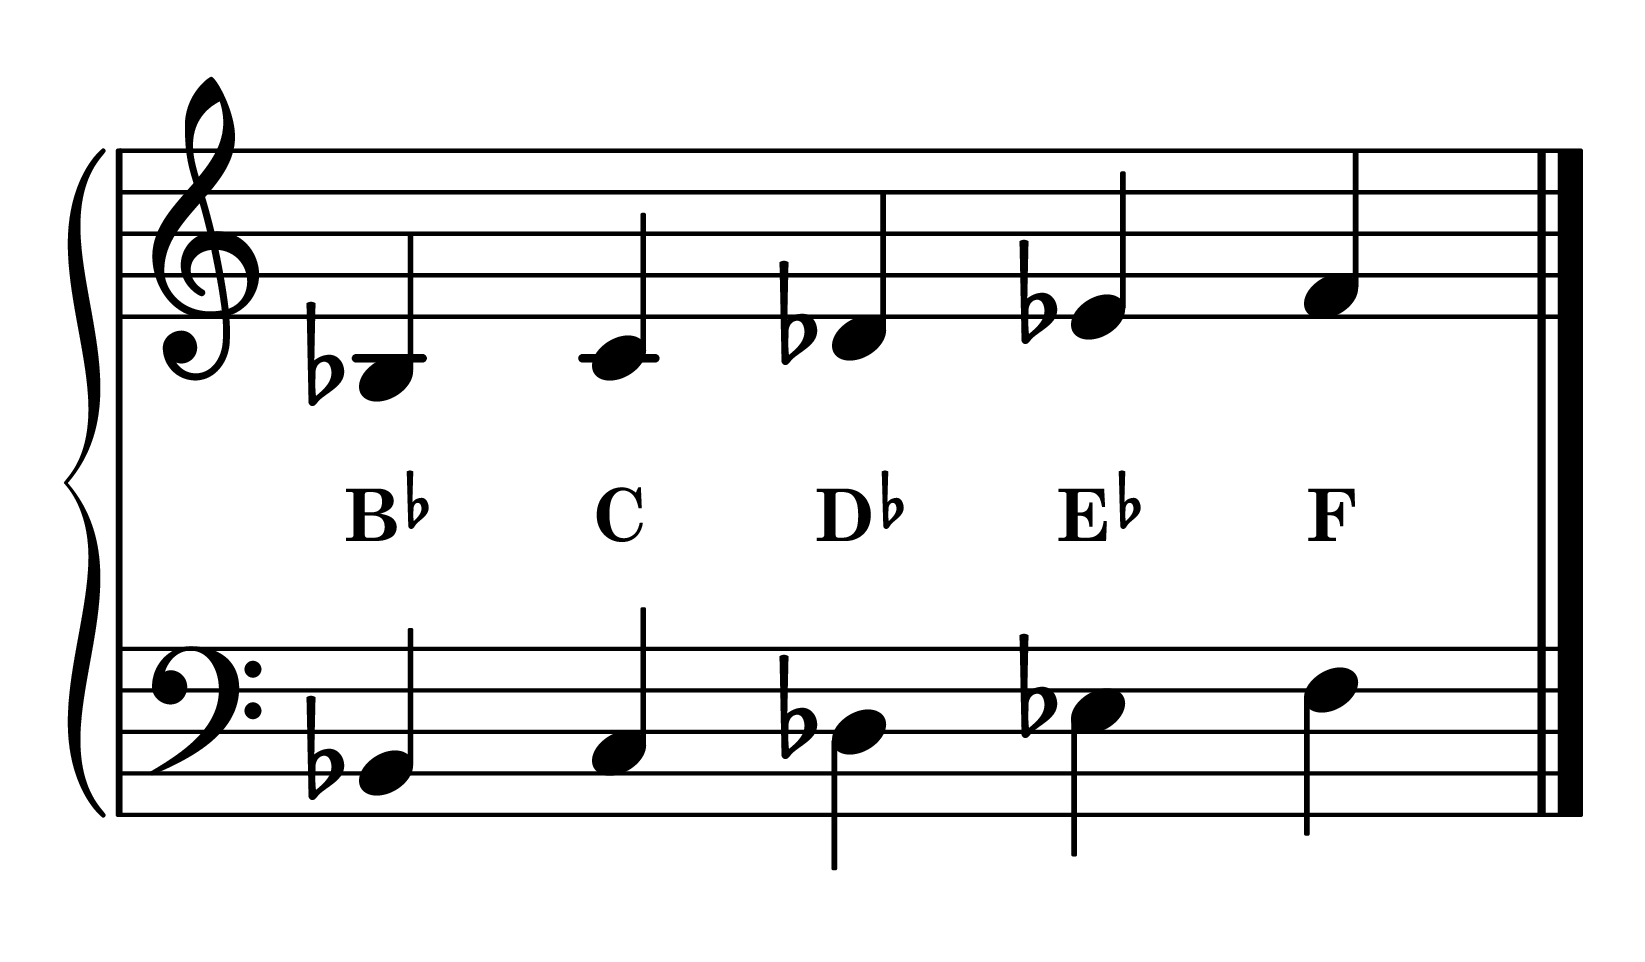
LH Fingering: 5 4 3 2 1
F Minor Position
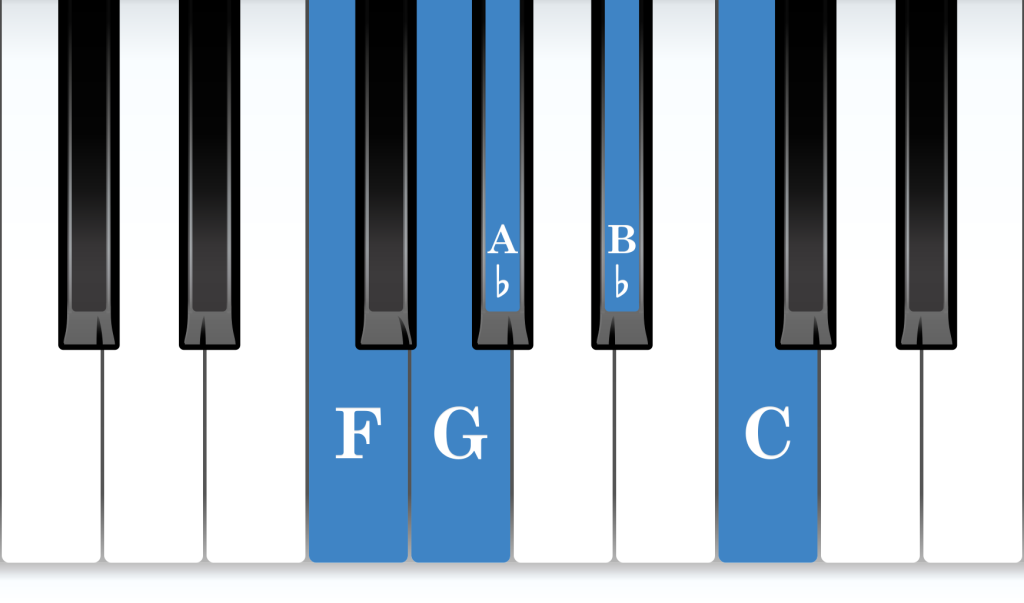
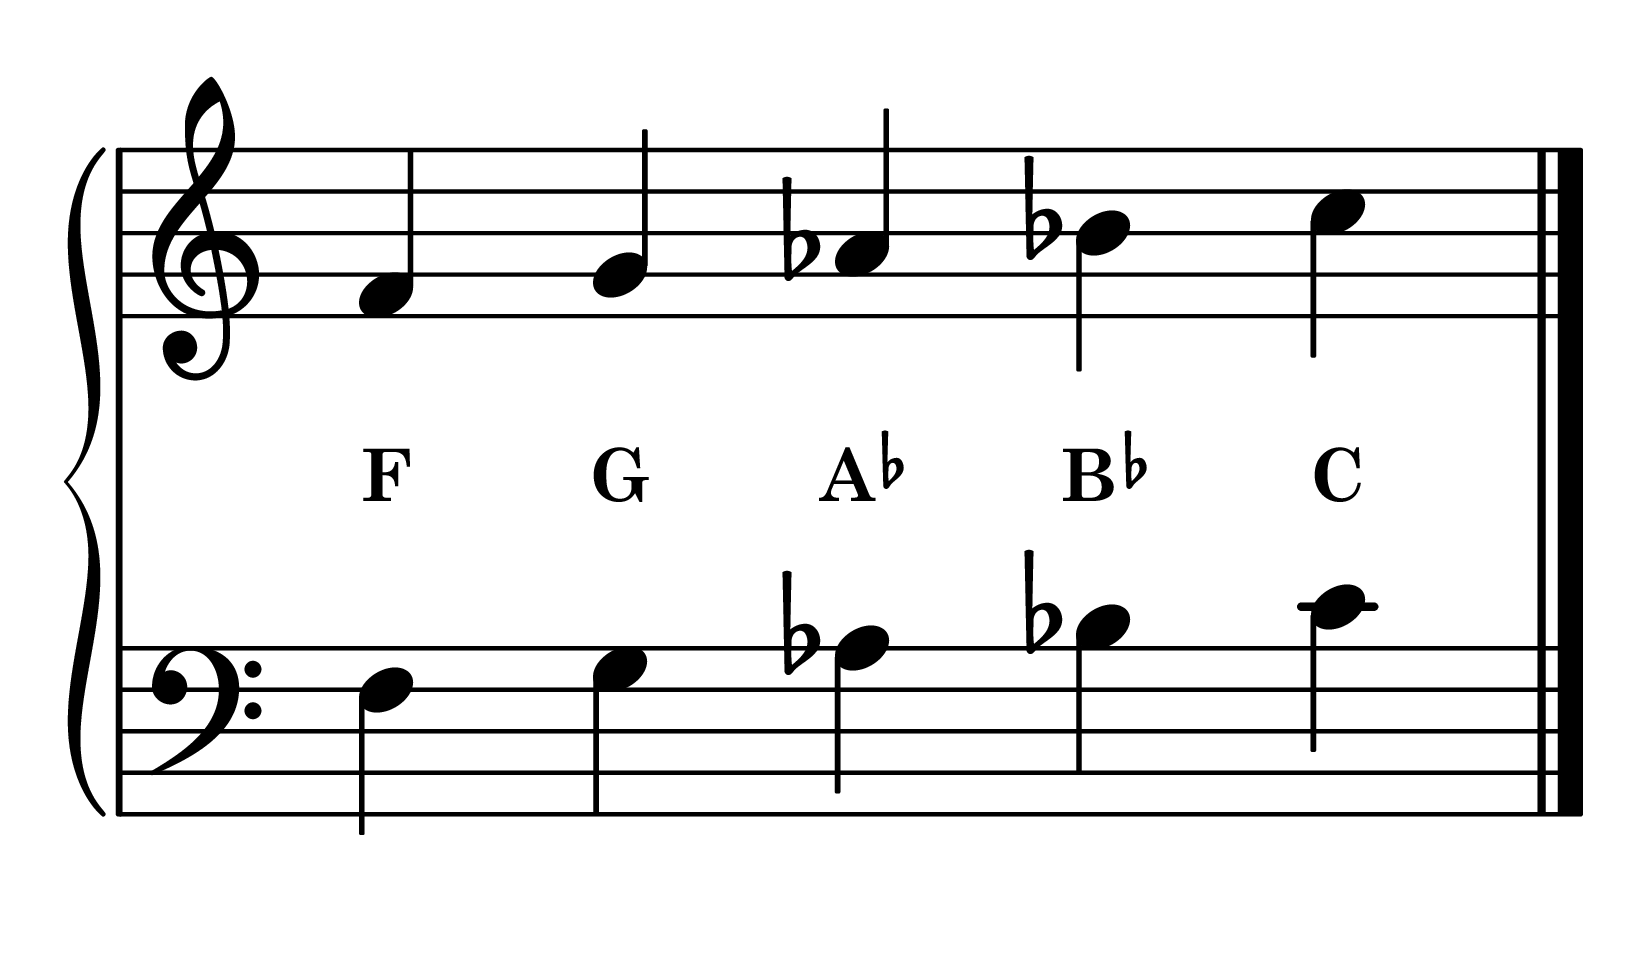
LH Fingering: 5 4 3 2 1
C Minor Position
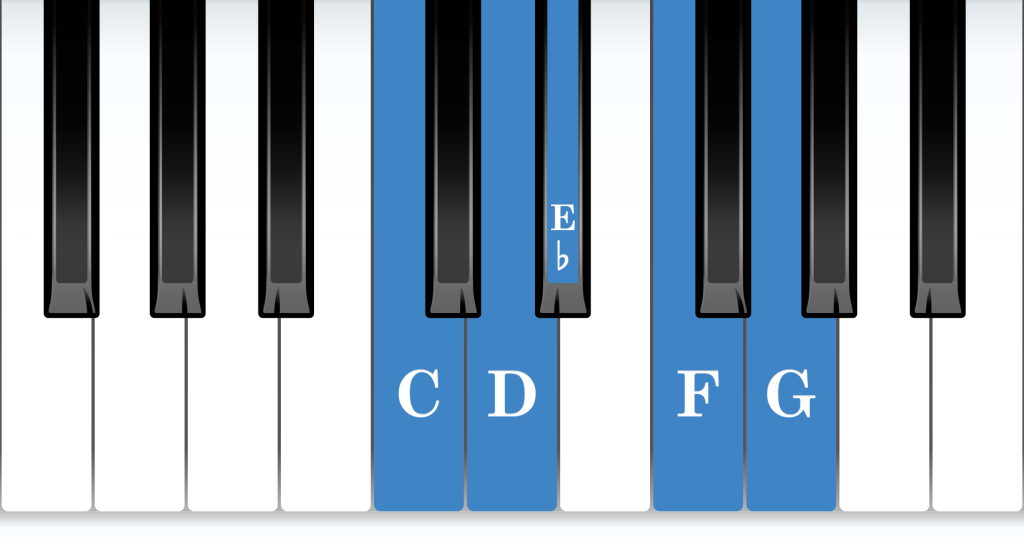
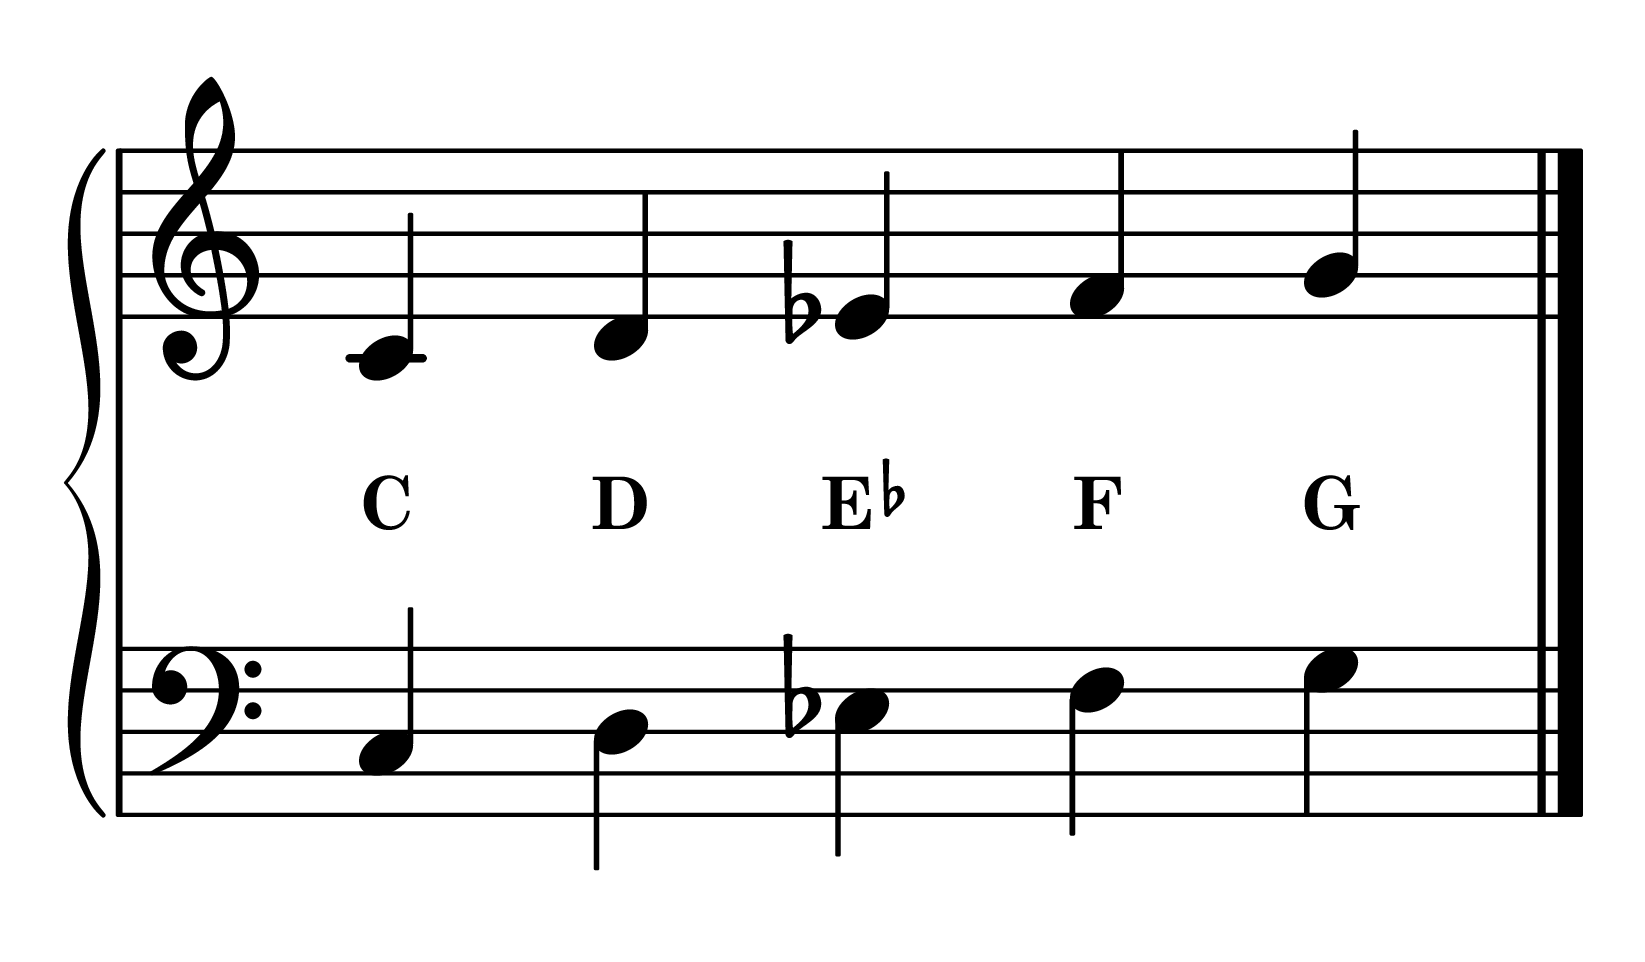
LH Fingering: 5 4 3 2 1
G Minor Position
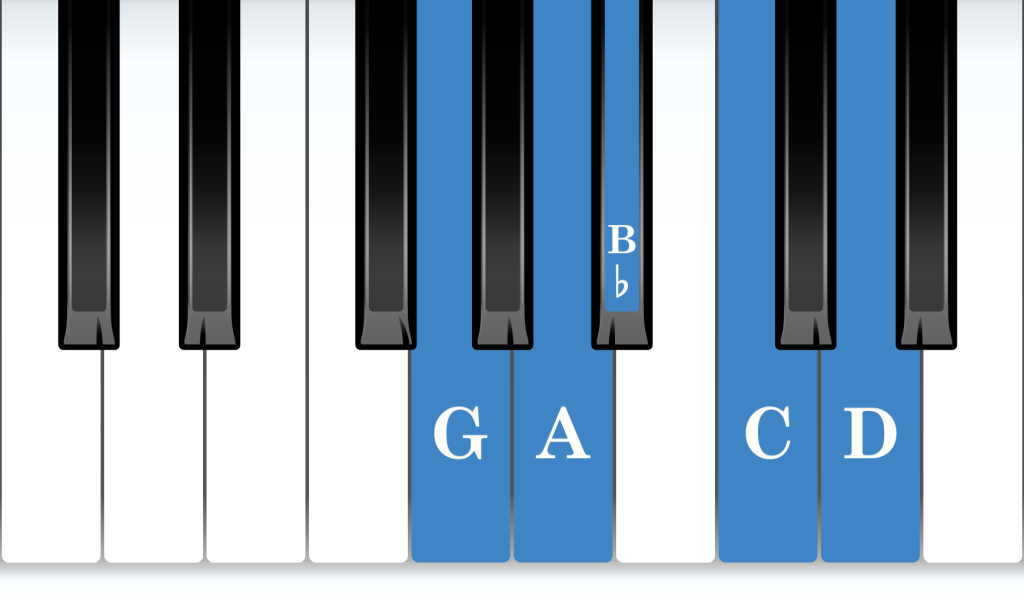
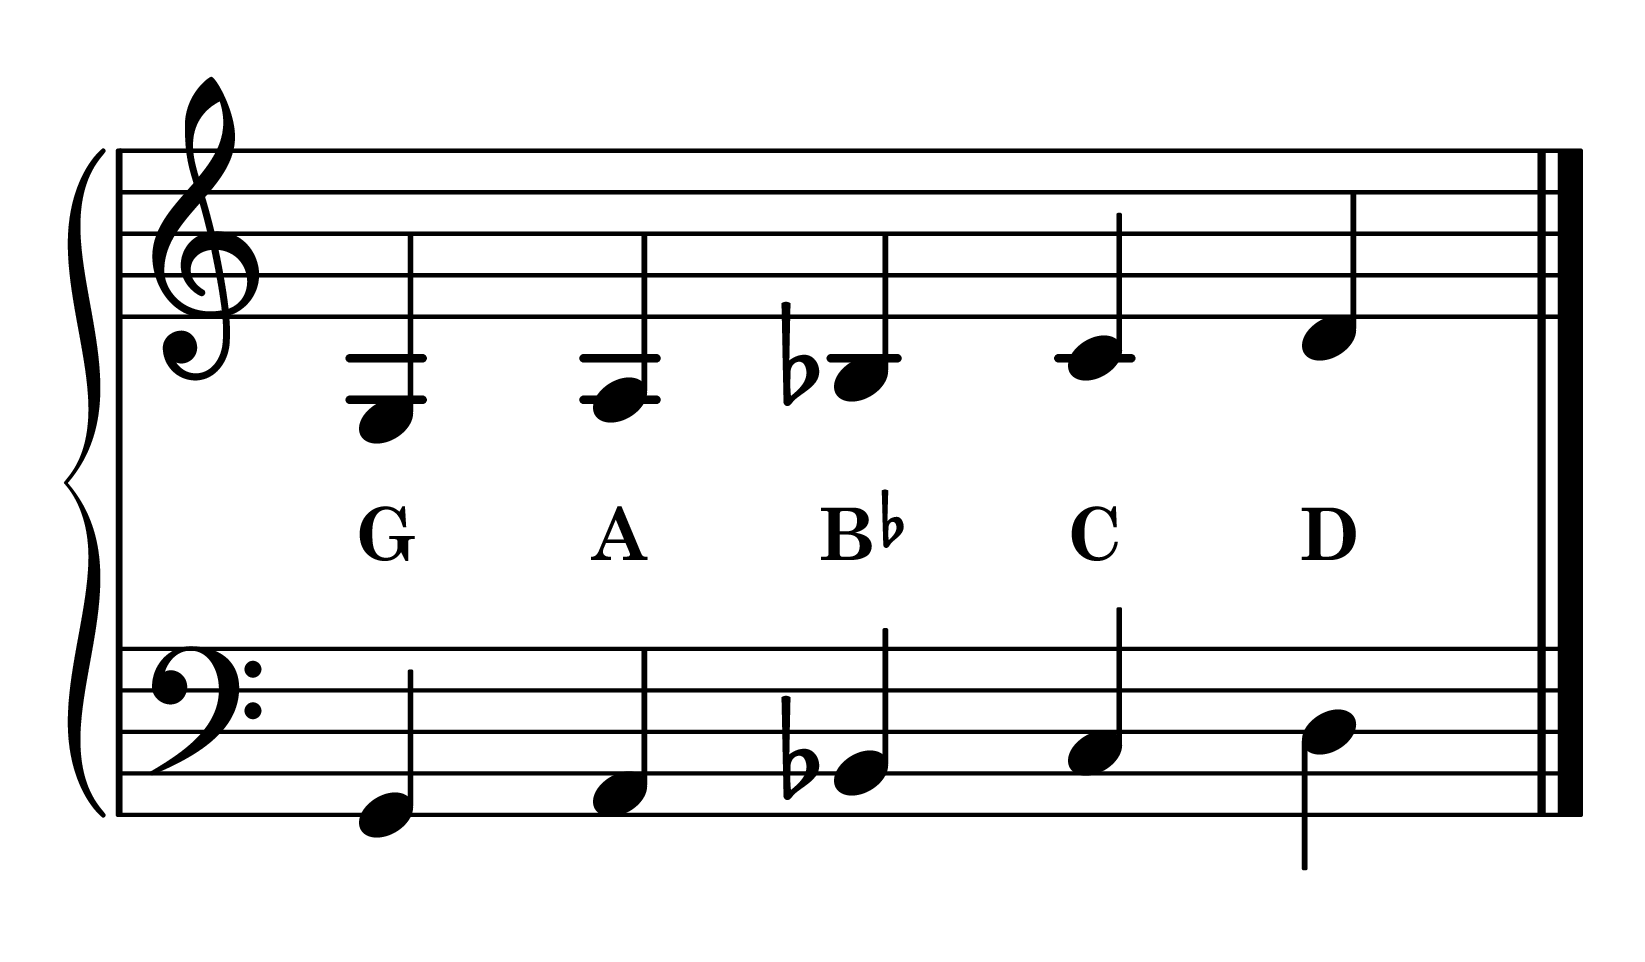
LH Fingering: 5 4 3 2 1
D Minor Position
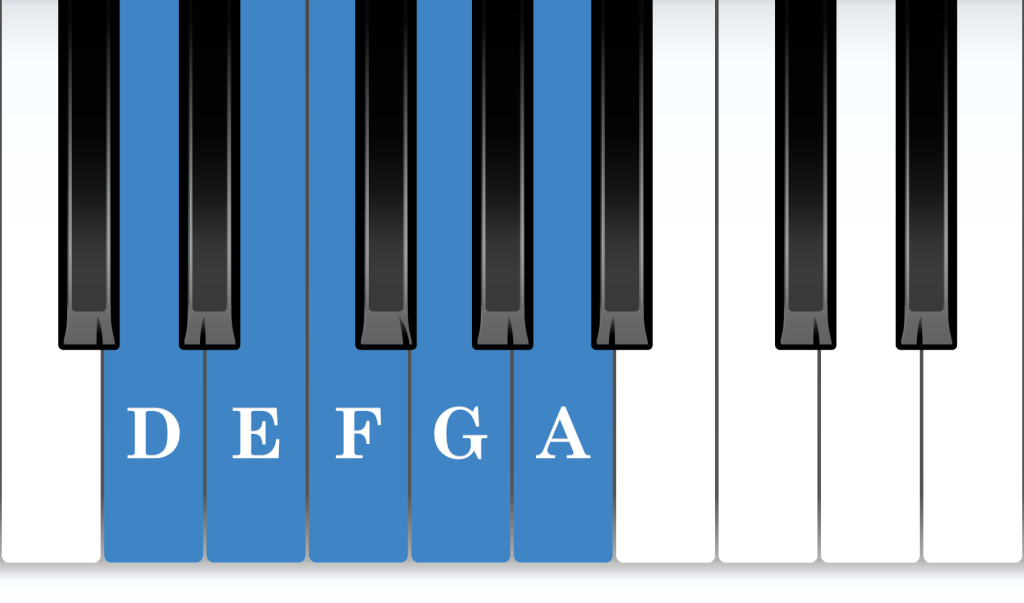
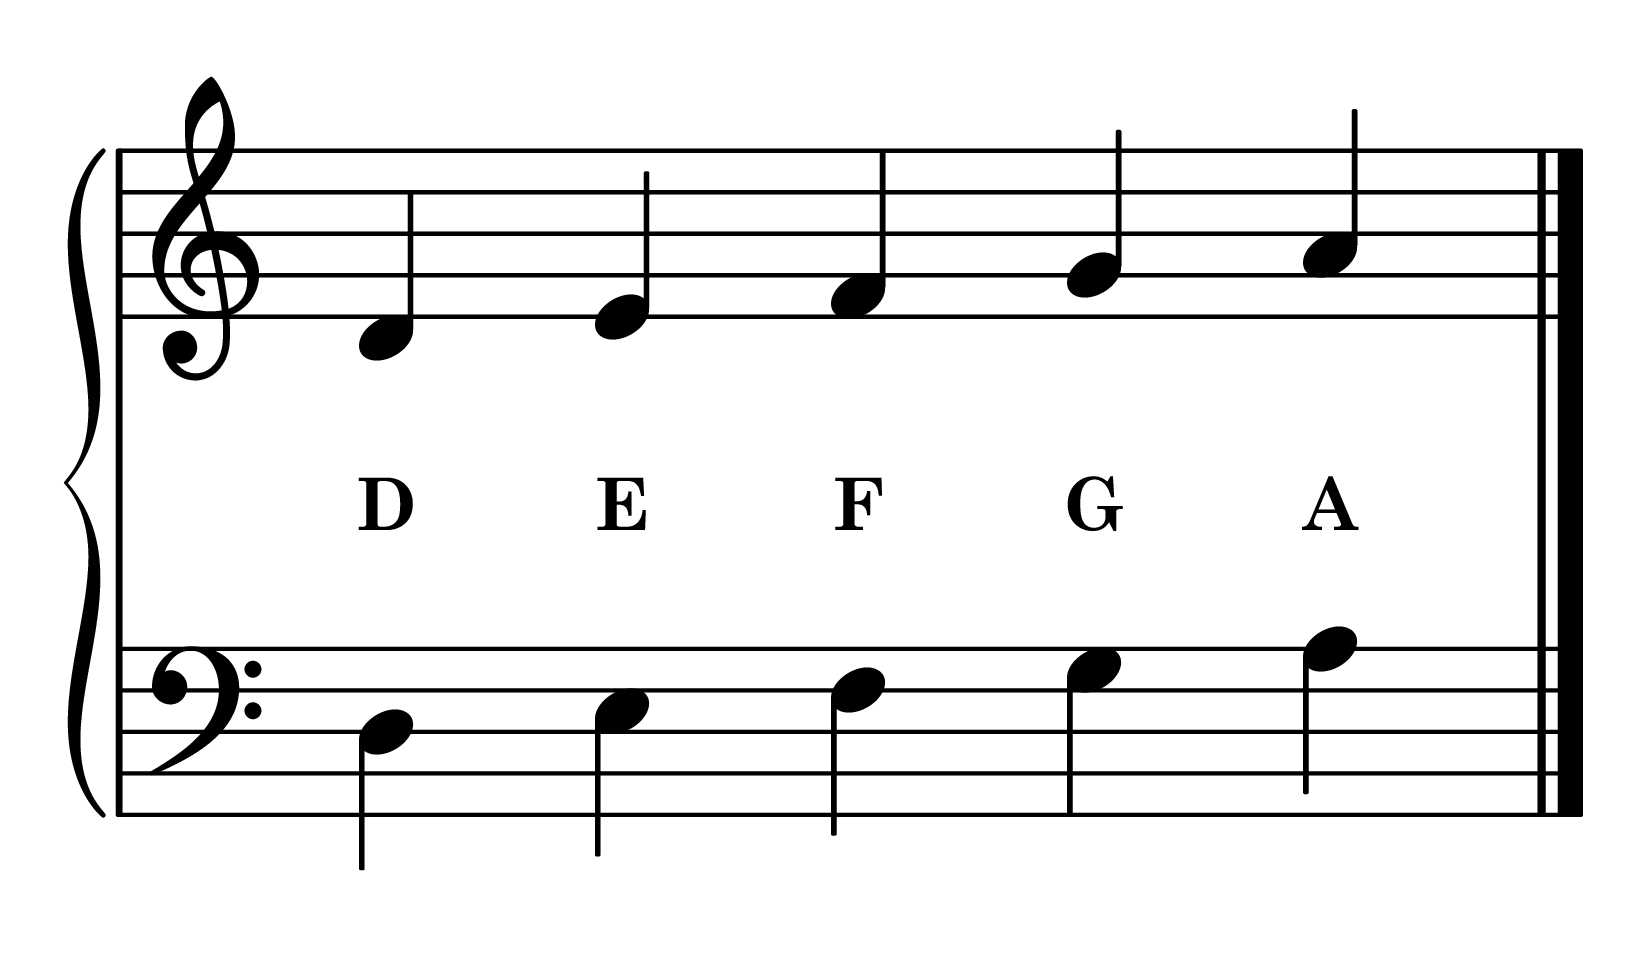
LH Fingering: 5 4 3 2 1
Where five-finger patterns lead
Five notes is a small unit, but a lot is built from it. Extend the pattern to eight notes and it becomes a scale. Play its first, third and fifth notes together and it becomes a triad, which is where the chord lessons begin. Play those same three notes one after another and it becomes an arpeggio.
Knowing the pattern in all twelve positions makes each of those steps shorter, because the hand already knows where it is starting from.
Questions and answers
No questions here yet. Be the first to ask one.